Showing posts with label Alessandro. Show all posts

Tuesday, March 24, 2020

Picked Up the Car Today from NISMO! (Part 2)

Morita-san asking me to inspect the car before driving home. Photo by Ale.  Thanks! 
So driving impressions on the work that was done - as mentioned in the last post, I guess you can say it's very "OEM."  The car now feels like it was designed to drive the way it does from the ground up, with everything (power, response, ride, handling, braking) in perfect balance.

Before the Nismo Omori Factory Chassis Refresh, the car would at first literally take about 5 minutes to warm up "its legs" - like an aging athlete, and even then the car felt somewhat twitchy. Powerful and fun, but somehow not polished? Which I attributed to the 10 year old tires the car is (still) on...  I now think the rubber bushes had degraded more than I realized.  And I bet the new rear suspension member bushings make a difference too. Various guest drivers had previously commented on how well the car was balanced, but I think it's now at a higher level altogether - as if purposely designed by Nissan this way, and not simply happened to be put together well by chance (by me).

Today, the moment I got in my car, everything felt a bit smoother, lighter and yet still super communicative, and it seemed very balanced with the smooth power of the Mine's engine.  So the car basically rides smoother, and is likely a bit less tiring to drive.  Remember the car is running on smallish turbos, so the boost comes on low, and then builds and builds and builds... meanwhile shifting the 6 speed Getrag with the shorter gears, so the engine remains on boost... and then we end up going too fast, so use those massive R35 Brembos which calmly scrub off speed.

So I'm wondering - can this be improved? Remember NISMO removed the Do-Luck Floor Support Bars, and with the new rear suspension member I'm sure the Spoon Sports Rigid Collars are gone too.  Also the last time I had the Ohlins DFVs rebuilt was about 4 years ago.  So I wonder if the coilovers are operating at 100%? And yes, still on those old tires, which means I'm sliding in some aggressive corners... that reminds me, I didn't even notice the ATTESA kick in when I did so, which means it did so progressively and smoothly... like it's supposed to!

Photo by Mr. Ale
Anyway, I was having so much fun driving home, I wanted to keep going except of course, I needed to get the car into its new garage space.

So here it is. What do you all think? (ignore the boxes - containing new LMGT4s actually...lol... and the original side skirts wrapped in plastic... I need to hurry up and finish my garage project ASAP...)
Somehow the camera didn't quite catch accurate colors...although yes should probably replace the LED bulbs with something a bit more blue...


Finally! Both cars in the new garage. Along with Ale's Z parked out front in the driveway.
I noticed it too. The front end seems to be elevated a bit.
In taking these photos, you notice things -  I'm pretty sure my car never had so much lip clearance before. Which I think comes from the DFV coil-overs, which seem to have been adjusted a bit too high by NISMO...just for aesthetic purposes I'm going to have to lower the front a few centimeters. The gap between the front wheel and fender is huge!
Right? The gap seems much less here - back in 2015...
Actually in order to find the above photo, I found this blog entry where Ohlins recommends a distance of 350mm between wheel center and the fender (which results in a lowered stance like above). So something for me to do next weekend...although now that I think about it, lowering it too much resulted in rubbing the inside of the fenders. Will have to experiment.

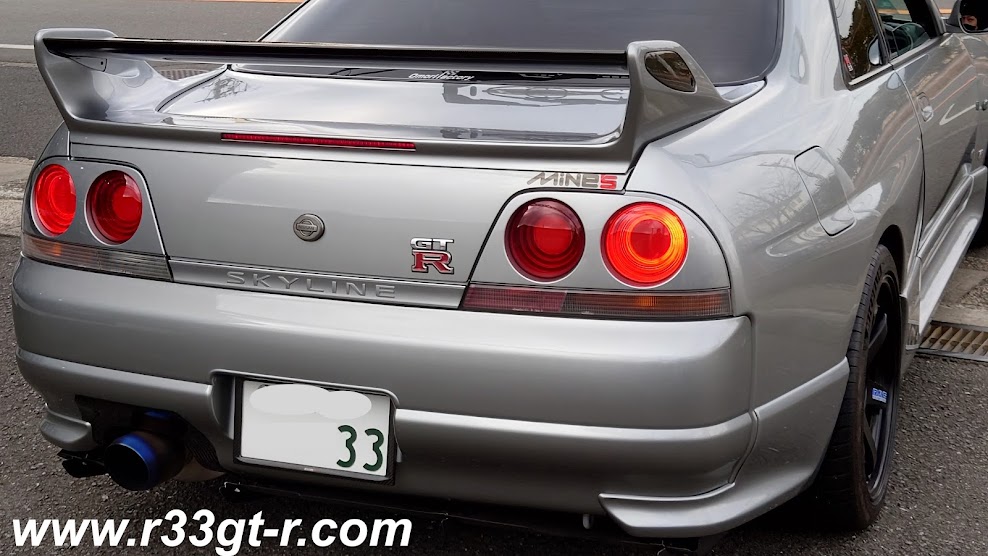
And finally, check out the new GT shiftknob. No more scratched up BNR34 unit to remind me of you know who everytime I shifted.
Still cannot believe how beautiful that red stitching on the leather is...
Anyway, I know that I need new tires, but before that, what should I do? Detail it myself? Or try to begin fixing the interior? Hmm...and now with the new garage, there is so much more I can do! Stay tuned!

Monday, March 23, 2020

Picked Up The Car Today from NISMO! (Part 1)

So the day we've all been waiting for finally arrived. After taking care of things around the house (i.e. cleaning the garage) I jumped in a taxi and arrived at NISMO Omori Factory 25 minutes later. My extremely useful friend Alessandro was kind enough to meet me there in his Z to take photos and help me haul back all the old parts.  Clearly the Nismo guys were wondering what he was doing there, AGAIN, but this time it wasn't to spend his money - the day had come for me to open up my wallet and make a donation to Nismo.
Surreal. Walking into a darkened NISMO Omori Factory - they are still closed to the public until the end of the month.
All in all, while like anyone else I like a good deal, I have to say that, for the quality of the job, the price I paid was fair.  More on the quality and my drive impressions later.

Which one would you choose, and where would you apply them?
One of the nice things about being a customer that actually had his car worked on by Nismo is, you get your choice of these stickers, either in silver or black. I chose silver, because if I EVER put any one of them on, it would be on the darkened side or rear window. And no I don't like the top two either (apparently customers put them on the front fenders, one to each side...)

Things are about to get interesting, again
 For future reference, Nismo's resident R33 GT-R guru is Morita-san (he built Nismo's Clubman Race Spec R33 GT-R - FYI the Speedhunters label of the R33 as only "Grand Touring" is NOT accurate...this is because in 2018 the 33 was upgraded to CRS spec), who then arrived to escort me back into the service bay to check out my car.  I'm thinking of sitting down with him at some future date and conducting an interview with him - ask him all sorts of R33 related questions, not just from me but from you readers as well as the members of ClubR33.

The OEM brake air deflectors
Remember in an earlier post, I complained about those gorgeous NISMO dry carbon fiber brake air deflectors? I guess they heard me complaining, because they put these on, essentially saving me about $2000. And guess what, OEM durability so I won't have to worry about them breaking either!

Check out the silver NISMO brace bar. Hard to tell the improvement in this photo.
And the pink ink marking - know what that's for?
 So as I was doing a final review of the underside, I was told that, in the past Nismo's paint on their braces and links had been a weak link. Recently they have improved the process and now powder coat, not paint, their underfloor braces and links.

There were also numerous pink ink markings on the underside. Takasu-san wants me to come back in a few months and they will make sure, by looking at these markings, that everything is still tight and up to spec.
Right. Now I want this in my garage.
Of course, other than the stickers mentioned above, THIS is what I was really excited about. The rare official NISMO plate...

Giving forever, a special cachet to my car...
One last photo with me before my car leaves the factory floor...
From this vantage point, I watched as Takasu-san started up the engine...
...and drove my car into that famous parking lot, visited by YouTubers and car freaks the world over...
Proceeded to remove all the protective interior coverings...
 The moment of truth as I get into my car... (thanks Ale for the photo)

As mentioned earlier, I wanted to keep all my old parts, maybe to sell, maybe for a future project - and it turns out they stuck them in several boxes, more than what could fit in the trunk of my car, so naturally I convinced Ale to put them in his Z, and he then followed me home. He DOES take some nice pictures, don't you think?
photo by Ale
Looks so good!  
Just as I was beginning to have some fun... 
The electronic toll reader in my car failed...
So I got stuck at this toll booth for a good 3 minutes... because the ETC reader that WORX Auto installed had failed...sign... Some components of the headunit it's connected to work, because it still gave off that annoying beep at random intervals that I could never figure out how to turn off. The head unit itself now refuses to turn on as well.

Anyway, in tomorrow's post I'll show you how the car looks in my new garage and also talk a bit about how the car now feels - in a word "OEM" but let me explain how that is a very good thing...

Saturday, October 5, 2019

Yes, Still At NISMO OMORI...but that could be a good thing?

Long time readers will recall when I had my car at Mine's to receive its new engine - that took a long time too. The latest news is that I'm still trying to get an estimate on certain work I want done but I've been told very apologetically by Takasu-san at NISMO that vendor that they use for part of the work is booked solid but they are trying to get my car taken care of as soon as they can...

Meanwhile, my friend Alessandro sent over some photos which I will share here. (Thanks! And yes, I may have an opportunity to drop into NISMO for some work related business next week in which case I will make sure I check out my car in person...)

First, he dropped into NISMO today to inquire about some work on his second car (Z33) and was kind enough to make sure my car was still there.
Nice white V-Spec there as well...wonder what the engineless car is??
Second, as I was too busy to attend this year's R's Festival, he was kind enough to send me these photos of NISMO's R33 demo car - not sure if it's called the Grand Touring or the Clubman Race Spec but in any case they had this car at the Festival, with an interesting new prototype part.

Such a nice clean engine bay! Gives me some ideas...
Note I've annotated the photo with 2 arrows - one green and one red.

For the GREEN one, I'm interested in why NISMO engineers chose to leave this space uncovered. Usually the cooling (slam) panel extends all the way across, if not including the space behind the headlights like the Garage Defend version, then at least covering the space between the headlights. It seems to me that leaving the space open like that defeats the purpose of having the panel there.  I am guessing that NISMO needed that space there to allow enough air to enter into their new prototype carbon air intake, OR this was done because the panel was not allowing heat to dissipate well (this is a claim I've heard about the full width Garage Defend panel from the guys at Mine's, Nissan Prince Tokyo and NISMO).

As for the RED arrow, I'm curious as to why this tube like thing needs to be there - Ale told me it was to allow for space for the radiator bracket - but it appears to actually block airflow into the intake.  My guess is that, as a prototype part, this was done as a quick solution to accommodate the bracket, a quick and easily solution in order to get the part made in time for the R's Festival.  I'm hoping that if this part goes into production, then the space for the bracket will be molded more closely to the bracket.

Let's take a closer look:

Obviously not true NISMO quality... look closely
As Ale explains in his post, up until now upon installation of the NISMO inlet pipes, the instructions have been to take a heat gun and literally soften the ABS plastic OEM airbox cover to allow for re-fitment over the pipes (which are taller than the OEM).  I did this as well (actually, I had Sugimoto-san at Nissan Prince do it as he had a proper heat gun) back when I installed the pipes.

Looking closely at the photo above, while the carbon at first glance looks quite gorgeous, I see what look to be bubble in the clear coat. And what's that weird molding residue on the left edge there right in front of the cut out?

So as a believer in function over form, I'm curious as to whether this is indeed an improvement or just for looks. Something I will inquire into next time I'm at NISMO, hopefully soon. If this actually provides for objectively better breathing, then my car's overly long stay at NISMO will have been worth it!

Wednesday, June 12, 2019

A Quick Visit to NISMO Omori Factory...

As long as I've owned my car, I've never had my car actually worked on or even inspected by the guys at Nismo Omori Factory. Granted, I've had many many different Nismo parts installed on my car over the years, and Nismo trained mechanics (the guys at Nissan Prince Tokyo Motorsports Factory (Yamada-san in particular) as well as Ninomiya-san at BeAmbitious) but maybe it's not quite the same? 

Time to find out! A few weeks ago I received an introduction to Takasu-san at Omori Factory, and went down to visit him. I show up at the appointed time, and had to park next to this very nice Nismo Z34. 
Cannot believe how small my car looks next to the Z! Maybe it's the angle?

After the pleasantries, I first made clear to the guys at Nismo that I was a regular working man with a growing family - i.e. I'm not going to be able to spend as much as some people and reproduce a Clubman Sport car. And in any case, I am not going to change the way my car looks  - I just want to see what they can do to fix/improve/modernize.
Master Mechanic Takasu-san checking out the Mine's engine...
I know my car intimately - both good and bad - and so what I thought was going to be a short conversation ("how about this?") turned into a long one.  Truth be told, to make the car perfect/brand new would simply cost too much. Basically anything Nismo Omori does is NOT cheap - whether engine work, body work, restorations, etc.  And apparently more and more owners throughout Japan (as well as a select few from overseas) are now contacting Nismo Omori with the same thing in mind - can you make my car better/newer/more special. So basically, Nismo has no incentive to give me a discount on anything...(time to start playing the lottery?).

Here is the view walking BACK to the public area. Love that R30, and that 33 is actually PURPLE, not black!
As a Nissan employee, even though they didn't give me a corporate discount (yet...), they DID let me walk around and check out some cars they were still working on (Ale's car, for example) as well as a very special R34 Z-Tune from Australia. And of course the cars shown above - most of which had come in for body work - except for the R30 which is being gradually rebuilt from the ground up (this time it was for an engine refresh, previously it was the body, maybe next the interior....??)


Just LOVE the way my car looks. Classic lines, smooth body, still looks fresh.
Unfortunately for me - Nismo Omori in the end told me that they could NOT work on my car - at least in its present state. You see, as an OEM manufacturer they apparently can't take any short cuts. Takasu-san had noticed that my shaken (registration) papers weren't quite up to par.  This is because when I got my GETRAG 6-speed installed, I had failed to properly re-register my car - technically it's no longer a "BCNR33" but a "BCNR33-kai" (BCNR33改).  At the time - it just didn't seem important and no one at the inspection center seemed to care.

Anyway - I guess if I really want Nismo to take a look I'll just have to fix the problem - take the car in and get the paperwork sorted and then see what Nismo believes they can do to improve the car...hopefully I can get this project started soon. It sure would be interesting to see what they suggest I do to improve my car.

Saturday, May 26, 2018

Fixing the Interior, Part 4 (DEFI Heads Up Display)

So one unique item I've had on my car for many years is a Heads Up Display (HUD) unit made by DEFI called the VSD Basis (no longer in production but here is the English instruction manual!) that displays speed or engine revs (it's a primitive system) on the lower right side of the windshield.  I got this because for the longest time I did not want to change the OEM speedometer, which only displays up to 180kph, but of course the car is capable of much more (especially after installation of the Mine's built engine) and I needed a way to figure out how fast I was going on the track. Since unlike some other GT-R owners here in Japan (especially a certain rich millennial BNR34 owner), I actually track my car. (or used to, anyway - and will again soon - that's what the car is designed for!).

Control unit on left, display unit on right.
From: https://minkara.carview.co.jp/userid/131534/car/41102/41491/note.aspx
The control unit for the Defi had previously been attached by double stick tape to the fuse box cover - right above my right knee and readily accessible so I could change not only between speed and engine revs, but also brightness depending on time of day.

So of course when I got my car back from Nakamura of WORX, I was SUPER PISSED OFF to find out that the control unit had disappeared. When I asked where it was, he told me he had placed it BEHIND the driver's side kick panel - out of sight, out of mind.  WTF?? UNACCEPTABLE!


Now, I understand he didn't want to tape or glue it to the leather covered fuse box cover (and THANK GOD he didn't - or worse BOLT it on...), but could he have not made a bracket? He had shown such creativity with the additional fuses in the trunk, and the bracket in the glove box which he had even covered in matching Alcantara (but then proceeded to ruin it by drilling two screws into the leather... sigh...)
Custom fuse box for audio items in trunk by Nakamura. Nice, right? Except now that I've uncovered his errors, I'm worried about this. Will have to go and double check there aren't any problems...
At least he didn't damage anything this time. I should be grateful, but now it was up to me to figure out how and where to place the control unit.

So I decided to take a look. When I removed the cover, I discovered that he had used various zip ties to secure the unit, and at the same time, had used shrink tubing to shorten the length the wiring going into the unit. This meant that I would not be able to relocate to the left side of the dash nor next to my left leg - the control unit would have to stay relatively close to its original location.

After re-routing the wiring to its maximum length, I found and bent a piece of thin aluminum in an effort to make a bracket.  My idea was to use one of the bolts securing the dashboard as the base to which the bracket would attach.

Unfortunately, after a few tries I discovered that my solo DIY efforts were not going to work. And, unless I was willing to be very patient and have a very special bracket made, a quick solution was not going to present itself.

In the end, I decided that the original fuse box cover was indeed the correct location, not only because I was used to it but ergonomically it works very well. So, the next step is then to decide how to affix the control unit.  Clearly, I do not want to use glue or super strong double stick tape, which would likely damage the leather.

So, the only solution I could come up with was to use rubber bands to literally strap the unit to the cover. But, that is ugly and ghetto (excuse the term).  Time to get creative.


What I ended up doing was to finding a small black rubber work glove at the local hardware store, and cutting off the fingers and using the rest of it (essentially the wrist portion). Luckily, that wrist portion fits snugly around both the cover and the control unit. Once the control unit is inserted, just need to make the wiring is zip-tied out of the way.

Being black, from a distance the black rubber looks like it's supposed to be there. Not the ideal and most permanent solution but since it cost me less than 300 yen, it will do for now until I can figure out how to mount the control unit without damaging the leather.

Incidentally, the green arrows point to the 1) alarm LED (blue) and the microphone (un-needed) for the Navi unit.
Ok so a couple of more posts left on stuff I had to fix due to damage done or illogical placement by Nakamura at WORX during the alarm and stereo install.  As you can tell from this post, these aren't necessary permanent fixes, but simply enough to get by without annoying the heck out of me everytime I get in my car.  One of these days I will find a proper shop and get everything properly sorted, but until then my fixes will work.

Friday, February 17, 2017

First Time Ever All Fluids Change/First Visit of the Year to Nissan Prince Tokyo

So even though I've owned my car for over 10 years now, there is still a first time for everything - so this was the first time I had ALL fluids in the car changed out at once. 

Anyway - because I need to drive the car a bit for an upcoming project, and because it's been literally just sitting in the garage for a while now collecting dust, I decided it was time to get at least an oil change done.  And, given how disgusting the coolant was during my engine bay freshen-up project, I also realized I hadn't had the coolant changed in a long, long time. Maybe not since I had the Mine's engine installed? No, say it isn't so...

Absolutely disgusting. Hope the insides of the radiator and engine aren't like this either...
So, I called up the guys at Nissan Prince (specifically Nismo Performance Center Tokyo, at the Nissan Prince dealership in Sakura-shinmachi) for a Sunday appointment to "replace all fluids."  Oh, and since my BNR34 otaku friend Alessandro happened to be free that day, I invited him along as he had been asking me for a ride in a tuned GT-R.  Oh, and he loves going to NPCT as well, being there almost every weekend hunting down parts for his GT-R before they disappear from Nissan stock. Maybe one day he will talk about his experience in my car.

It turned out that taking the car in now was a good move. Because as I got on the expressway, there was a weird shimmy in the steering wheel between 80-100kph...

Anyway, we got there safely and after parking the car, Alessandro got busy and took the following photos for me...


Can you see the dirt? It was drizzling that day, which,
combined with the dust on the car and the exhaust soot, left its mark on the car!
I then went inside and asked the following to be done:
1) Oil change - I had found several liters of (unopened) Motul 300V (5W-40) in my garage, which they had no problem using.  I usually ask for and use 15W-50, but as it's still cold in Tokyo... and bringing my own oil, which I bought at discount, saves me money!  Oh, and for filters, given a choice of Nissan or NISMO, with a price difference of only 300 yen or so, I went with NISMO. Yes, slight brand whore...oh and yes shame on me last time I changed the oil was when I tried out that NISMO motor oil, back in June 2015! (but probably about only 1000kms back).

2) Brake oil change. Remember my drive in Hakone with Dino, Russ and Miguel? At the time it seemed like either the pads were gone or the fluid was boiling too easily. A quick confirmed plenty of pad life left, so new brake fluid was needed. I brought some Endless RF-650 (DOT 5.1) for them to replace the old RF-650. Last time I changed it was...probably 3-4 years ago? Yikes.

3) LSD oil change. I recently heard the OS Giken Super Lock LSD, which is normally very quiet, start making some noise so figured it was time for some new fluid, having never changed the oil since I had it installed more than 6 years ago. I had stock of the OS Giken 80W-250 oil, for exclusive use in this LSD.  

4) Power Steering fluid.  Although I only asked for Nissan OEM, they went ahead (after checking with me) and used NUTEC ZZ51-kai. Which turns out to be AT fluid.

5) Engine Coolant - I told them Nissan OEM was fine.

6) Air Cleaner - I decided to get a new one as the last time I changed mine out was about 20,000kms ago. NISMO of course.

7) Front LSD - this was done when the Getrag was installed last year so I demurred.

8) Clutch oil - I asked them to use whatever RF650 was left over after the brakes were done.

Finally, I also asked them to check to see if the leak they had previously found in the Getrag, was back.

The following weekend, I was back to pick up the car:

Hmm. That doesn't quite look right.

Oh yeah, that looks good. Even the red oil plate looks good here...

Good news - the Getrag leak was confirmed gone, and the shimmy I had noticed was because the two front tires had lost their weights along the way and had to be rebalanced. Alas, as I drove away, I realized I hadn't seen the coolant listed on the invoice. Somehow, there had a been a miscommunication. So I turned the car around... oh well...

Finally this past Thursday, I left work early and took the train to the dealership. First time I had dropped by this late, actually.

No sporty vehicles in sight...
Of course I quickly found my car.
Yamazaki-san had made sure that, in addition to the coolant, the ATTESA fluid had also been changed out.  I have never had this changed out since owning the car, and he told me that the schedule to replace is 60,000 kms or so.

And while I was paying, I asked a bunch of questions about some upcoming NISMO parts. Stay tuned!
The view out the office window. Can you spot the blue R33 lurking in the corner?
When I walked over to talk to the mechanics to ask about the coolant (how dirty it was - they had to flush it out a twice!), I noticed a Bayside Blue BNR34 being worked on, with a totally bling part in the engine bay:

C'mon! Does the carbon part work any better than the aluminum? No, but still...
 There was one last item that I had noticed when I had attempted to pick up the car on Sunday - the gas pedal was a bit "loose" - turns out that the throttle cable had stretched a bit so that was adjusted as well. Amazing how that detail can make the car feel so much more solid!


Yamazaki-san moving my car out of the pit for me to drive home.
And so how does it feel now? In a word, refreshed! Amazing how a simple fluid change can really liven things up. (And actually, I just realized that, my car was registered as a new car in February 1997, meaning that this month, my car is 20 years old!)

Yes, I had a blast or two on the way home, relishing how easy the car is to drive (and now with full confidence that everything is properly lubricated, balanced and cooled). In fact, in some ways, the GT-R is easier to drive than the IS-F; for sure, the steering is both more communicative and lighter, for example, and the Ohlins do a far better job than the stock dampers on the Lexus. Yes, the GT-R rides better than the Lexus...

With more power, the GT-R feels lighter and more nimble (but strangely, not smaller - I think primarily due to the seating position), but this is to be expected. Surprisingly, I prefer the brake feel of the IS-F (also Brembos) so perhaps it's time to look into new pads on the GT-R?

In any case, lots to do to keep improving the car... I promise my next post on Speedhunters will demonstrate that!
Monday, January 16, 2017

Some Increased Publicity... Plus Photos From the Cutting Room Floor

As most of you probably noticed, during the last couple of weeks I did a Speedhunters post where I described my multi-month "clean-up" of the engine bay.  Also, my friend Alessandro did a very nice post on the car as he had come over to help during the light bulb replacement project.

But there were several photos that didn't make the cut. So, I decided to post them here.

First, in preparation for the Speedhunters article, I actually had considered re-wrapping the HKS oil cooler hoses in black plastic spiral wrap.

First, I had to cut this zip tie away.
You can also see the SAMCO radiator hose on the bottom and the weird white spots on it that eventually convinced me to replace it!
It's too bad I couldn't use this in the end. Cheap and easy!
Here's how it looked after I finished the re-wrap. Looks OK, but a bit odd at the same time...
So what do you think? Should I have stuck with the black wrap or did I do the right thing with the clamps?

Speaking of clamps:
Mysterious package from China. And yes, Japan Customs opened to inspect it!
Since I wasn't sure if I should go for anodized silver or black, I ordered both!
 Did I make the right choice by going with the black clamps in the end?

Yes, that is probably 20 years of accumulated gunk!
 As mentioned earlier, when I had Alessandro come over to help, the first thing we decided to do was to replace the silicon SAMCO radiator hose with a new one.

But, SAMCO pricing in Japan is ridiculous, so I went ahead with this one from SARD
Here is Alessandro helping with the clamps.
Incidentally, he later went crazy with metal polish on the Koyo radiator. Thanks Ale!
I was researching new clamps for the radiator hose and a friend told me about some good ones made by Mikalor. So, I went ahead and ordered some.
While nice Stainless Steel, the ones that arrived were scratched up.
They also seemed to not be as shiny as they should be.
Maybe I need to polish them in my free time?
So yes, I gave up on these and went ahead with the ones included in the SARD kit.  We then turned our attention to trying to remove the front bumper, for the headlamp bulb article I did recently.

Here is a close up, looking up from inside the turn signal space, one we removed it.
You can see the ballast for the Xenons.
And of course, having removed the undertray I had to clean it. Simple Green is the bomb!
Rusted license plate stay
 In removing the bumper I thought we might have to remove the license plate stay. So off it came, and we noticed it was quite rusty.

I've resprayed it with anti-rust paint, this will have to do until I get a new one.
So that is one more new part to have to reorder!  Anyway, I am now working on my next Speedhunters post, and will of course provide some more behind the scenes coverage to appear here on the blog. Stay tuned! And thanks everyone for the comments made on the Speedhunters post!