So a few weeks ago, I got a message from Ochiai-san from Nismo Omori Factory, letting me know that not only had the part finally come in after a 6 month wait, but the OTHER had been returned.
Confused? Ok let me explain.
First part. Last time I had the car at Nismo Omori Factory back in June of this year, they had completed all the work except one bit, which required the ordering of a new part - and in all fairness, I was told to expect quite a wait.
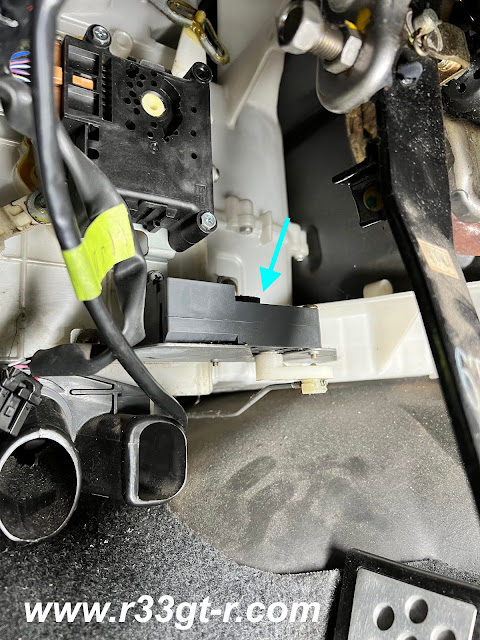
This is called the Mode Door Actuator - and is basically the servo unit that directs the heated or cooled air where it is supposed to go. Ochiai-san told me that this is often a problem with 33s - the internal circuit fails so the servo motor swings left and right continuously, making a whirring sound which can get quite annoying (and frankly might be hard to hear since the RB isn't the quietest engine...)
Man, that is dusty down there! Another winter project for me!!!
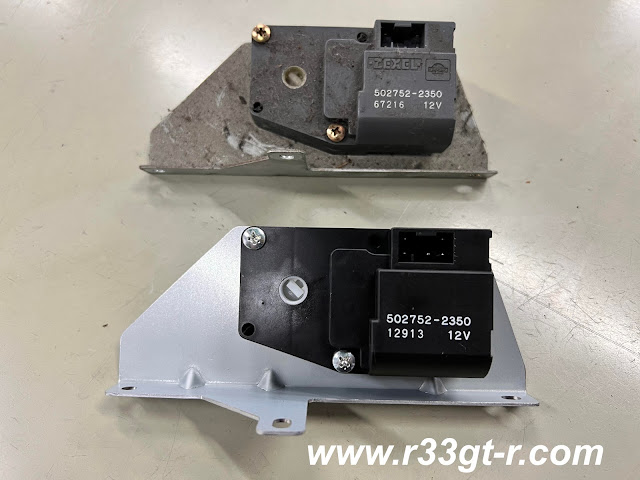
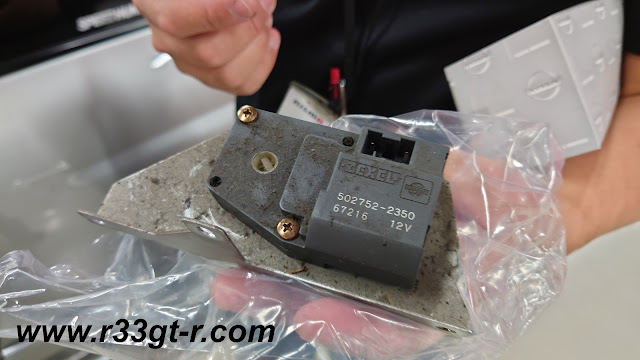
Yeah, that is a lot of dust on the old one... yikes.
New part quickly installed.
So it only took a few minutes to install the part, after which Ochiai-san sent me these photos and the video clip below showing it working!
Ok, perhaps a minor part that most people wouldn't care much about, but for me, everything on this car has to be in proper working order!
Yikes that is filthy!
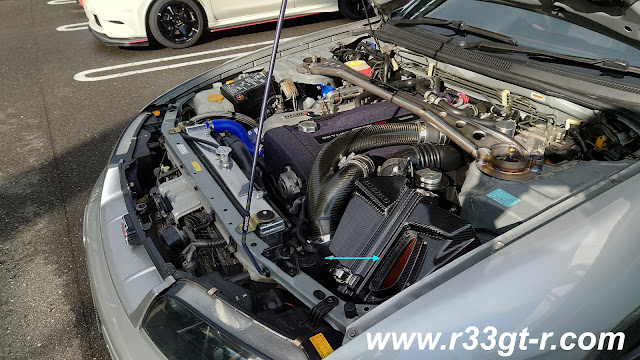
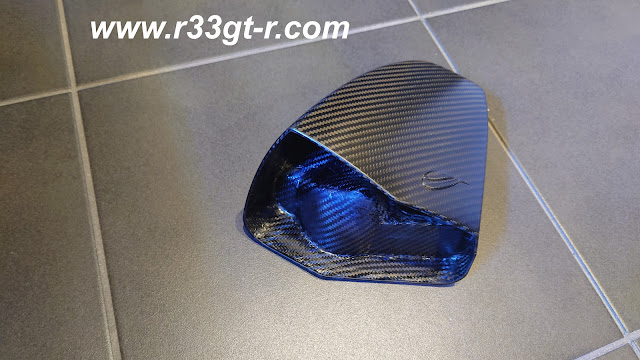
The OTHER part in question is the carbon snorkel, which as you can see is missing from the airbox.
Here is a close up:
Installed it looks like this, just in case:
So what happened? This is quite embarrassing for Omori Factory, but apparently the production of this snorkel was supposed to be a one time, limited run only. However demand was very high (the guys at Nismo tell me it's in part due to this blog! Way to go readers!) and so the decision was made to do a second run. Problem is, the supplier had already destroyed the original mold, and so Nismo reached out to me to borrow my snorkel so it could be lent to the supplier for them to create another mold.
So when I got the call that both parts had come in, I dropped off the car, and also had Ochiai-san take a look at all of the new upgrades courtesy of Mine's. He spotted a couple of issues but nothing some clever taping cannot fix - stay tuned for that!
Anyway, as we discussed the recent mods, it became apparent that there are STILL a few things I need to do. Some minor, some calling for another large donation to Nismo. In any case, as this crazy year comes to a close, I hope you all have a nice end of year and beginning of year holiday! See you all next year!
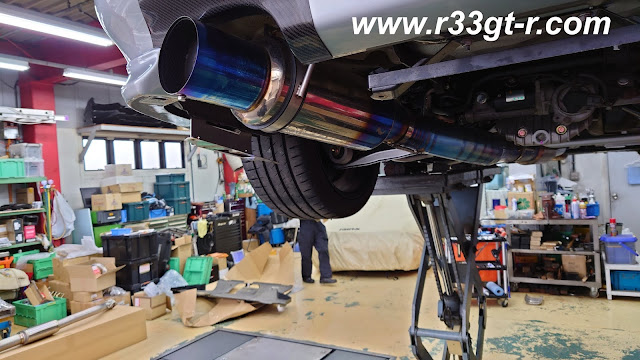
So a quick post to show everyone what the new Mine's titanium exhaust sounds like installed - and then a question. (Taken at Nismo, super impressed with the cold start up, so quick! And yeah the engine was cold so a lot of black exhaust, looks like we may need to fine tune that):
Compare with the Tomei Expreme (taken at Mine's so please excuse the street noise):
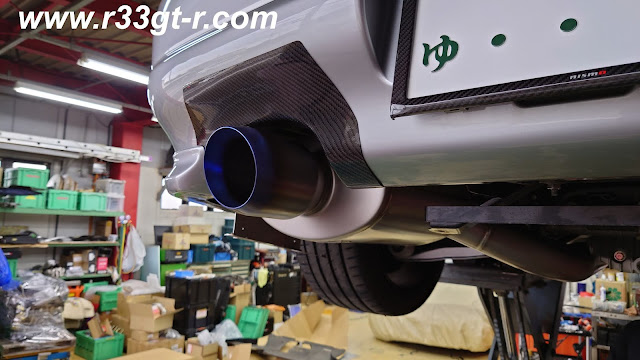
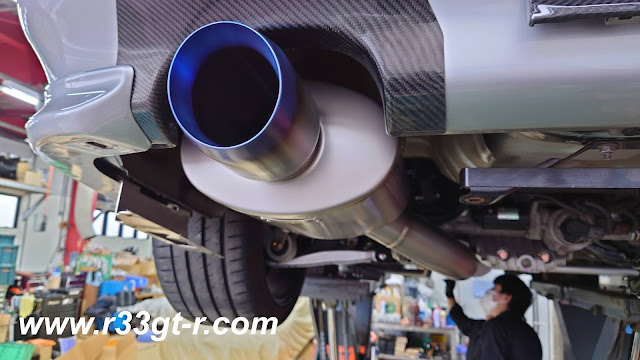
Obviously, the Mine's exhaust looks great - but it also looks like it sticks out just a bit too much? I thought so too, so I called Nakayama-san to confirm. He told me that unfortunately, because of the diffuser - which although i told them they could modify as needed - but they did not - and its brackets, as well as the oversized differential cover - they ended up putting a 10mm spacer between the cat and the exhaust.
In other words, the tip of the exhaust sticks out about 1cm more than it would otherwise. I was told that this would just pass shaken, because its furthest point is aligned with the rear bumper's furthest point.
So question for my readers - should I go back and ask them to cut the diffuser/replace with the OEM diff cover, so the exhaust is shorter by 1cm? Or maybe just 5mm?
Second question - should I keep the carbon exhaust shield, or remove it? It already might be starting to peel off, but I do not want to use the Nismo version which uses rivets. So I may be resigned to continuously cleaning that area...
But what was the car doing at Nismo? Upcoming final post of the year soon!
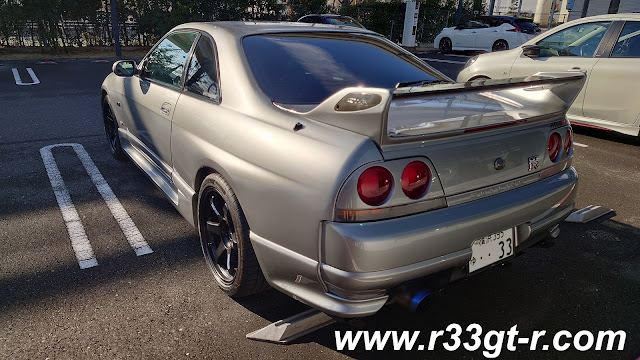
BONUS - here is a nice photo of the CRS (Clubman Race Spec) R33 GT-R (Yep, it has been upgraded to CRS status). Why? Because it was sitting there, looking nice! Enjoy!
So as I mentioned in the first of these Mine's visit posts, the Silence-VX Pro Titan III was not the only Mine's part I decided my car needed.
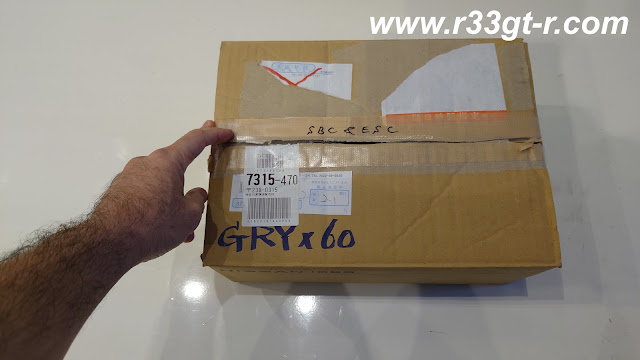
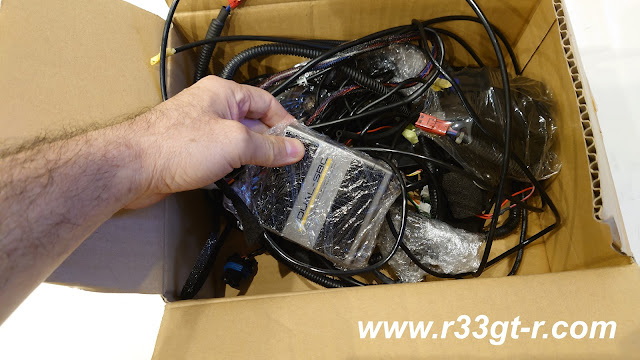
But before I show you what I got installed, how about I show you what was removed? The guys at Mine's were nice enough to pack up all my old parts into boxes for me.
Damn when did I get so hairy?
You can already tell that it contains "SBC" and "ESC" so:
And yes, not surprisingly, they made sure to wrap up the important pieces in plastic. So they don't get scratched up. Why? Because Japan...
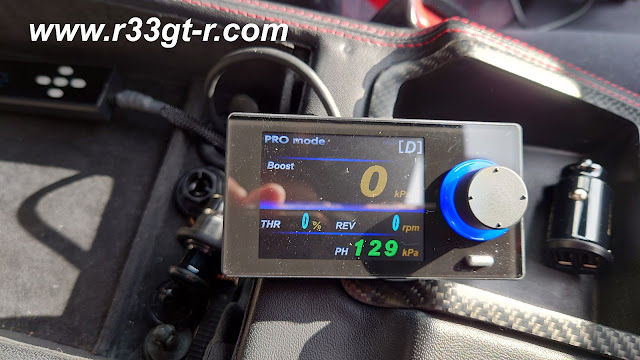
So yes, they removed my old Blitz Dual-SBC boost controller for a newer unit by HKS, their EVC7:
Frankly, I'm not sure how this improves control of the turbos, except the interface seems to be much more user friendly. Maybe more precise control? Although when I picked up the car I vaguely remember Nakayama-san saying something about setting up different boost settings and that he decided that at the maximum boost setting the car felt too fast and so he dialed it down one notch.(!) Actually I found this comparison chart but maybe one of you guys can sum it up for me.
Ok onto more removed parts.
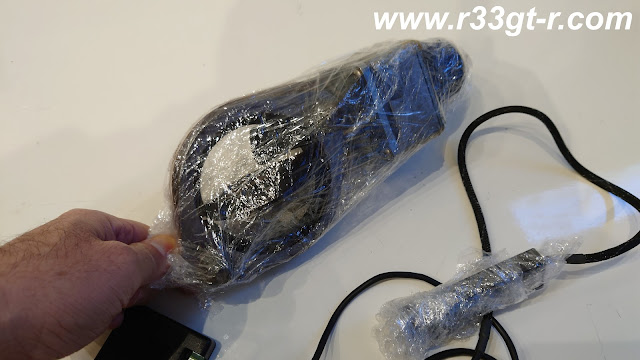
Blitz E-ESC, electronic exhaust sound controller. This was the electric valve I referred to in my previous post.
Note how even the controller is wrapped in plastic. Not good for the environment, Japan!
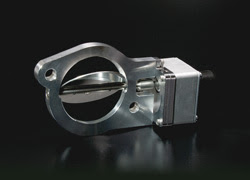
Looks like this unwrapped, according to the Blitz website:
And here is a video of the effect it had on the sound of the Tomei.
Obviously, with the new Mine's exhaust, this is something I don't need anymore. Removal of this valve -quite heavy actually - saves me XXX grams - and maybe makes up for the difference of the slightly heavier Mine's exhaust vs the Tomei? Not sure what I will do with the E-ESC now - maybe save for the Lexus if I ever get an aftermarket exhaust for it? I see Blitz discontinued it, so it could be handy in the future.
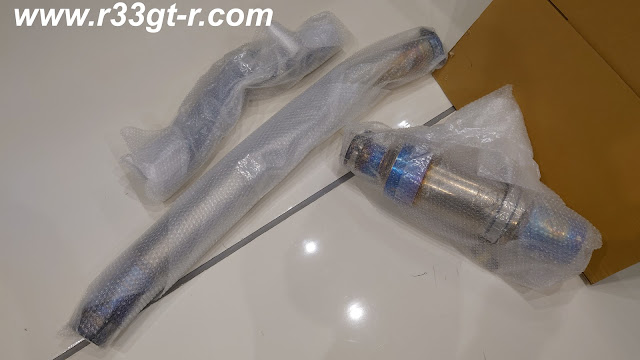
Also, they gave me back all of the Tomei Expreme Titanium - in pieces (it is not a one piece design, like the Mine's is), all nicely wrapped up!
Not sure what to do with this - keep for future track days?
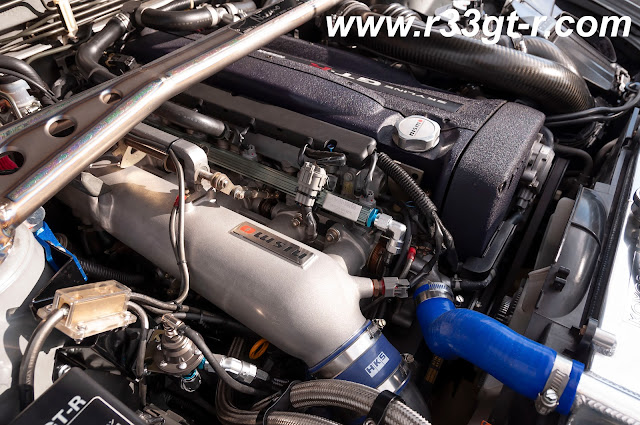
Ok so the exhaust and exhaust value were obvious, given my previous blog post. How about this - the engine bay, how it used to look:
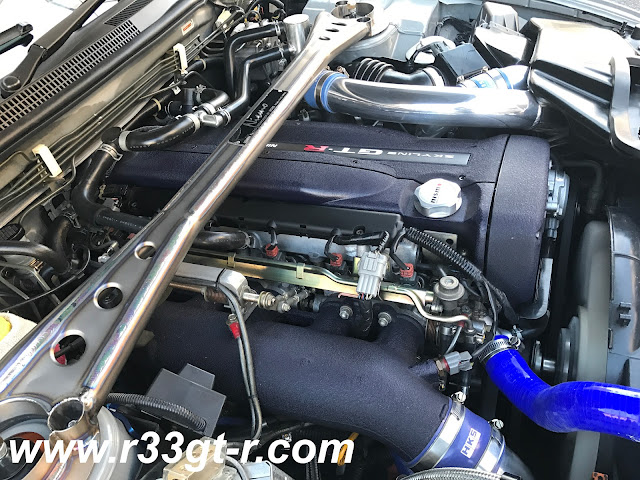
To now, this:
I changed out the OEM plenum, complete with the Mine's crinkle coating, for a non-crinkle coated Nismo plenum. I've always thought this part looked great just the way it is, and by limiting the crinkle coating to the engine, I think it actually further emphasizes the engine itself although strangely maybe it makes the engine bay look a bit busy?
Of course, if the plenum is replaced, other stuff is going on too.
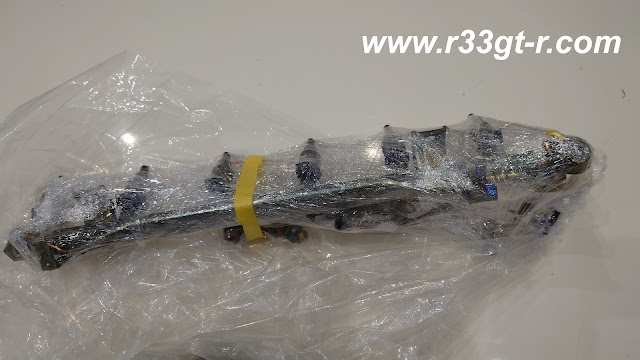
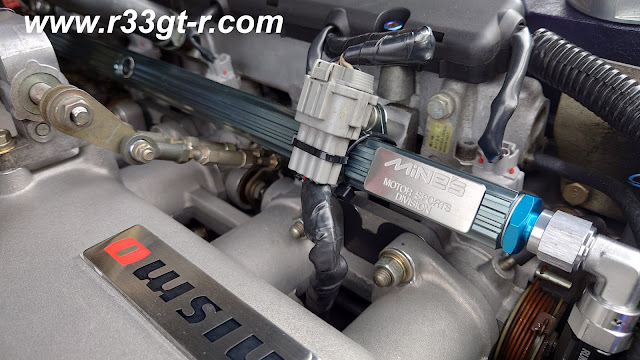
That's right, I decided to replace the old Nismo 600cc single hole injectors with modern OEM R35 12 hole injectors! This necessitated a new fuel rail:
If you look at the Mine's website, you will see that they advertise this bit of kit showing all the fuel lines on the topside - Nakayama-san told me some owners like to be able to show off, when the hood/bonnet is opened, that they have this new set up installed and so opt to have the fuel lines routed as follows:
Hmm. Just noticed the red O is different...argh!!!
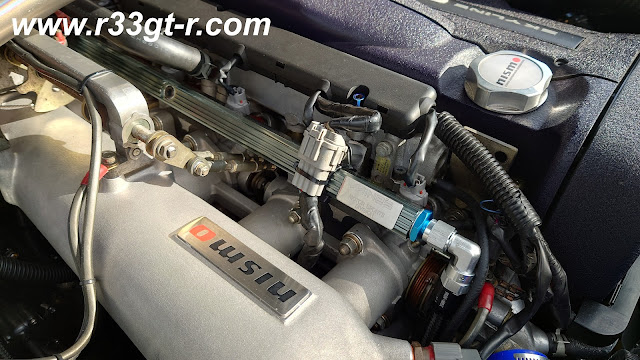
Not me, I like the more subtle look of the fuel lines all tucked away.
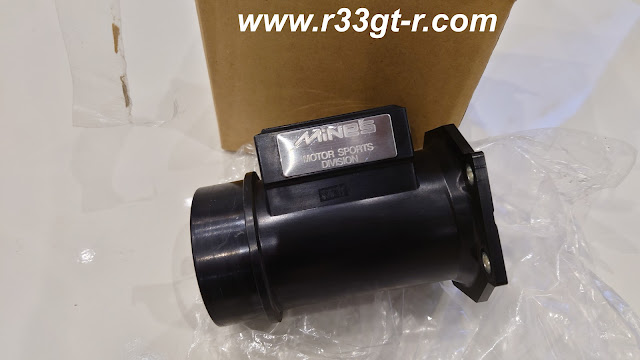
Of course, with new injectors you should run new Air Flow Meters (some people may disagree, I am just letting Mine's and Nakayama-san install what they have perfected over the years) so these old Mine's units came off:
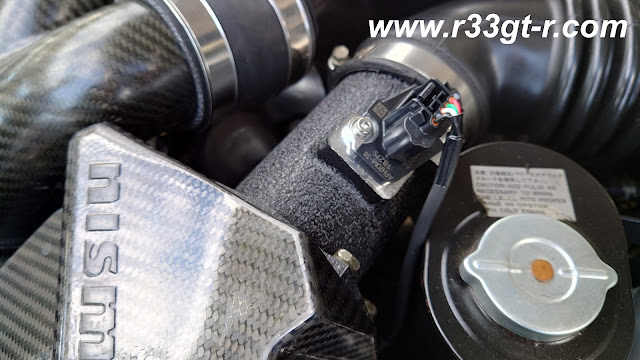
To be replaced by the modern and thus much more accurate R35 ones. OEM parts FTW, I say!
The black crinkle finish is a bonus!
And with new injectors and AFMs, Mine's installed a new custom VX-ROM for me (I know because Nakayama-san told me about he himself setting it up out on the road). So how does it all work together?
First, I don't know why, but the engine starts up much easier. Even Ochiai-san at Nismo commented on this (yes another Nismo post coming soon!). Second, throttle response with the new R35 injectors, along with more volume in the Nismo plenum, results in very crisp, instant response. To be honest, it was very good before, but I feel like it's even more precise. Surgical?
Strangely, the exhaust still stinks, although not chokingly bad as before. Maybe it can't be helped with these engines but I was hoping for cleaner fuel burning due to better fuel atomization from the 12 holes.
I will post a sound clip of the Mine's exhaust soon, but it is fairly quiet. Still loud compared to the Lexus or the average car, but much more refined and therefore tolerable.
Power-wise, because of the more accurate throttle play, I feel like the car is more lively, and even with the new exhaust, which may be slightly more restrictive, I never felt like the car was down on power. So with better response and no perceptible change in power, (Nakayama-san grinned knowingly when I told him this), I am VERY satisfied at how this upgrade turned out! Although come next year sometime, Nakayama-san is promising me another powertrain upgrade which he thinks will make the engine even more responsive!
There is however one more pre-arranged modification I had Mine's do. I will publish that as soon as the Speedhunters article (working title - Return of Project 33) comes out, which now appears to be next month. If I do not see it get published by then, then I will go ahead and update the blog accordingly - you guys should not have to wait for that to find out what is really going on!
Sitting pretty at Mine's after a bunch of new parts!
So I have to admit to not posting much these past few months, because of course I was planning a few things for my car. Of course I am busy at work too, but that excuse gets overused.
In any case, as I hinted in this post from September, there are some newer parts at Mine's that I have been interested in lately that I think will help to further improve the car (yeah, it never ends...). One of these of course is their new Silence-VX Pro Titan III exhaust:
Change in that there was nothing wrong with the exhaust. It was just loud. Very loud. Clearly designed for the racetrack such that I could feel how free-flowing it was. Unfortunately some shops in Japan (like Nissan Prince Tokyo Motorsports Division and Nismo Omori Factory) will usually refuse to work on cars that do not have JASMA certified (and thus street legal) exhaust systems. Never mind it was always a problem starting up my car on an early weekend morning in order to go for a nice drive. As readers know, I ended up installing not just an electric valve to try to muffle the sound for in-town use, I eventually even installed an aftermarket exhaust bung as well. This allowed me to get down to close to street legal levels, after which Omori Factory kindly chose to not make a big issue of the legality of the exhaust...
In the past, I had told the guys at Mine's that there was bound to be demand for their titanium exhausts from 33 owners, which until recently were available only for 32s and 34s. So I was pleasantly surprised to first get a phone call from Takayanagi-san of Mine's giving me a heads up that they had developed one for the 33 due to popular demand, and then thrilled when during my earlier visit to Mine's Nakayama-san promised me that I would be one of the first, if not the first, r33 customer to have this new titanium exhaust installed!
Flash forward to a few weeks ago, when we had arranged for me to drop off the car. For posterity, I wanted to record what the Tomei sounded like, so...
And then of course Nakayama-san again took my car into the famed garage.
And then the fun began!
So it seemed like I was the only customer that day - yes, I felt special, like this was a historical moment! In any case, I wanted to test fit the new exhaust, just to see how it looked.
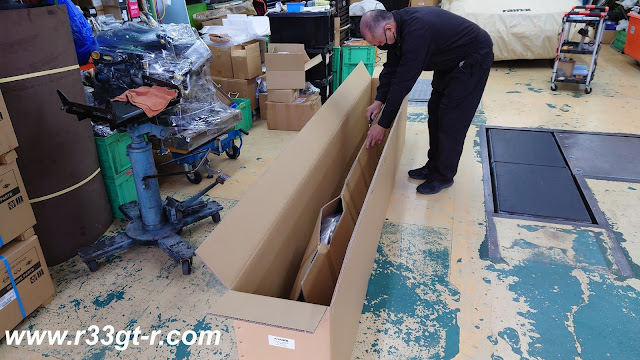
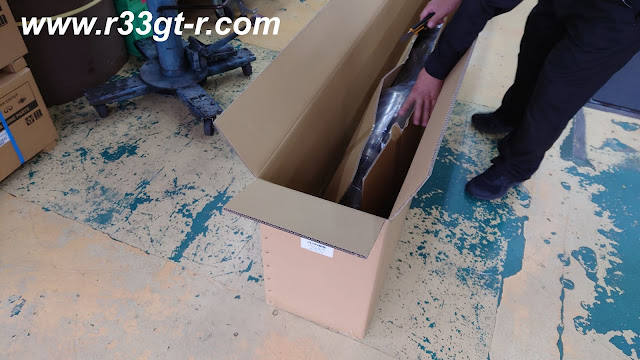
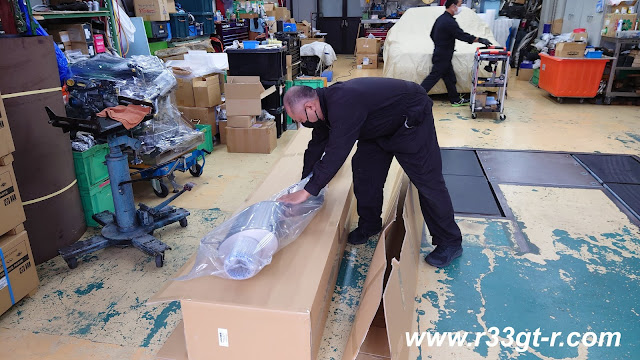
While a couple of the Mine's mechanics began to prep the 33 so they could unbolt the Tomei from the car, Nakayama-san gleefully opened up a very long box.
And pulled out a very large, very beautiful piece of art!
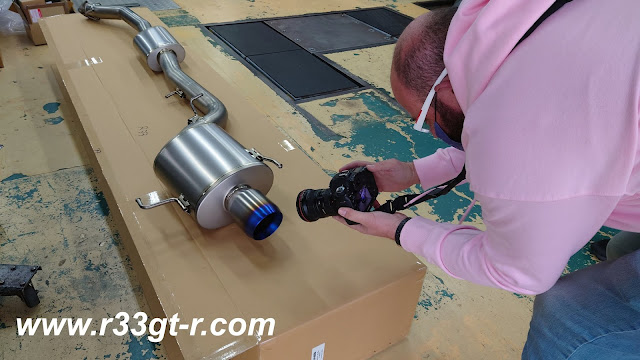
Look who happened to be in the neighborhood. Of course he had to take advantage of this instant so
He was mumbling something about Speedhunters. I guess we will eventually find out if this photo gets published on SH.
I'm no pro, but here is my photo taken with my Sony Xperia 1 Mark III:
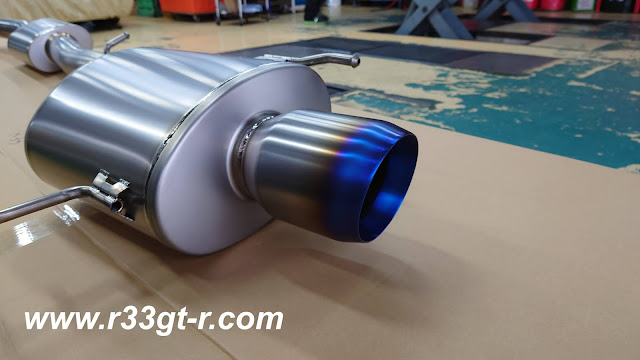
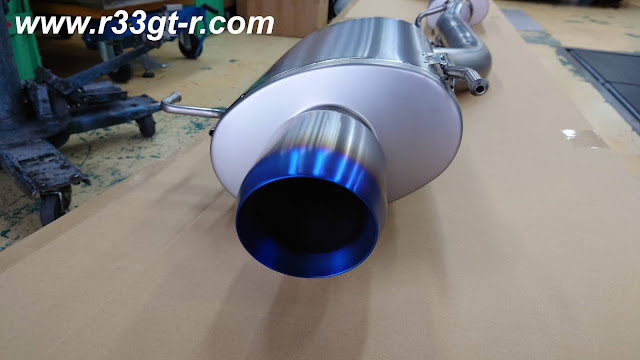
Another angle:
Very tasty!
Meanwhile the other mechanics had jacked my car up, and were trying to figure out how to remove the diffuser.
A few bolts here and there, and voila!
After which it was relatively easy to remove the Tomei exhaust, and temporarily install the Silence-VX
I say temporarily because, unfortunately there seemed to be a clearance problem caused by both the diffuser brackets and the extra oil capacity rear diff cover.
Realizing that this issue wasn't going to be solved in the next few minutes, and because I had asked Mine's to install some other tasty bits, I then decided to go home and save a few hundred yen by hitching a ride with Mr. Dalle Carbonare to the nearest train station.
In my next post, I'll discuss some of the other parts that got removed and the new ones that got installed. Stay tuned!
So friends, yes I have not posted for awhile, but it does not mean I have not done anything car related in that time.
Now that I have a decent garage, I started thinking about what kind of tools I will need going forward in order to properly support a "Garage Life" - not just display my car, or even my other hobby of washing/detailing my cars - as this blog has shown, since purchasing my GT-R I have always spent time tinkering with it, making it "mine."
But I have recently come to realize that while the Craftsman tools I inherited from my dad are decent, they are nowhere near as good as some stuff the Japanese make. And as I get older and clumsier, anything that helps make it easier to work on my car(s) in my home garage, is most welcome. But good tools are expensive, right? Well, not if you live in Japan AND you buy Japanese tools - imported tools from the US, Germany, etc., ARE expensive however. So I decided to start by focusing on Japanese tool manufacturers.
So far, I have discovered that Ko-ken Tools seems to be THE socket specialist - and they have an automotive specific line up, their Z-EAL line (basically making things as compact as possible to get into tight situations); KTC (Kyoto Tool Company) is known also for their comprehensive line-up, but are also known for their auto-specific tools (and their super premiumNEPROSseries!); TONE (pronounced "to-neh") is also a comprehensive tool manufacturer with some interesting stuff and some racing pedigree; ENGINEER seems to be really into cutting tools, like wire cutters/strippers (I actually bought one during the stereo install) and pliers; VESSEL seems to be the king of screwdrivers (I bought their compact motorized one - saves my wrist!); and others such asANEX and Asahi Tools- and yes, many more - I am just beginning this new obsession! And yes, I try to buy the "Made in Japan" products these manufacturers sell - not only do I find the Japanese craftsmanship superior, even to the items made in Taiwan (which are very close, admittedly) but it's my way of supporting my local economy (even some Japanese brands have things made in China and other countries, so sticking to Made in Japan is not just relying on the brand name)!
Anyway - let me show you why I got so excited about these tools. For example:
Ko-ken wheel nut sockets with protector
Simple idea, but really genius. I have had to use electrical tape on the sockets I used on wheel nuts, but always felt there had to be a better way. On these sockets, the thin plastic housing protects against inadvertent scratches on the wheel. On the inside, there is a small plastic circle at top to prevent scratching those chrome bolts too!
Or how about this - ever try to use a hex wrench, but in a location that was too small for your hands to manually start the bolt? So you either hope that you the screw is steel so that the magnetized hex wrench holds the screw just long enough to get started, or you use some something sticky to hold the screw on the wrench... well no more!
Why Good Design award? Check out the tips in this close-up:
That's right - the ends have spring loaded steel balls that hold the hex bolt head in place!
Well that's great for hex head bolts but what about regular bolts? Not to worry, Ko-ken has something for that too.
Same concept - the Ko-ken Nut Grip sockets have this black wire spring on the outside of the sockets that then hold two very small balls in place against the incoming bolt (blue arrows).
Speaking of Ko-ken - check out these socket wrench extensions with the built in knurling - useful for when you want to manually spin that bolt into place!
I mentioned VESSEL above - I am simply in love with their rechargeable powered "Ballgrip" screwdriver with changeable tips.
Rechargable via USB. Has a built in LED lamp too, so perfect accessing hard to see and reach screws from underneath, especially in the interior!
Finally, check out this TONE swivel head ratchet.
Now I know that Snap-On and other companies have swivel head ratchets, but what impressed me was the low price - around 6000 yen - plus the superb craftsmanship (made in Japan, yes!) - the handle is hollowed out so super light and superbly balanced! Have not had a chance to use this yet however...
Anyway - as I continue to buy and collect various tools, I will probably set up a PAGE on this blog dedicated to these tools. Most of them of course will be used to work on the GT-R, so yes this is all R33 GT-R related!
Oh, and yes, upcoming post very soon on the latest on the car itself, so please stay tuned!
So after I installed the Nismo Carbon Fiber Airbox, I was looking for an excuse to drive the car to see if I could feel any difference - after all, if Nismo is recommending an ECU rewrite, this is not simply a cosmetic add-on, right? (YES! See my analysis below).
Because it's too much of a hassle to get a new ECU (even though I've been meaning to actually - someone send me one!) I decided to simply unplug the battery and let the Mine's VX-ROM reset itself to learning mode - I figured that the velocity stacks would increase airflow, which means that the ECU would adjust fuel and spark accordingly - in theory having the air flow in more quickly would be similar to the effect I had when I experimented with creating an air inlet that gave a ram-air effect. So hopefully, even if the VX-ROM wasn't able to take full advantage of the increased airflow, it should still result in a noticeable difference.
So last Saturday, after having called ahead a week before (highly recommended during these crazy times), I drove down for my appointment at Mine's at 1pm. You see, every summer Mine's has their Summer Sale where they offer some parts on sale as well as zero percent financing for their more expensive items - such as engines. That's how I was able to afford my Mine's engine way back in 2007 - I'm not rich like some people! Anyway, I had been promising Nakayama-san (the engine Takumi) and Takayanagi-san for years (when meeting up with them at Nismo Festival) that I was over due for a visit and a few new Mine's parts.
Flash forward 14 years, and I figured it was time to have Nakayama-san take a look at my car and make sure everything was still up to their high spec. I unfortunately once let someone who didn't know how to drive very well take a quick spin in my car, and the engine's quickness surprised him - meaning he did not shift quickly enough, causing the engine to redline. So at the very least I need to get that checked out (hopefully the Mine's engine is over-built and thus idiot proof...)
Anyway, despite the traffic it was a quick drive down to Yokosuka, where Mine's is. After having endured a summer of very mediocre rental cars on my trips - Kia Optima, Toyota Corolla (JDM), Toyota Corolla (USDM) and Mitsubishi Mirage (JDM), it was SIMPLY AWESOME to take the GT-R for an extended drive. They simply do not make cars like this anymore, I felt so connected to the car and the road, and with the rebuilt suspension thanks to the Omori Factory chassis refresh, it was like driving a new car. The super responsive Mine's engine coupled to the Getrag is icing on the cake.
Walking into Mine's, it seemed not much had changed since my last visit. I think this engine has been displayed in the same spot for the last 20 years...
But actually, they did have a few new items on the shelves:
Actually these are officially Nissan licensed items... maybe except for that shift knob
Surfboard not for sale
Who wears these in public?
Very nice, except iPhone models only...
So after the usual pleasantries and a quick discussion with Nakayama-san and Takayanagi-san about what I was concerned with, as well the possible future upgrades I wanted, Nakayama-san had one of the techs clear out space in their workshop for my car. He jumped in my car...
And drove it over to their garage workshop:
Once parked, he revved up the engine a few times.
This was apparently enough for him to get a general sense of how healthy the engine is. The verdict - given how little I have driven over the past years - probably around a bit over 30,000km since the engine was built - he believes that the engine is probably fine, despite my stupidity in letting an incompetent redline the engine. He also examined the engine compartment and noted nothing amiss, no leaks or imminent failures, which of course is always a relief.
Nakayama-san did point out a few areas which can now be improved - technology and techniques have improved in the last 14 years so likely I will be doing what I can to upgrade over the next few months.
After a few more discussions on upcoming parts - most notably Mine's is finally releasing a titanium Silence VX exhaust system for the R33 GT-R - due to customer demand! - I drove back home, enjoying every minute of it and wondering how the upgrades will further improve this car.
As for the Nismo Carbon Fiber Airbox - I do believe it ACTUALLY MAKES A DIFFERENCE! At high speed engine response was slightly more immediate - exactly how it was with the ram-air system, as well as how the car responded when I first installed the Tomei Expreme titanium exhaust (without any sound deadening inserts like I have in now - to keep the peace in my neighborhood). A slight push on the throttle is immediately translated into an increase in revs, and the car thus seemed slightly more eager and alive. However - I did not notice a difference at low speed, so if all you do is drive around in the city, this is simply pure bling.
So then, is it worth the price? Hard to say - a homemade ram-air system is probably just as effective, and if you couple that with a completely free breathing exhaust like the Tomei (without baffles) then you might get the same effect, a more responsive engine. But, we all know that many of us like to buy things on HOW THEY LOOK - and yeah it looks great. So in the end, I think you have to ask your wallet...