Saturday, September 3, 2022

I've Met Another Crazy Kohki KR4 Owner

Recently, a fellow R33 GT-R owner messaged me on this blog about how he had successfully used a BNR34 part on his car. Murray (Follow him on IG: kaizen.r33) currently lives in Okinawa, Japan, so when I found myself there for a couple weeks of special work, it was natural that we would meet up in person just so I could check out his car (his daily!).

Beautiful! Love the quasi 400R look, reminds me of my car. And the Nismo intercooler
venting is awesome!

Once we met up, of course I had to check out in person what he had tried to explain to me via email and photos about his mod using the BNR34 rear strut tower board, which being two layered (vice the single layer BCNR33 piece) provides more rigidity to the rear of the car.


So I could tell immediately that this looked different from the usual 33 part.  First, the Nismo Performance Damper appears (and is) shorter, but that is because its mounting points are different - you can see in the next photo (kindly provided by Murray) that compares the 33 and 34 rear boards - the 33 is one piece so the rear strut bar (and thus the Nismo Damper) connects on top, while the mounting for the 34 strut bar (and thus Nismo Damper) is a separate piece that lies on top of and bolted underneath the rear board.  Murray told me that because of the different lengths he had to buy a new Nismo Damper for the rear. Because Nismo only sells in front/rear pairs, he sold his new 34 front one on Yahoo Auctions.  


Additionally, Murray informed me that, compared to the 33 board, the 34 board has 4 extra recessed holes, probably M10x50mm in the standard 1.25 pitch. He says the Series 3/Kohki cars already have these holes drilled at the factory so he had no problems adding and tightening these extra bolts down. Otherwise, as I reported in the GT-R magazine article post, this part is a direct easy fit requiring no mods to either the car or the 34 board.

Murray reports he could immediately feel the difference - an increase in rear stability - and this makes sense as the 33 is longer than the 34 and thus I would suspect that an increase in rigidity here in this area would do wonders in how the car feels.  Certainly makes sense given how this 33 was used as the basis for improvements that would end up in the 34. Incidentally, I forgot to take photos, but Murray also has the S15 trunk bar installed as well, so the improvement I think might be noticeable in my car as well.

I am very, very tempted to do this mod! I will have to research the Damper issue- whether the change in structure is effective, etc. Ideally I want not to have to buy a new Nismo Damper...

But of course I had to check out the rest of the car.  I had already noticed that this car was running those beautiful Nismo semi-gloss LMGT4 wheels, and I could already spot some brake mods.

And yes we agreed on tire choice too - PS4S

These are ACRE Dustless-Real pads and Dixcel FS 6 slot rotors. He has the 400R fender flares but told me that Nismo no longer offered the ones for the front. I will have to look into this, but meanwhile we discussed how the Nismo R35 brake package does wonders for the braking ability of the car.  I think if Murray ever takes his car to Fuji Speedway, he will realize that the OEM brakes are the weak point of the car. I did advise him to stay away from adaptor brackets made elsewhere, unless he can overcome the shortcomings I found with the set I sourced from the UK. 

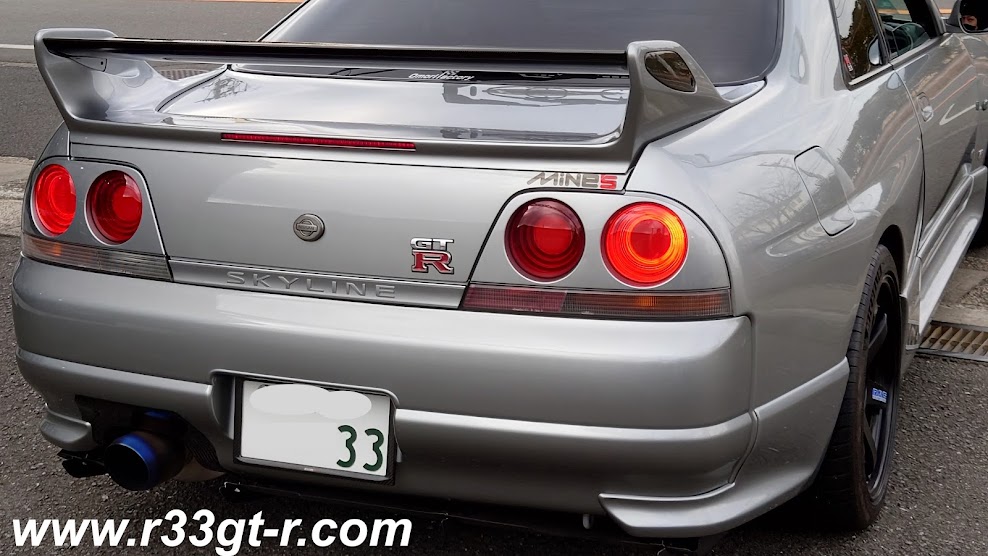
While still at the rear of the car, I noticed that Murray had also installed a BNR34 rear diffuser. But it looked different than mine. And it's not just the 400R rear bumper.

I forgot to ask if the red taping is reflective. If so, nice touch!

Turns out that Murray had the rear diffuser custom-made by CW-collective.  No photos from me as my knees were not cooperating that day (but check out Murray's IG), but I did notice how clean the exhaust cut-out was.  Murray did remark that compared to the OEM 34 version, he did not have a jack up point (so he has to use the arms), but otherwise the install was very clean.  And he even used the OEM 34 plastic fins, which is a smart move because they can get damaged when backing up (although I did not see any damage to the fins on his car).

One more interesting piece in the trunk area was this old-style Nismo badge that is no longer available.  I suspect that Murray and I may have been competing on Yahoo Auctions for the last few years over the same parts...


I also spotted this side turn signal that Murray says came with the car. Yes I have advised him to get it changed out for a more inconspicuous part.


Anyway a well put together and a very clean look that works! (despite the shaved off trunk lock - done by the prior owner of the car).

And the car has a replica carbon 400R double blade rear wing

Ok so let's check what's under the hood(bonnet!).


Hard to tell at this angle, but Murray reports the new HKS GTIII-2530s work really well. I also spotted the carbon fiber Nismo Omori Factory original air intake - great minds think alike?  Also hard to tell at this angle is the deletion of the OEM CAS for a more modern trigger kit, with the engine now controlled by a Haltech Elite 2500.  And yes that is a MASSIVE front strut tower bar! 

I also noted that he was running a non-standard front lip. Murray reminded me that this was also a Nismo piece, I guess my focus has been on other Nismo parts as it didn't register with me when he told me!
A better view of that massive Midori Seibi tower bar

From what else I can recall, Murray told me that he had gotten his Xenons redone with a much brighter bulb set-up, retrofitted with G5-BRT projectors from Lightwerkz Global. Additionally, he told me he is running a very interesting cam set-up - 290 on both intake and exhaust with 10.8mm clearance.  Sounds awesome, but he admits that the decrease in engine pressure was causing him some brake pressure issues; hopefully the Auto Select Large Capacity Brake Master Cylinder he is getting installed soon will mitigate the issue.

But wait - what about the interior? Hold on as this was, to me, the highlight of the tour.

First, I noticed the real carbon treatment on the dash surround. Not my taste as I like matte and not gloss but it worked well here actually. Then I noticed the Garage Yoshida sourced HVAC relocation kit, and the 2DIN screen.  Yep, been there, done that, except of course not Garage Yoshida. 

But of course, I then saw that the instrument cluster is the old Nismo option that has the center screen. Murray told me he sadly does not have the Epson EJ1 computer module that came with it - he is on the hunt for it. 

I would argue however that he does NOT need it. Yeah I know not OEM, but his current execution is WAY better:

And if that wasn't impressive enough, once past the welcome screen:

Here is a close up:


Murray says he was inspired by the R35's graphics when he configured this set up! I am very, very impressed with this!

I really think this is way better than the original:

I mean if you are going to Resto-mod... let's make it modern, right!?

But this wasn't his only interior mod. Check out his camera mount.

We were joking that maybe this gave some more body rigidity as well. Looking forward to whatever video Murray takes from this!

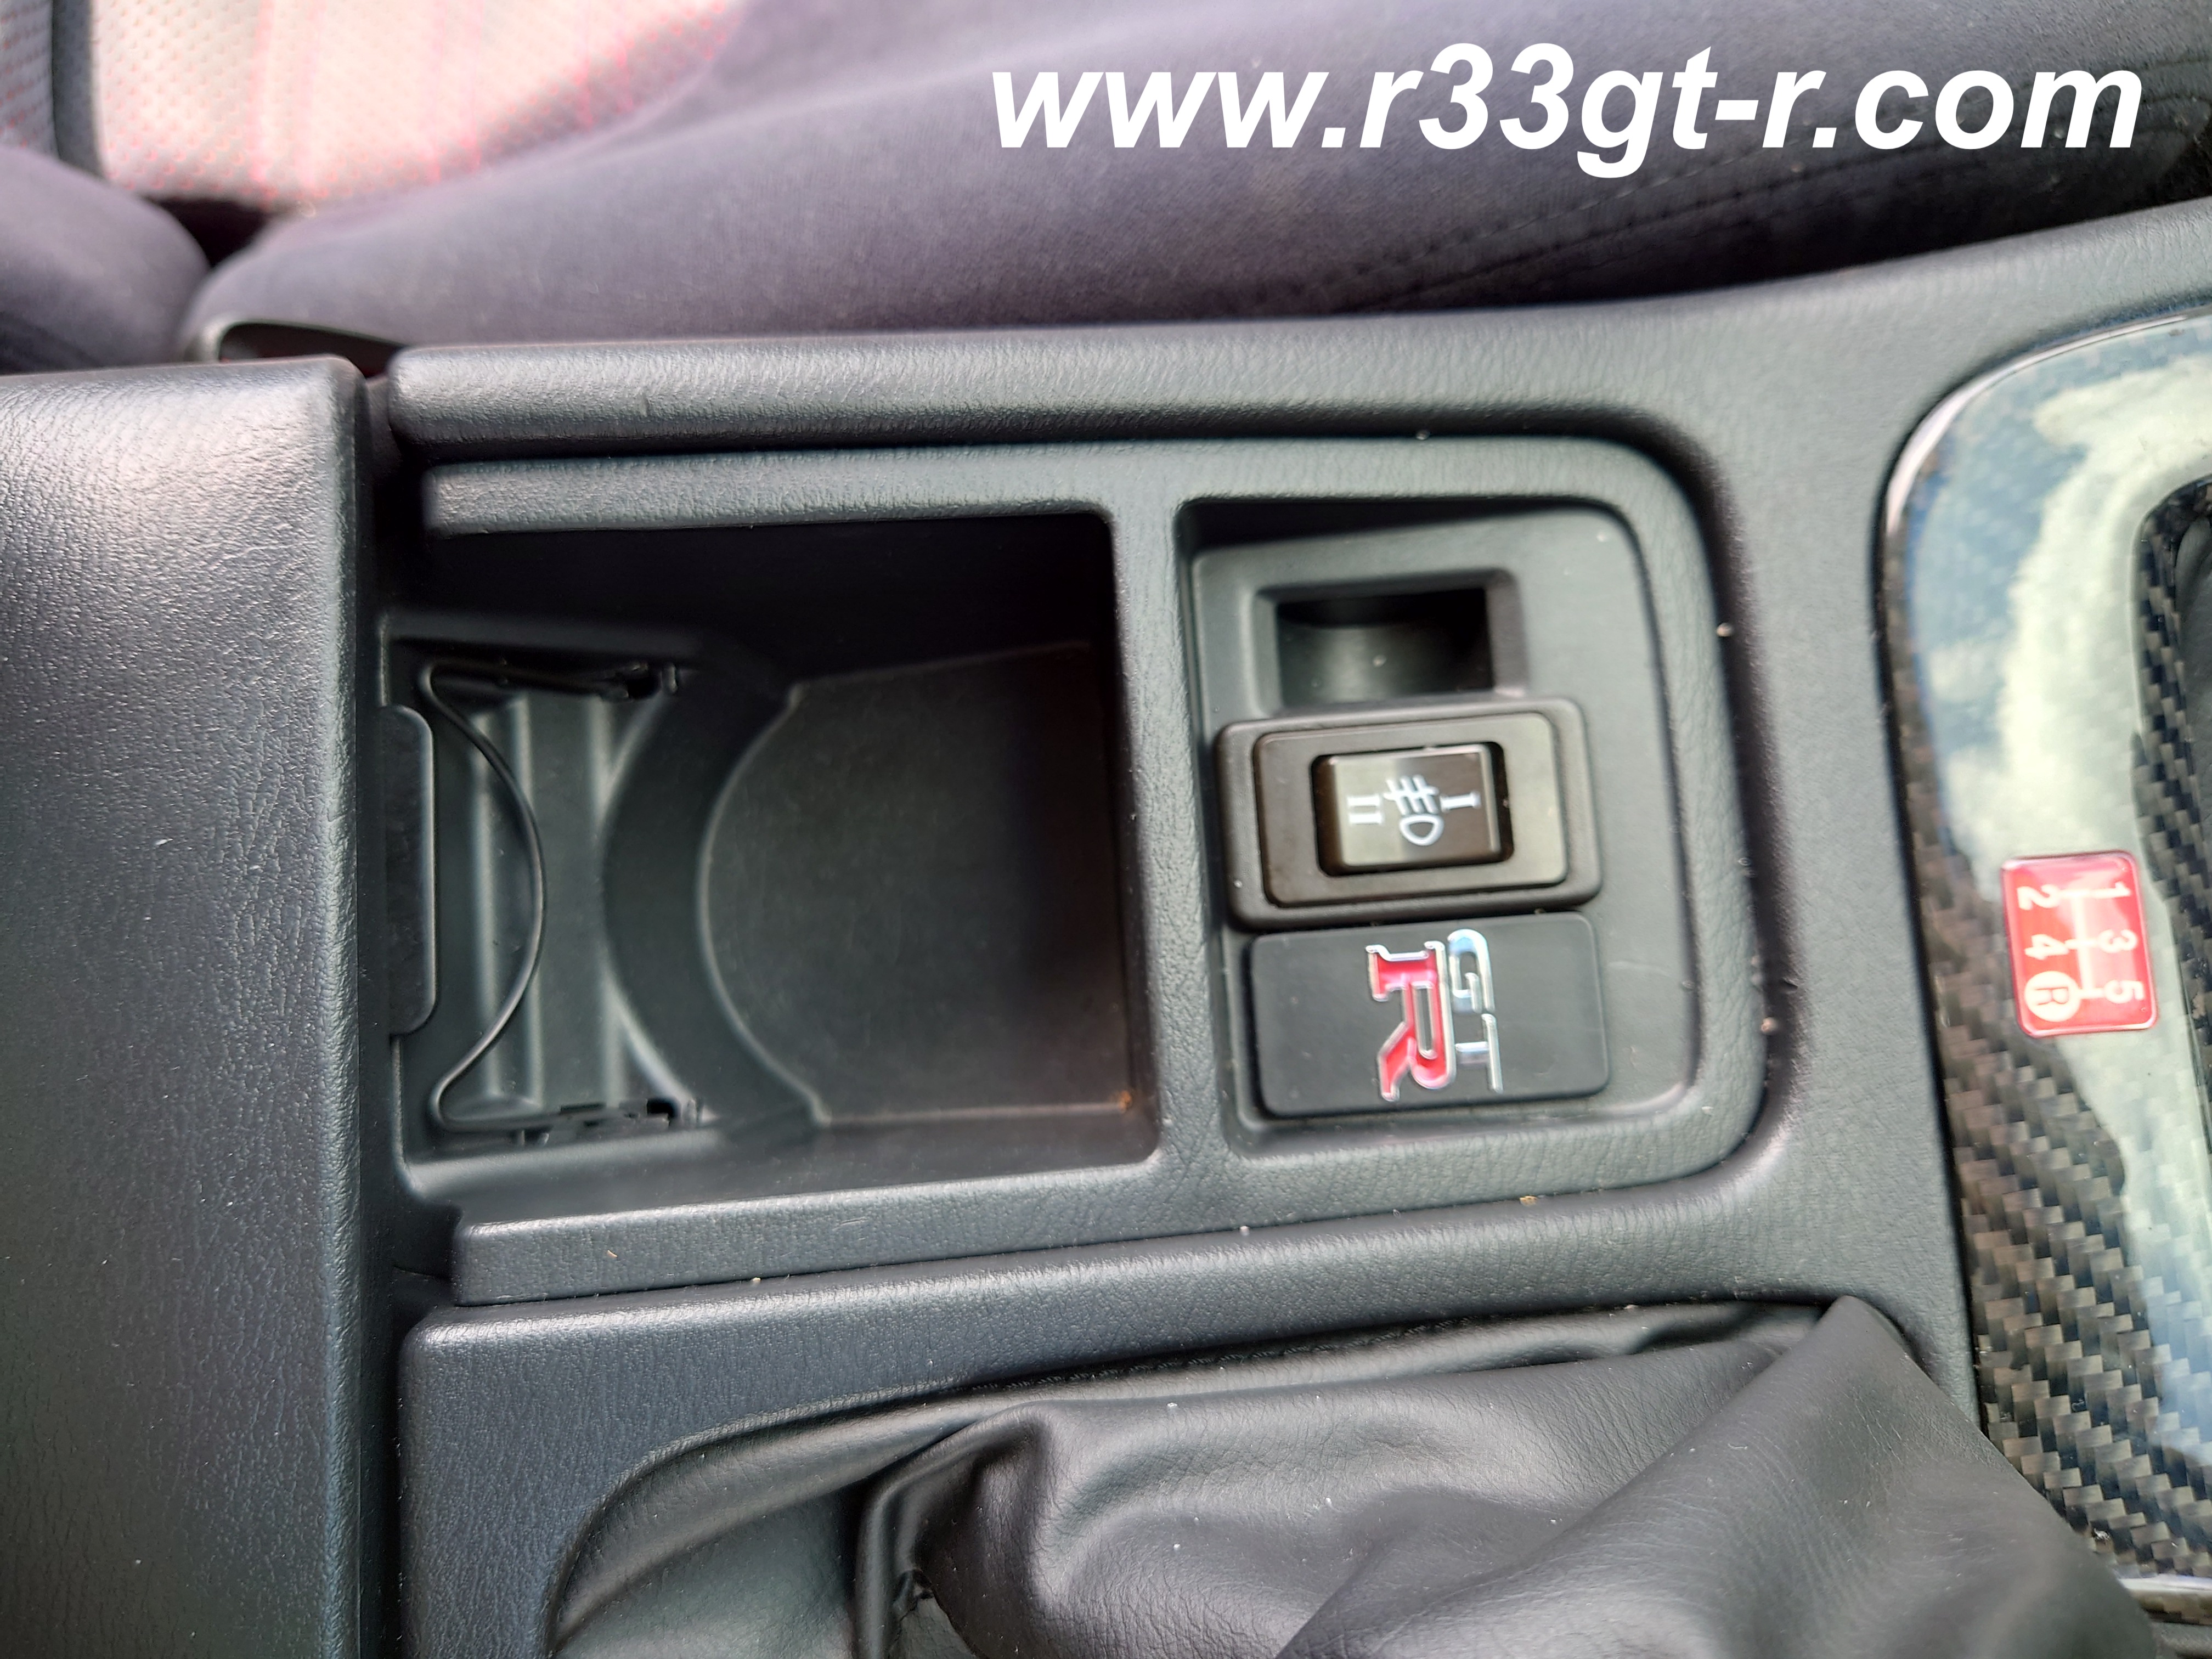
Lastly - and this is something new for me - as I learned something - is this OEM R33 cup holder.
No OEM foglights yet, but Murray is on the hunt for a set!

Ok here is a better shot of the cupholder, without the carbon fiber insert:


So it turns out that the R33 GTST had these cupholders.  Unfortunately for the GT-R, the G-sensor needed for the ATTESA system that is mounted underneath this space prevents this part from fitting, but if you have already replaced the old analog G-sensor for a digital one from Do-Luck or Midori Seibi, then this mod is possible.

So this is another Murray mod that I may have to try out! Not that I EVER drink or eat in my car, but maybe if I get this part I will allow a water bottle in the car... lol.

Anyway, my thanks to Murray for taking time out of his day to swing by and let me check out his car.  I'll close this post with a fantastic photo he took... and I do hope we will be able to meet up again soon!

Sunday, July 31, 2022

New Japanese Tools for the Marine Day Tinkering

So for years I have done my tinkering with relatively cheap tools - some not so bad ones like an old Craftsman standard/metric socket set I "borrowed" from my dad, but others from a random assortment of tools that I collected over the years - basically I would buy something when I needed it, without thinking much beyond that.

With the COVID-19 pandemic, however, that all changed.  I realized that now was the perfect time for me to build up my tools to high quality ones.  Working for Nissan, I also wanted to make sure that everything I bought was Made in Japan as well - hey gotta support Japan industry. If not Made in Japan, then at least a Japanese brand.  After all, both my cars are Japanese, so I figured why not get tools that match?

So over the past few months I have been doing my research and collecting when I can, certain tools.  A couple of these popped up on this blog previously

But only recently did I decide to go all out. For example, I discovered that Kyoto Tool Company ("KTC") specializes or at least is known for automotive repair related tools.  KTC is Japan's most popular brand and because I like supporting the underdog I wasn't automatically going to buy anything KTC so I did a lot of research.

But then I discovered that KTC and Nissan have a long standing relationship - KTC still makes tool kits for Nissan, for example, and in the past even supplied its Mirror Polish (now their super premium NEPROS brand) tools in Infiniti tool kits! 

In fact right now NEPROS are providing this tool kit for Nissan's Autech brand:
From https://ajcollection.theshop.jp/items/56720955

Anyway, this lead me to purchase a nice rolling tool cabinet - KTC offers several models but this is the only one fully Made in Japan.  It comes in silver, black, white or red so of course I got silver to match my car and the garage cabinets.

From https://ktc.jp/catalog/index-category/category-list/ekw-1005__1005bk

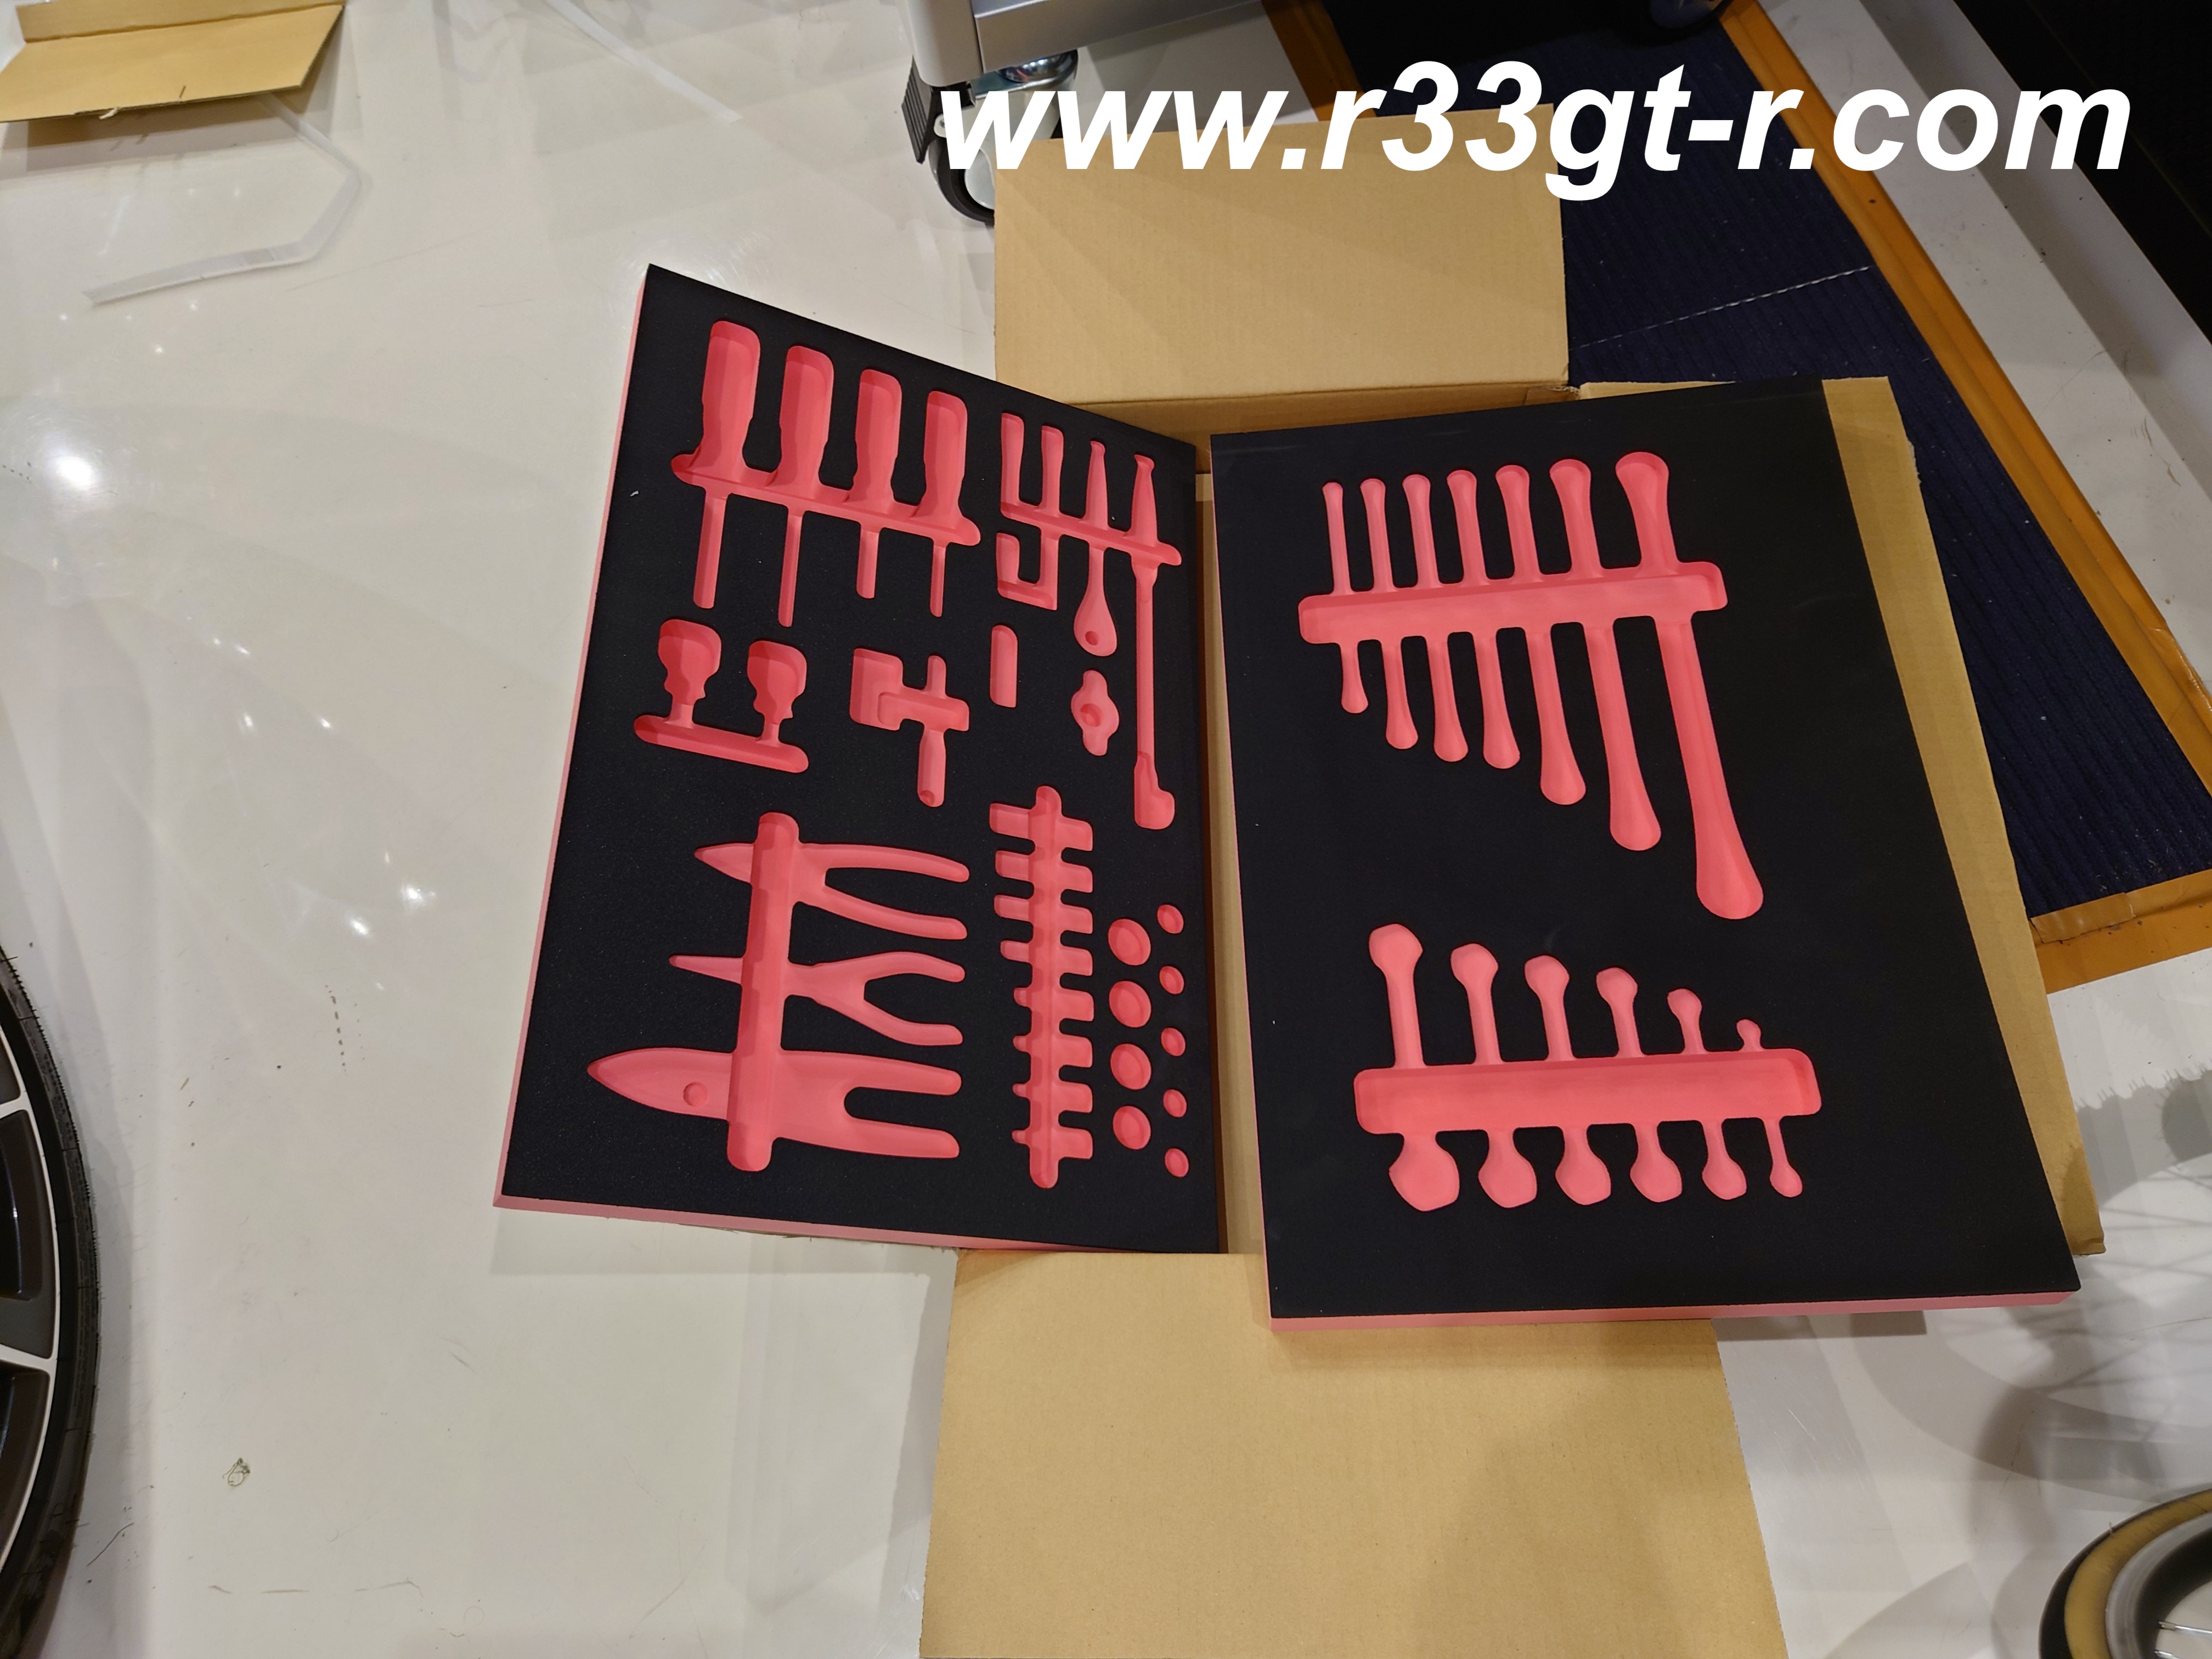
I also got the tool inserts designed for this tool cabinet - yes perfect for my OCD but in actuality really useful as it was easy to grab the right tool quickly, and also it made cleaning up so much more efficient too.
And yes perfect for my OCD...

However despite the cut outs for the KTC sockets and KTC socket wrench, you will note that even though I ended up filling up the socket holes with regular KTC sockets, I still went with another Japanese brand for more specialist sockets (not shown here) and a superlative socket wrench, Ko-Ken. 

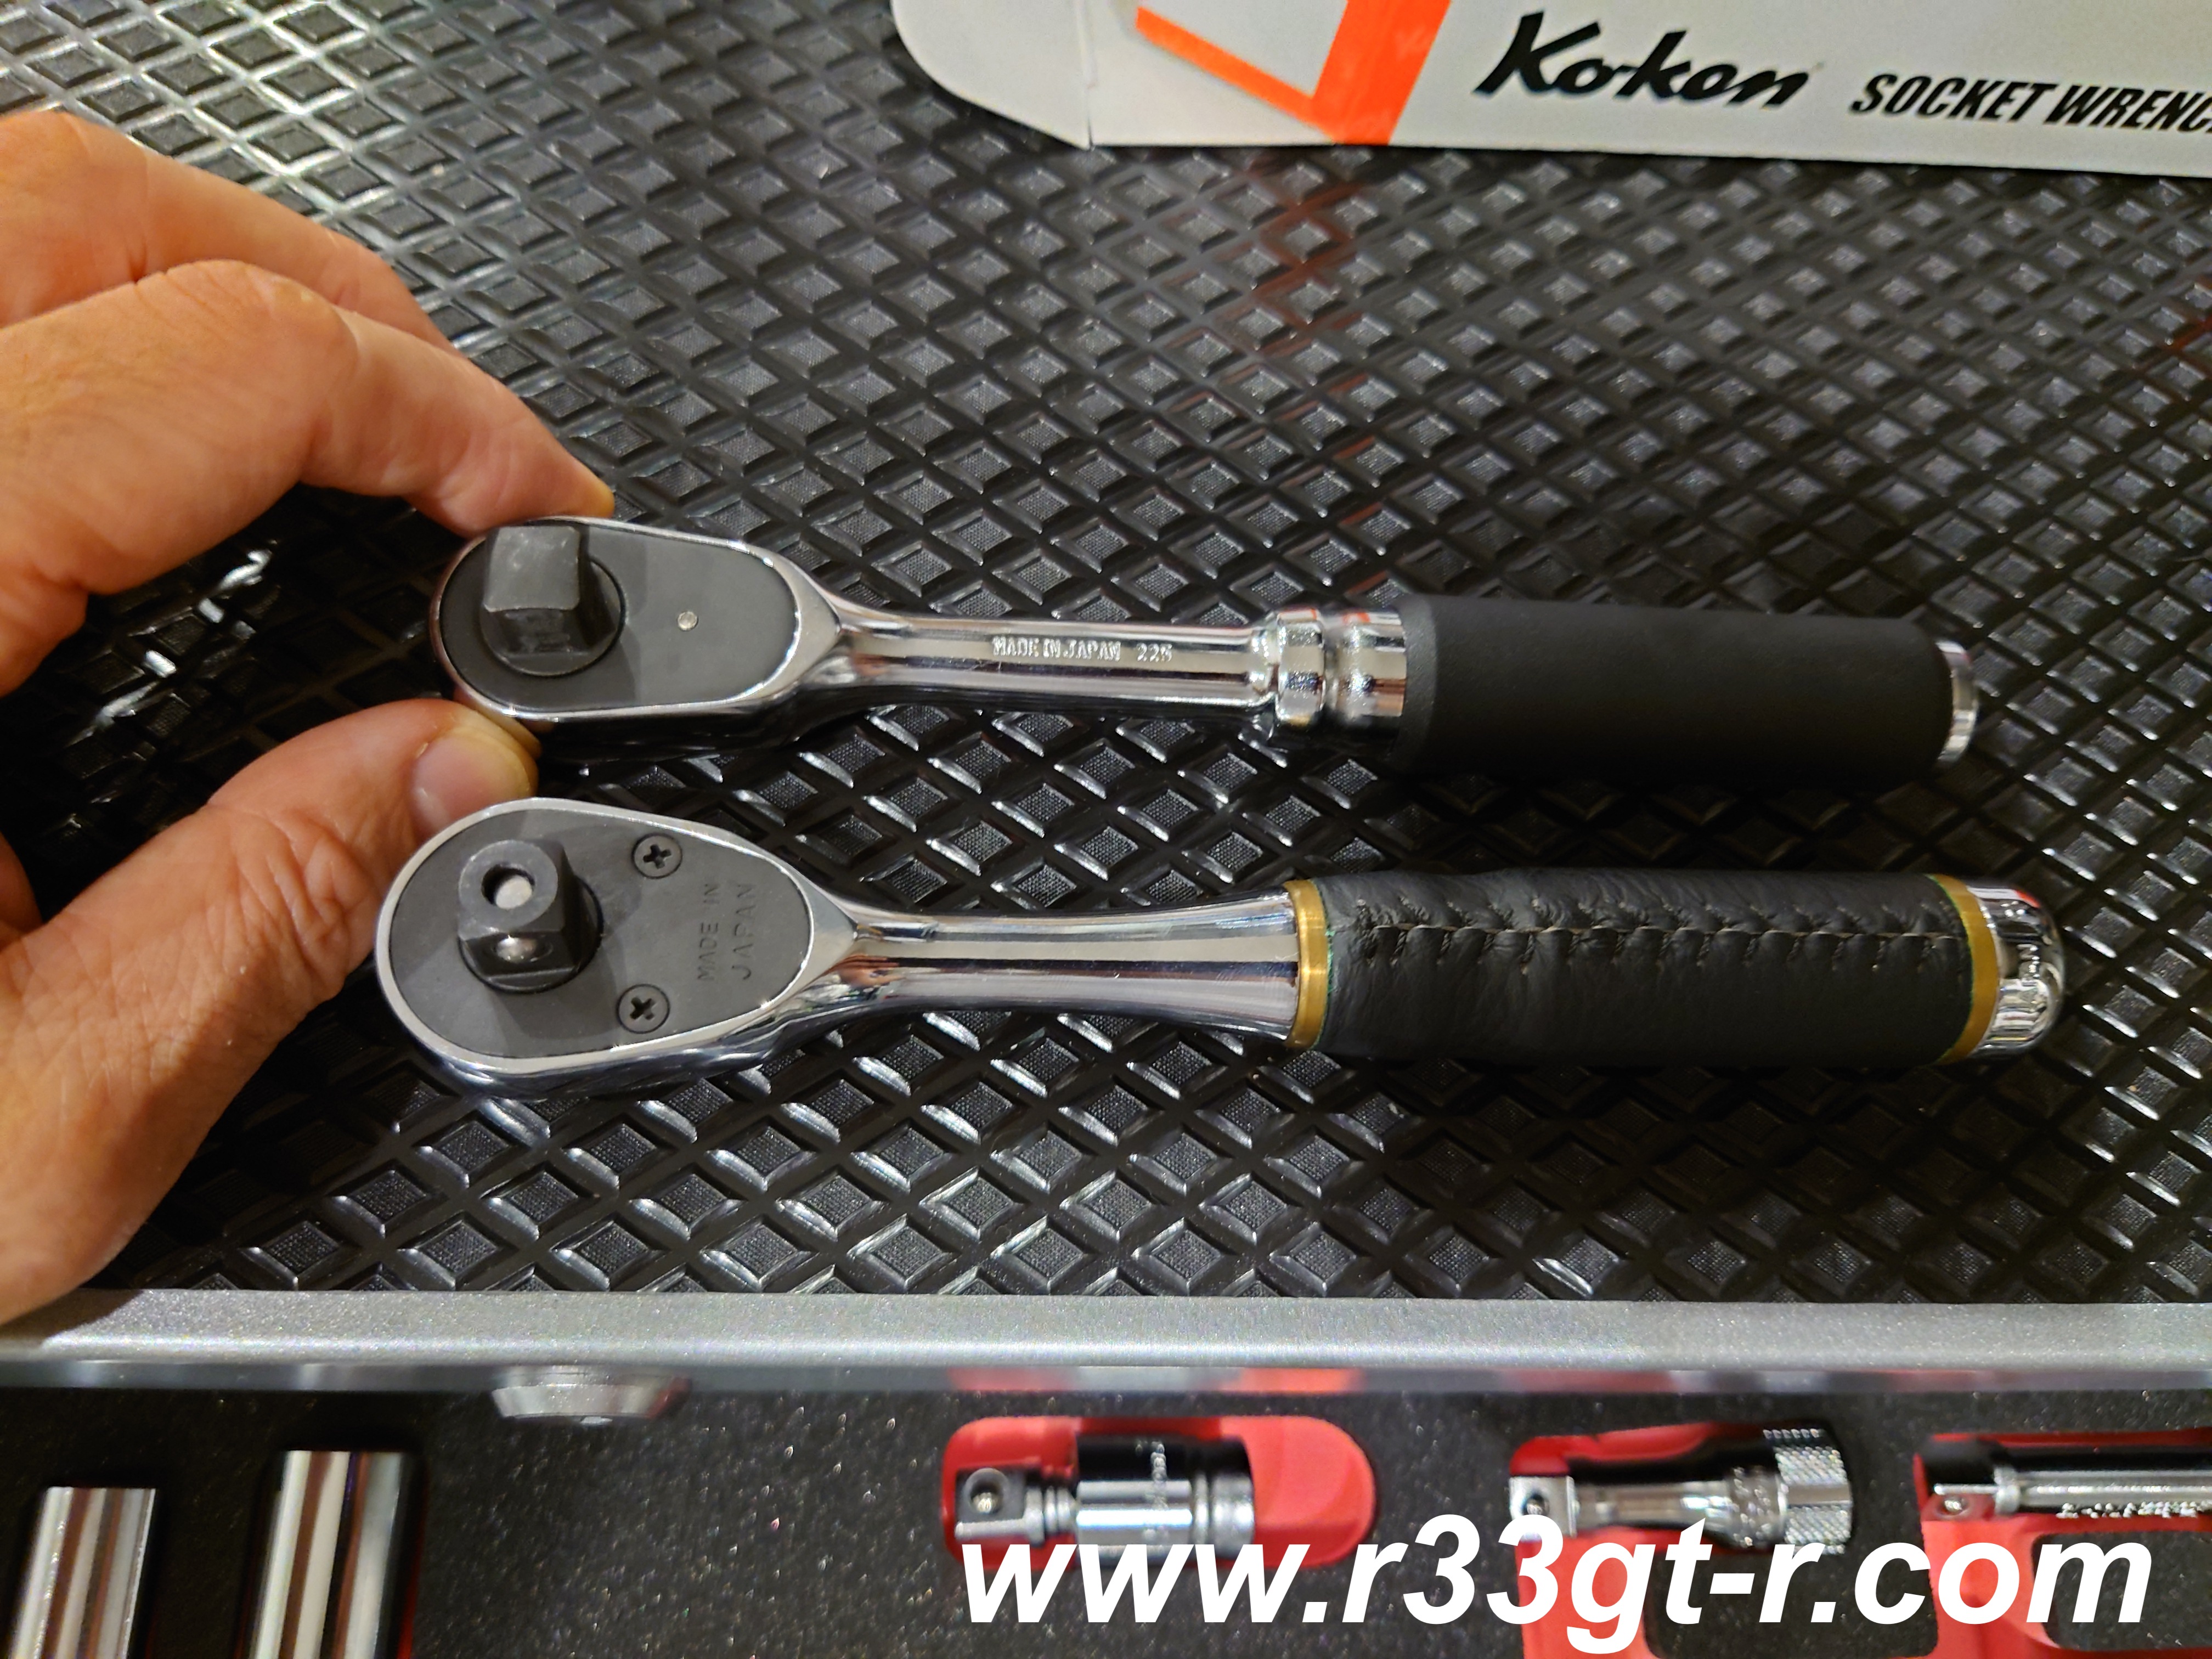
Check out the difference between a KTC NEPROS 3/8inch socket wrench (bottom) and the Ko-Ken ZEAL 3/8 socket wrench (top).

Yep, the NEPROS wrench has a leather wrapped handle!


This company's wrenches are definitely superior to even the NEPROS socket wrench in terms of feel, balance and the ratchet resistance. With such light resistance, it really makes it easy to spin it by hand as well as return the wrench to the initial position.  The additional spinner wheel helps, as well as the cross hatch pattern on the extension bars, which Koken offers but KTC did not.

Note the cross hatch patterns on the socket extensions 

So everything other than what is circled is KTC

While I did order a set of KTC screwdrivers that fit nicely into the cutouts (and I had previously picked up the set of 3 KTC wrenches on sale), I still continue to rely heavily on this lifesaver, a rechargeable motorized screwdriver by Vessell, acknowledged as the premier screwdriver specialist in Japan. By using the motorized feature, much less tiring than spinning a screwdriver by hand, although of course for delicate work you can simply use as a regular screwdriver.  With the built in LED light, this kind of tool is particularly useful for doing work in dark places like the underside of the steering wheel.


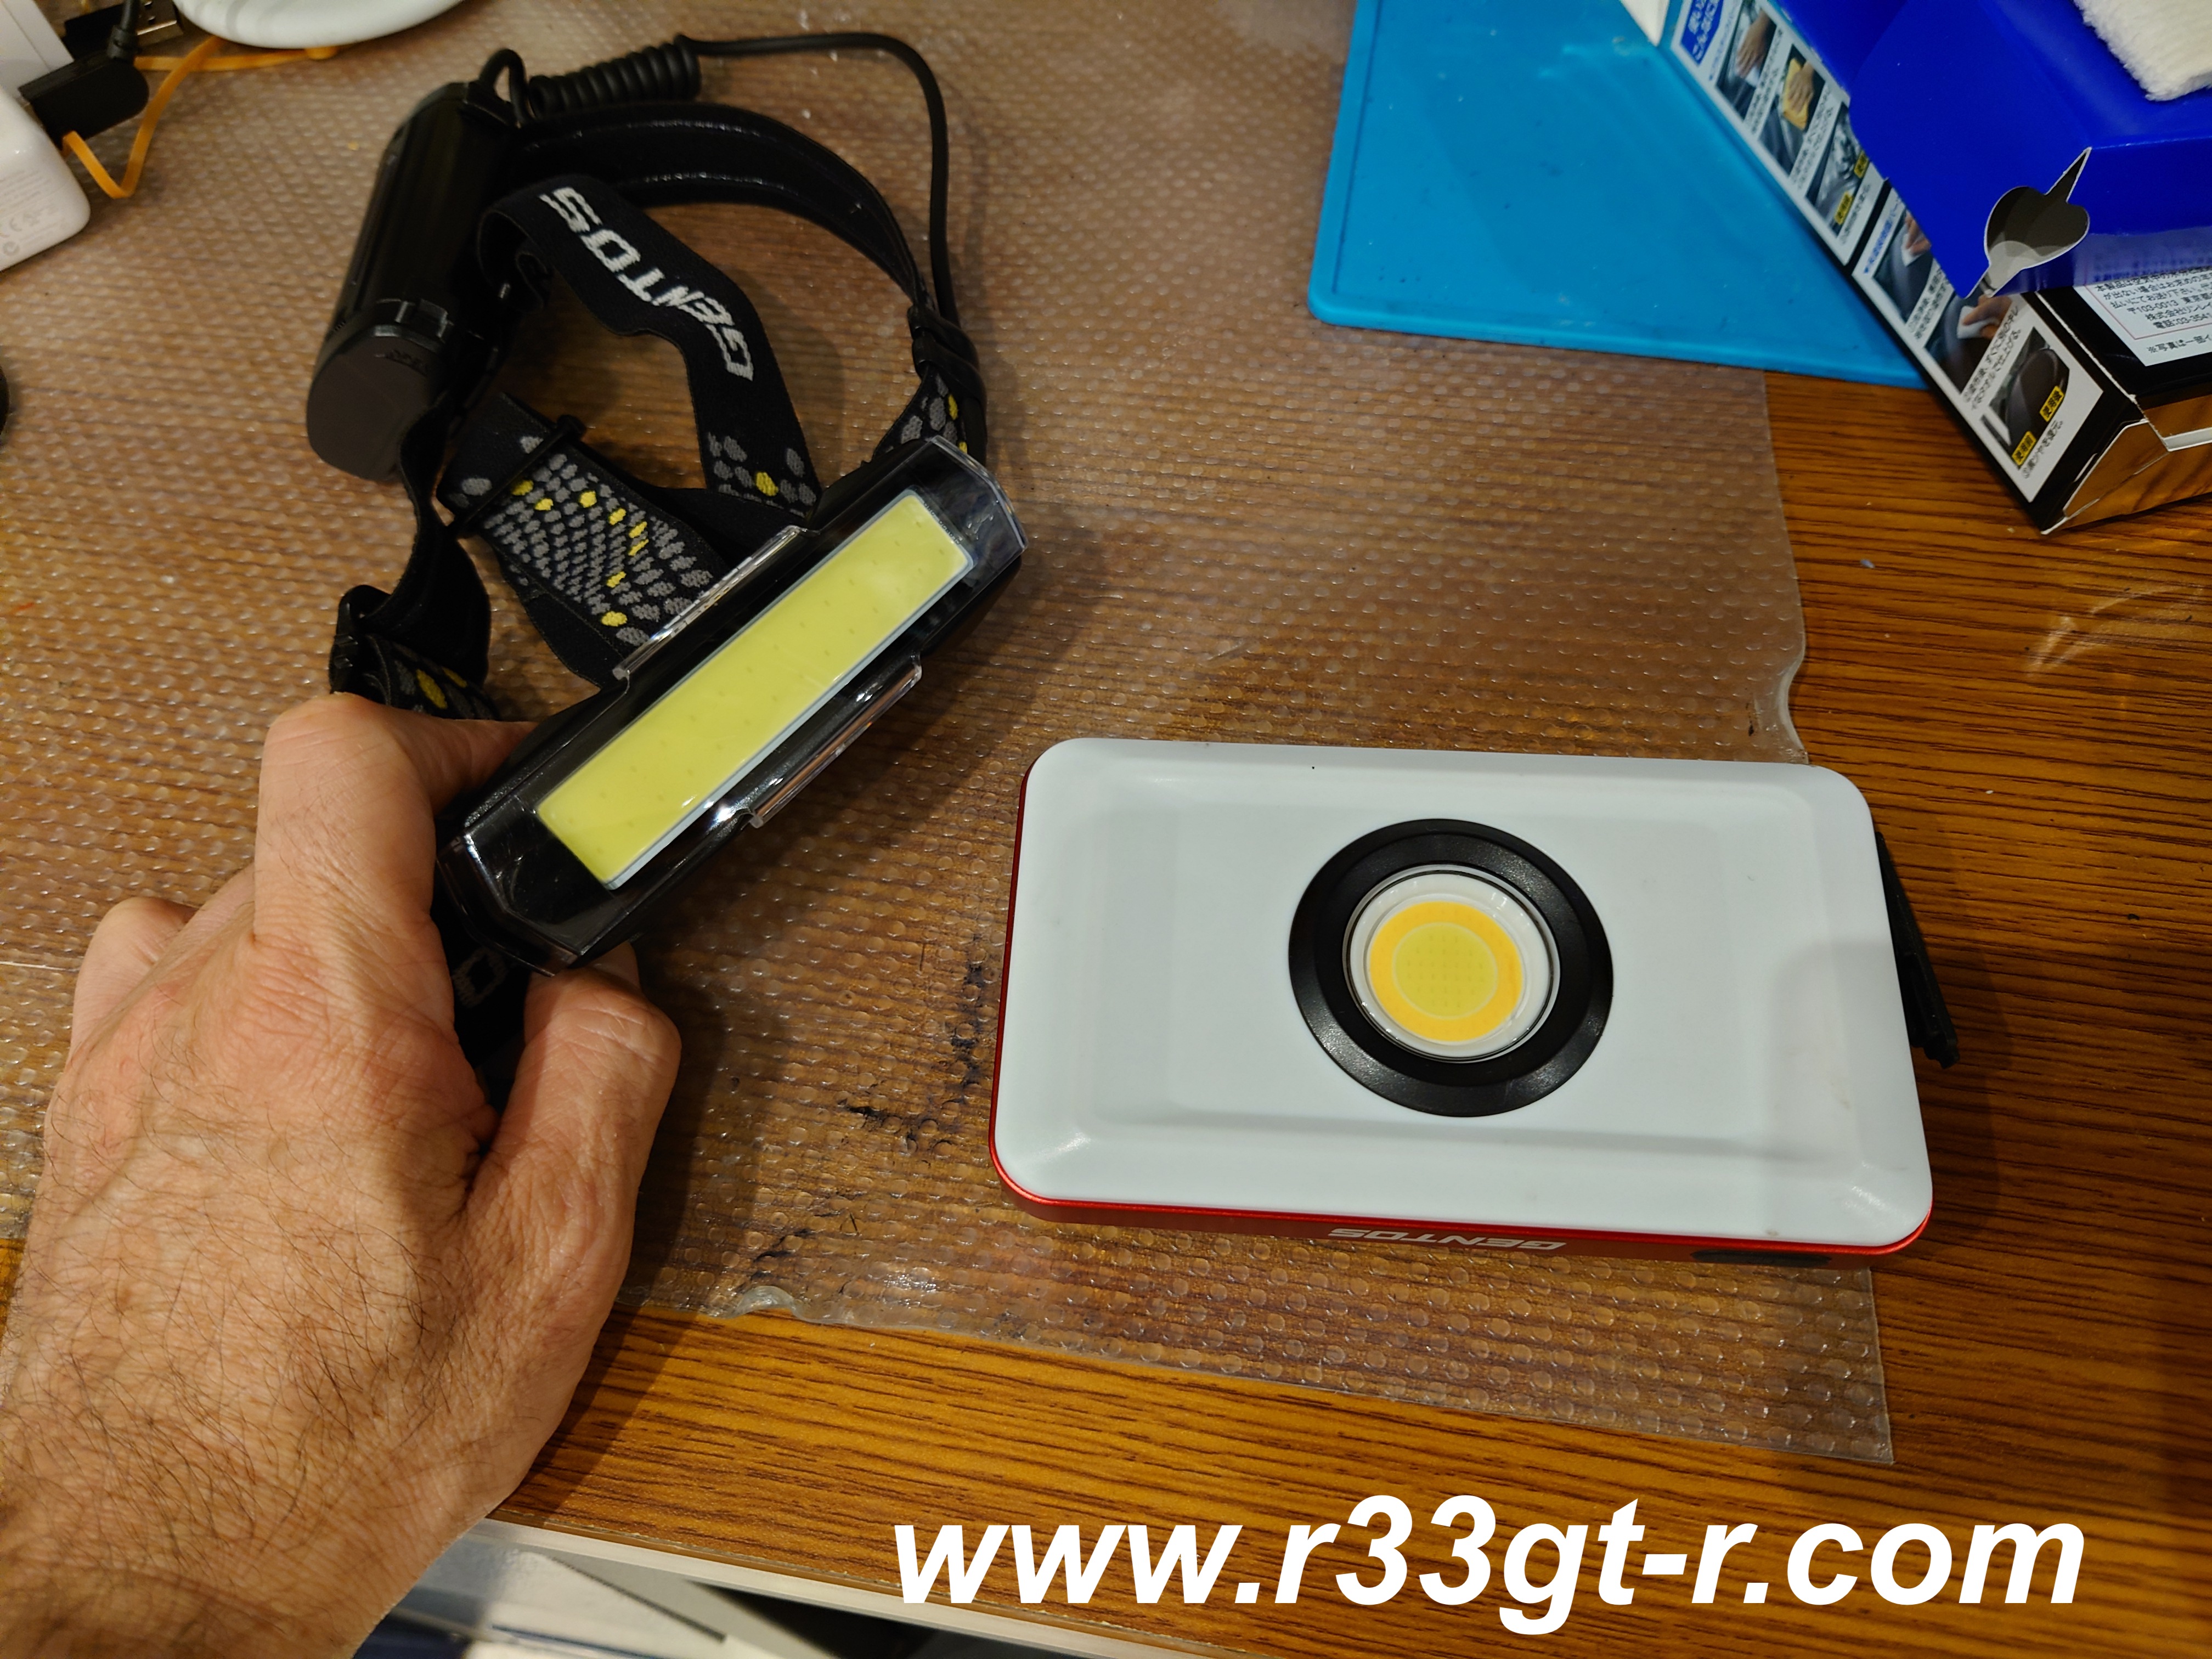
Talking about dark places and lighting - I relied heavily on this LED headband as well as this magnetized COB LED work light by GENTOS - 1100 lumens, and a 10,000 mAh battery which lasts for 12 hours (if not more) easily on one charge.  Proper lighting is KEY when working under the dash.


But perhaps the SUPERSTAR of my recent project on Marine Day is this tool - can anyone guess what this does?

Merry HS175C Coupling Tool by Muromoto Tekko - btw I paid less than half retail on Amazon...

That's right it is a special tool designed specifically to quickly and easily remove those very annoying multi-pin automotive electrical connectors.  Made by Muromoto Tekko as part of their automotive speciality tools lineup and of course Made In Japan.  In the past, I had always struggled with those white electrical connectors - for example those that connect the power window switches to the main harness, or all those that connect the buttons on the main surround to the harness behind it.  Using this means my fingernails are no longer cracked, fingers are no longer sore, and since the tool makes disconnecting the connectors easy, it helps prevent damage to whatever interior piece that needs removal. Especially true as those plastics have all hardened with age and so require more force to disconnect than might be expected. 

I found this graphic which makes it easier to understand what I am saying...
Please check out the website where I found this graphic - tremendously helpful! Plus videos too!

In the same way, I also used this other tool a couple times for smaller connectors - it slips onto your thumb and gives you a built in plastic tip that you can press down on those small little disconnect tabs on the couplers.

It's called the Amon 2381 Music Project Harness Coupler Remover

So here is the rolling tool cabinet in action. Maybe in a future post I can show you how it arrived and how I had to unpack and put the wheels and side handle on, but in a word, it was super heavy! 74kg empty!!
Not sure about sticker tuning, frankly. Although I am tempted as I now have a large canvas for all those stickers I've collected from the parts I've installed on the GT-R.

There were several other tools I found and purchased in order to round out what I might need - except they were not need this time round. Like this 1/4 inch ratchet and socket set from Ko-Ken. Same super smooth low resistance ratchet as the 3/8 size.  And yes I do have the Ko-Ken Nut Grip Sockets, separate from this set and in both 1/4 and 3/8 sizes.


Not sure when I will be able to start really using these tools, but I feel pretty prepared for just about anything now, short of an engine or transmission removal!

Ok next post - back to more car stuff. Stay tuned and thanks for letting me talk about these tools. 

Sunday, July 24, 2022

Marine Day Holiday Full On OCD Tinkering... Part 2

So in addition to the mirror replacement, I decided to focus on some on aesthetic issues - both very minor and easy to do but the execution would take some time, so I was waiting for a day off like last Monday.  Actually, the nature of these tasks meant that I started and ended the day on one of these tasks, with the mirror project done in between! 

What task is this? Well if you have a Series 3 (kohki) version R33 GT-R you know how the dashboard surround - yes the black plastic with that slightly rough feeling - scratches very easily and it also picks up dirt easily too! And given that, despite what you might believe otherwise, I actually do drive my car around a bit...

So once again, I took off the panels, starting with the driver's side door window switch assembly, the ashtray, the shift surround, and the main surround.

Then cleared some space on my workbench to take a look at what I needed to do.

So here is one issue:

Look closely - there are also markings on the right corner too

Some other, more obvious examples.

And yes, cleaning with isopropyl alcohol (IPA) did not work. Nor did other mild solutions.

So, the solution is to paint! I have to use a special technique, which I describe below, but in preparation for paint that meant I had to remove all the switches, etc. 
Using a towel to make sure not to further scratch

It also means removing the leather shift boot from the shifter surround.


Which then gave me an excuse to properly clean, condition and protect the leather.

Which was badly needed. Bonus, I did not need to worry about any excess ending up on the black surround plastic, where it tends to smear. So, I could apply extra conditioner and let the leather all soak it up without worry!

Once all the switches were removed, and I taped up the cigarette lighter surround (I tried to remove but gave up) I did an IPA wipedown of all the parts using a clean, brand new microfiber cloth.


And then took a deep breath and...

So the technique I use is to use flat black spray paint, but I purposely hold the can further away from a normal painting stance. That allows the paint particles to dry slightly in mid-spray, which results in semi-dry particles landing on the surface.  If you recall the plastic itself started out with a slight rough, sandpaper feeling surface, so several passes of this painting technique were required to build up the particles on the surface.  So yes this took several hours, but again during this time I worked on replacing the mirror as I described in my previous post

While I had the surrounds off, I tackled another issue that had been slightly bothering me.  Can you tell?


So it may be my imagination, or else I have issues, but it seemed to me that the light bulbs used in the center HVAC unit did not seem to be as bright as the LEDs I used in the 3 gauge cluster - or for that matter, even the OEM cassette deck!

Suspecting it was time for the OEM bulbs to go, I found a seller on Yahoo Auctions who sent me this - they look like the COB type LEDs which I like, so promising!

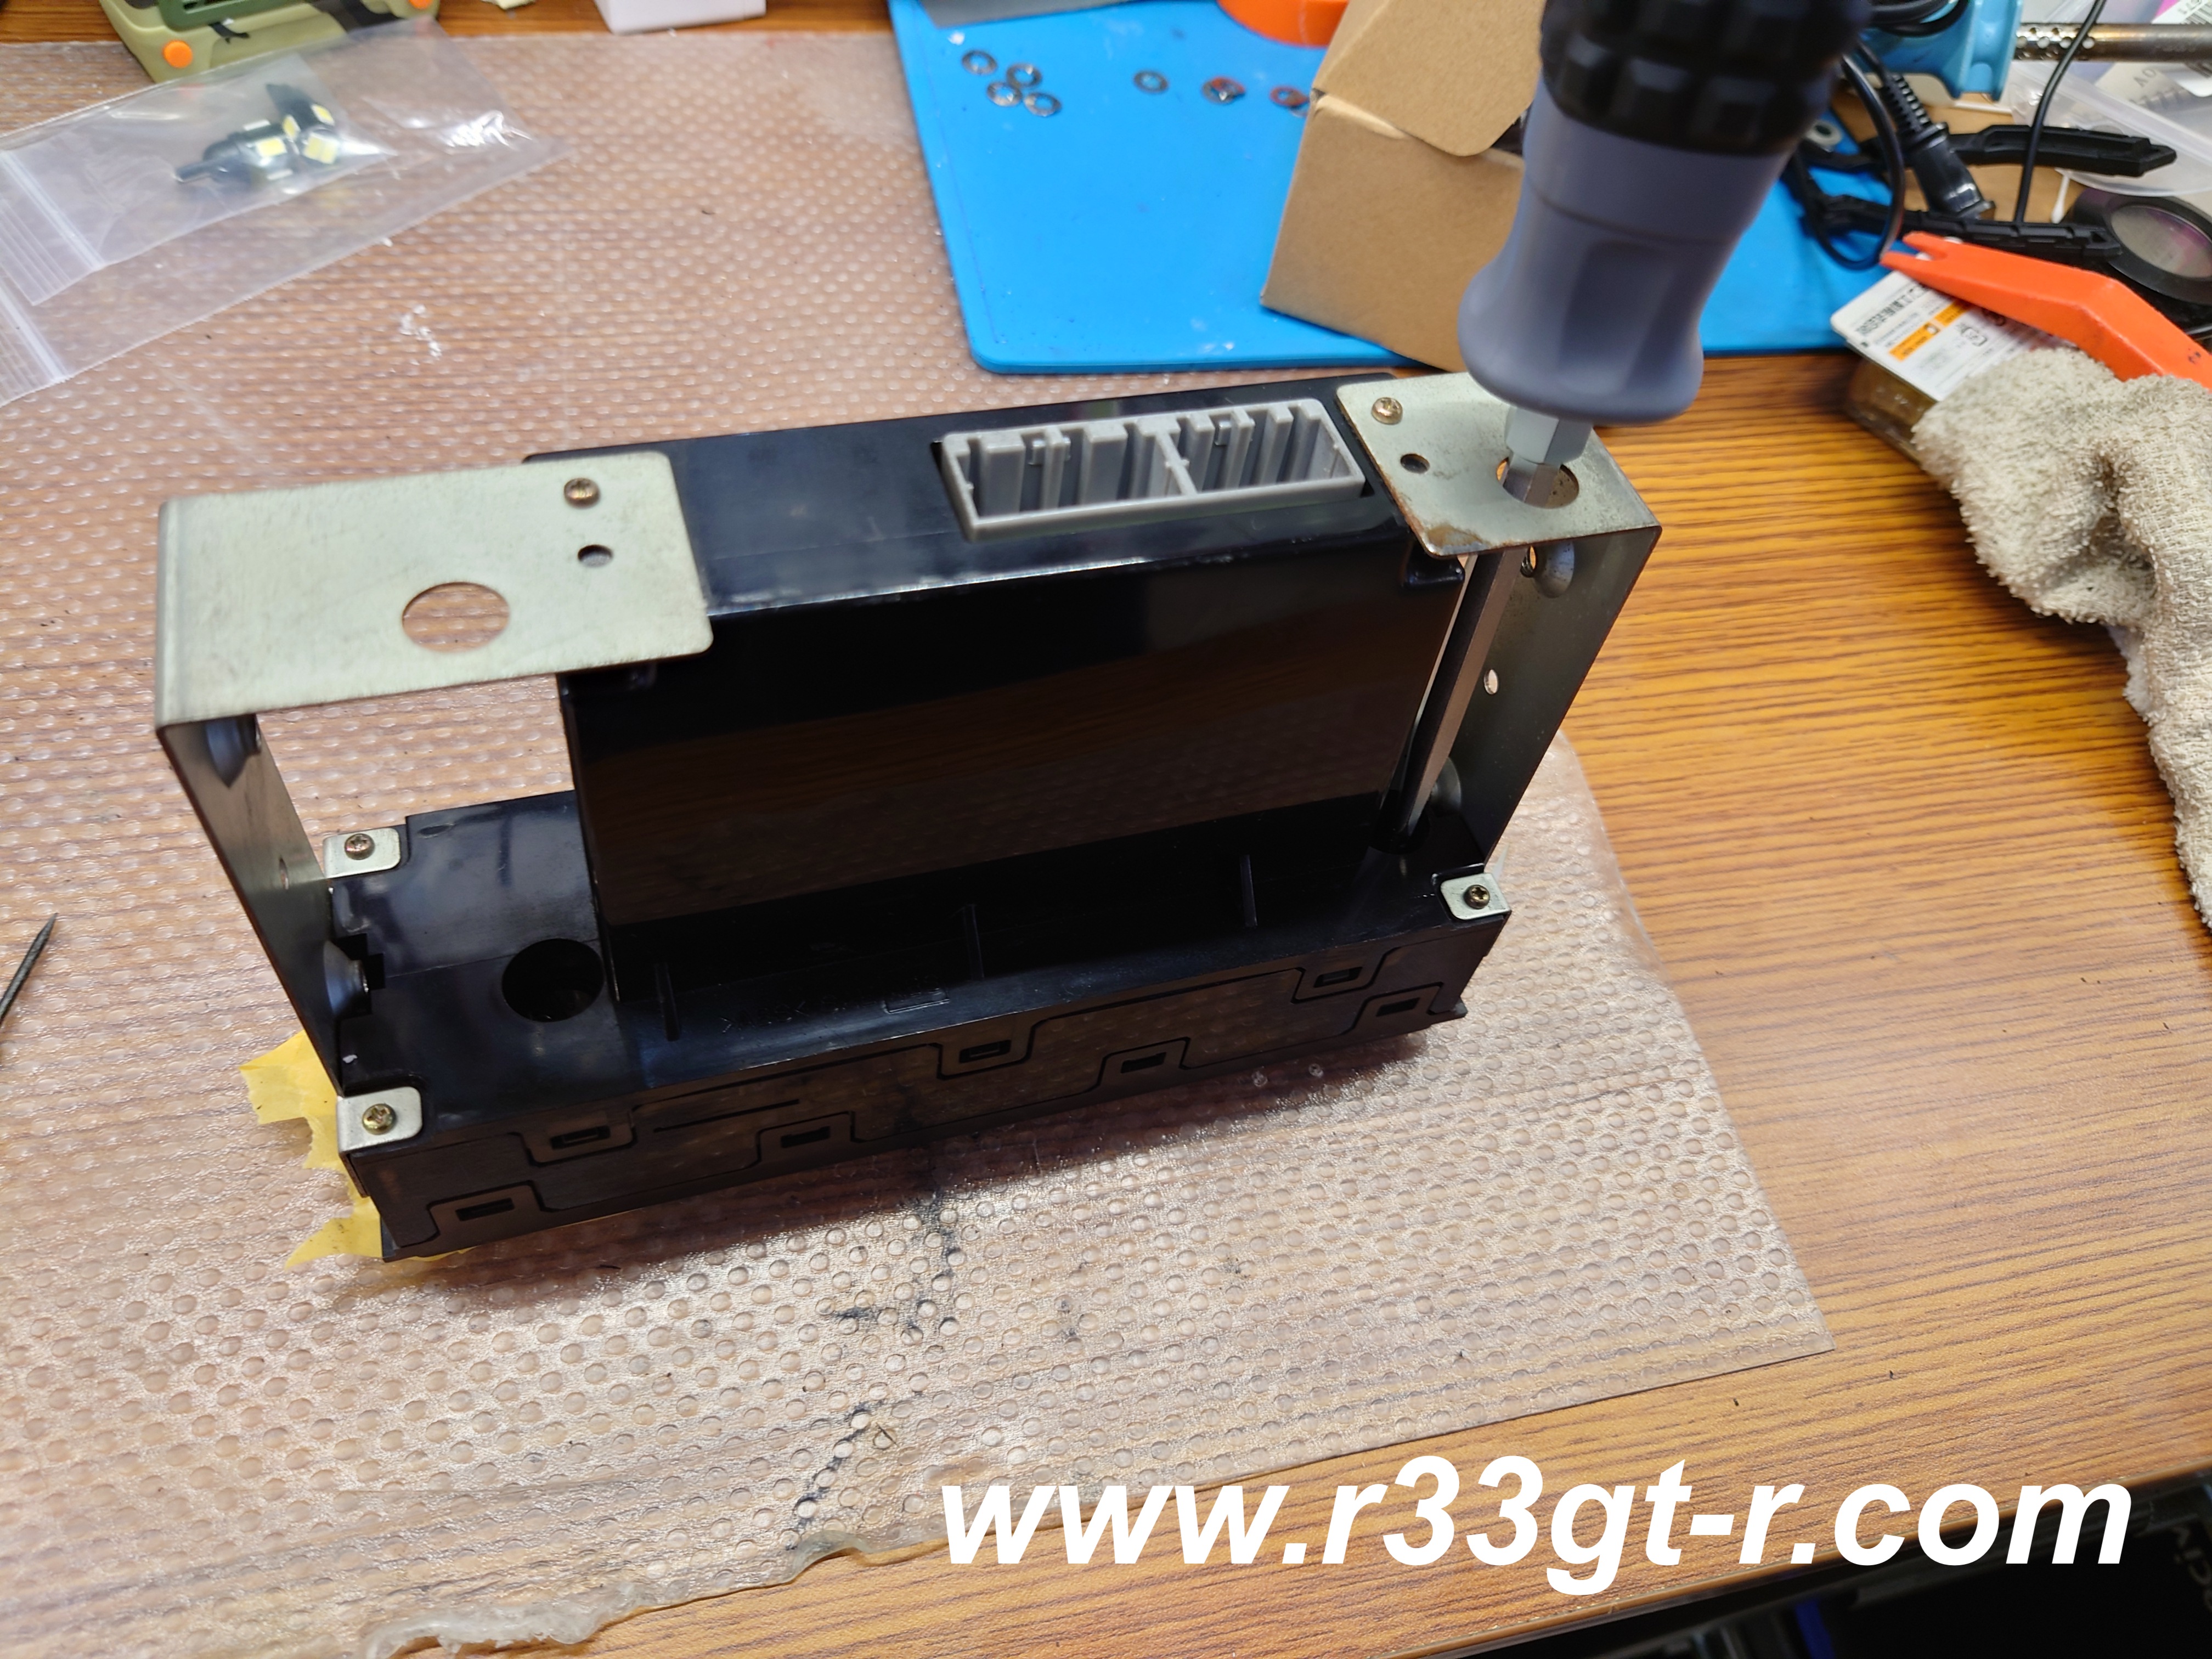
After removing the HVAC unit from the center stack, I saw that the front face was held into place with clip like fingers - so I carefully squeezed and leveraged around until I got the face off!

I even taped up the front to make sure that in my efforts I did not accidentally cause any scratches.

And managed to get the face plate off in one piece! Except...I quickly realized I had made a mistake.

As removal of the face plate did not give me any access to the light bulbs. Oops!  Instead, I found two holes on the backside of the unit which allow replacement of the bulbs without ANY disassembly of the unit itself. 


So I used a screwdriver to remove them and

Found that the bulbs WERE LEDs. I can't remember when I did the install, maybe it was something that Worx did? 


In any case, it was easy to replace these with the new LEDs. Looks way brighter and cleaner, right?

Meanwhile several coats of flat black spray paint had dried and after confirming the pieces looked great, I started to reassemble.  Note that I forgot to take a photo before I reattached the switches to the main surround, I was getting pretty tired at this point. 


Before reassembling the driver's door switch surround, however, I noticed something.

Yeah, a lot of dust and dirt! Me being me, I had to clean this up before reassembly. So, with some IPA and some pointed cotton swabs designed for this kind of thing:

Oh my, oh my...

And this is the THIRD one I used...


Anyway, the switches were finally clean enough to satisfy me, so:


I reassembled the switch into the surround, very carefully to avoid any last minute scratching.


I mean that looks BRAND NEW! (actually as I am writing this I just realized I DO have a brand new part that I bought many years ago just in case... should have done a comparo photo).  I guess I could have simply replaced with the brand new part, but given that the center surrounds are no longer available, I reasoned that painting all of these pieces simultaneously with the same paint using the same method would result in a more uniform result.  Which it did!


So what's next? I actually had a couple more mods which I was planning to do, but simply ran out of time this time. So something to look forward to.  The next post however I think I will show you a few interesting tools I found that made my life SO MUCH EASIER doing both of these projects - tools can make a huge difference, as you will see.  Thanks for reading!