Sunday, July 14, 2013

Glove Box and Center Console Clean-Up!

One more post before my final diffuser post...

So here is something I've been meaning to do for a long time.  A few months after I got my GT-R, thanks to the UK GTROC forum, I was introduced to a product made by a forum member which was marketed as an alternative to the expensive (or discontinued) torque split controllers by GRID, FIELD (E-TS Linear)  or Do-Luck (D-ETS-M).  But it turned out to be a waste of money, I should have stuck with the tried and true.

Upon installation, I found that not only did certain dash warning lights stay on initially (4WD and ABS, if I recall correctly) and even when I got that resolved somehow (I think I had to reset all ECUs by unplugging the battery, etc.) then I could never tell if the unit was working, even on the track. So it was just a matter of time before I unplugged it.   However, the hole I drilled in the center console to pass the leads through, was too small to pass the harness (I had soldered on connectors for quick release, etc.) so I just left the device in the console box, taking up space. Like so:
Note the hole for the wiring that I drilled
This is how I just left the wires underneath the console, unplugged and unused.
On the other hand, when I first got my car, I had a Navi installed, and one of the options I got at the same time was an ETC reader for electronic toll collection on Japanese expressways. However the shop had installed this in the glove box, which, in addition to the boost controller and later an iPod docking cable, meant for a very crowded glovebox - essentially unusable.

So nothing fit, but I didn't really care, until I bought this beautiful, limited edition, leather "shaken" case from what Nissan called "The Nissan Collection"... designed to fit in the glovebox. But because it didn't fit in the glovebox, I had kept it on the rear seat, which meant it ended up on the floor... not good.
Limited Edition, "Nissan Collection" item.

In addition to the shaken and insurance papers, fits the owner's log and manual neatly
Hence I decided to relocate the ETC reader device from the glovebox to the center console. First, I had to remove the center surround to access the stereo head unit, as well unscrew the HVAC and head unit to access these wires in the glove box which connected to the ETC device.


These wires lead to an area behind the head unit, hence:

And then I was able to reroute the wires to end up underneath the center console box.  Meanwhile, I had "snip" taken out the Skylab device:
Anybody want this? Just pay for shipping and it's yours!
 And then I used a drill and a very sharp knife to create a small space for the ETC wires to pass through:
Not m best work, but since it's usually out of sight, out of mind...
This allowed the ETC device to fit in nicely - even though it appears to be taller than the box, the cover has an indent which means no problems in closing the lid securely - and no problems removing the credit card sized ETC card when necessary, either. And use of double stick cushion tape means this is as secure as can be.

Check out all that space there in front - perfect for some secret unseen switches?

Now the glovebox has more than enough space for the Shaken case to fit.
I'll keep the iPod/iPhone connectivity for now...
In conclusion - while storage space is limited, I now have use of the glovebox. And, given the space still available in the center console, this means any other devices I get - can be located there too. And yes, already have some things in mind.... stay tuned!

Saturday, July 6, 2013

Trunk Bar: Another Noticeable Improvement in Body Rigidity

As I wait for a part I need to finish my extra mod for the BNR34 diffuser to arrive (so I can do my true last post on the diffuser install), let me also showcase something ELSE I had done at BeAmbitious, and the real reason it took over a week to get the car back to me.

So during my research into the mechanical differences between the R33 and R34 GT-Rs, other than aerodynamics, the other area where the R34 improved upon the R33 was in body rigidity.

This makes sense, I believe my car is a much better handling car since the addition of various NISMO underbody brace bars, and especially the Nagisa Auto fender brace.

Now the Series 3 has additional bracing in the trunk, but that is in the front of the trunk area - between the struts towers and the rear wall framing where the battery is located.

And this is a result most likely because the BNR34 was being developed during the run of the R33 and in fact the BNR34 test beds were modified R33s. So likely, these braces were an improvement that was discovered during the BNR34 development, and incorporated into the later R33s.

There was one improvement that isn't that well advertised or known, and that is the brace bar in the trunk of the R34.  Not sure why this didn't make it into later R33s, as it is an easy piece to add, however this brace bar concept DID make it into certain models of the S15 Silvia.

So when I began my search for a used piece, I was able to find one in decent shape off of an S15. I had also read on Minkara of another R33 GT-R owner (and also a few ECR33 and even ER34 owners) who had installed an S15 trunk brace bar without issue, so rather than searching for a BNR34 one, I picked up one of the more easily available S15 ones.

When it arrived, it was in good shape, with some scratches, presumably caused by items in the trunk!

But as I had some leftover KR4 silver paint from my fluidic nozzle project, I used that and sprayed the entire bar to get it as nice looking as possible. Turned out ok, I think:


I let Ninomiya-san of Be Ambitious take care of the install while I left the car with him in order to install the R34 V-spec rear diffuser. It turns out that there are already holes pre-drilled in the trunk in the right place (under some rubber caps), however what needs to be taken care of is to have something fill the gap between the floor and the bumper reinforcement, which also has holes pre-drilled. (Apologies but since I did not do the install I don't know what size bolts...). For my car, Ninomiya-san had some billet anodized aluminum spacers custom made (not cheap), but it is obviously more solid than what people usually do, which is to stack washers one on top of each other to fill the gap. And getting these spacers made took over a week and hence the delay in getting my car back to me (I thought the diffuser and trunk bar install would take a day or two, but it ended up taking a week).

EDIT - Mook on the UK GTROC forum did this mod - here is a link to some GOOD installation photos and information on the bolt and spacer sizes.  Thanks to both Mook for the photos and K66 Sky for the information.

Anyway here is how it looks now, installed.

And here is close-up of one side, bolted in:

Now what about the result? Did it change the car? In a word, "yes!" Definitely!  On my way home after picking up the car, it's only a few kilometers, but immediately the car felt "shorter" - I know that sounds odd but that is the best way to describe it.

Later, I took a 2 hour drive into Tokyo, and discovered that, in addition to the car feeling shorter, the suspension seems much stiffer now. What was before a firm but pleasant ride is now on the verge of being a bit too harsh!  So unless this is a placebo effect, I guess my senses are telling me that, before the trunk flexed and allowed the dampers to feel softer - now as the trunk area is more solid, the dampers don't have as much "give"... at least that's my theory.

Any thoughts, my friends? Am I imagining things? I think I am going to continue making the body as rigid as possible without the use of a roll cage, until the car feels like it's carved out of one solid block of steel. I will look into spot welding, but have heard that rusting can be an issue, so I may just have to see what else is out there that is bolt-on.
Tuesday, July 2, 2013

BNR34 Rear Diffuser Project, Part 4: Putting it All Together!

So when I went to pick up my car from BeAmbitious, I was happy with  the seamless job Ninomiya-san had done.
Taken at 7pm in the evening, hence a bit unclear... sorry!


First, instead of a four sided rear center bracket, Ninomiya-san simply used two hangar type brackets. 
Simplicity at work here - only time will tell if this is enough.
Second, the carbon was cut in order for the Tomei muffler to peacefully coexist. I couldn't tell how it was cut, it was only apparently after I took the diffuser off for another upcoming project! (Stay tuned!)
Some smooth cutting there, no rough edges.
Third, the entire diffuser was dropped a few millimeters in order for the exhaust pipe to have a bit more leeway on the front side of the diffuser.
For those of you with R34s, you should be aware that Tomei has apparently been sending out a retrofit kit similar to these spacers, in order to prevent the leading edge of the diffuser from pressing into the ExPreme titanium exhaust.
Fourth, the metal jack-up point was moved a few cm forward, and an alumite "gap filler" attached, in order to ensure the jack up point is not only flush with the diff, but also far in front of the Greddy extra capacity diff cover (wouldn't want to jack it up on that)!

But the piece de resistance was the way he used the RB Motorsport side brackets:

Note how, instead of attaching them to the car directly, he chose to attach them by way of hard rubber bushings, in order to prevent any metallurgical issues to the body of the car, as well as considering the vibration the diffuser will generate, and tucked the side brackets up under the rear bumper. This means however that I cannot remove the diffuser with the brackets still attached to the diffuser, as one might do normally.

Rather, I have to undo the bolts for the two outer most fins, plus two additional bolts on the side protectors,  which then separates the diffuser from the side brackets, which remain attached to the car.

And this is why the side brackets and the diffuser's side protectors are not riveted together :
Pointing to where normally there would be a rivet holding the diffuser's plastic side piece to the side bracket 
So neither rivet is there now.
And the effect? Well, that will have to wait, at normal expressway speeds I haven't noticed much of a difference to be honest. Oh and when backing up, now have to be careful not to scratch the fins.
But next track day, let's see what speeds north of 200kph will do!

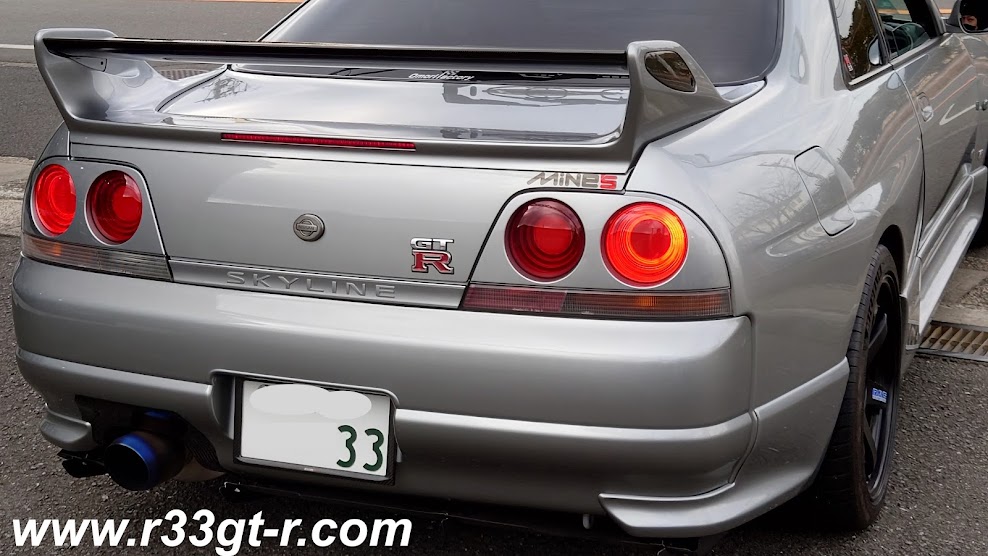
Finally - I realize I have yet to provide a nice photo that clearly shows the diffuser, in daylight. Patience my friends, I have ONE MORE diffuser related mod before I show the final, final result! 

Sunday, June 30, 2013

BNR34 Rear Diffuser Project, Part 3: How to Get the Diffuser to the Shop

Or more accurately, how to get a BNR34 rear diffuser to the shop when you don’t have the proper brackets in place?

I’m not especially proud of this, but basically what I did was to attach the front of the diffuser using the RB Motorsport supplied bolts, which surprisingly alone was able to keep the diffuser off the ground.  However, the diffuser did not neatly fit around the Tomei muffler (so there will have to be some cutting), resulting in a diffuser unbalanced left and right. 

Just to be on the safe side, of course, I decided to do what I can to control movement in the unattached back, so I ended up passing twine through the two bracket hole, and then running the string around the license plate frame. Meanwhile, I also used some packing tape between the diffuser and the bumper, to lessen the load on the twine.

The end result was ugly (some would say "ghetto"), and looked like this:

But I WAS able to get to BeAmbitious safely, and so I left my car with Ninomiya-san with great anticipation.


Next:  How it all turned out!

Wednesday, June 26, 2013

BNR34 Rear Diffuser Project, Part 2: Fitment (Attempt)

So after the diffuser was cleaned up and to some extent restored, the next step was to fit it to the car.  As I alluded in my intro post, the easiest way to do this, is to have the BNR34 V-spec triple cross bar installed (some people chose to have the bolts welded on the R33 triple cross bar instead).

Truth be told, this I had done by Ninomiya-san way back after I first got these pieces, right about the time Igot my personalized number plate

But obviously, I have been too busy to work on this diffuser project since then.

Anyway, the triple cross bar takes care of the front half of the diffuser. In the picture below, the front of the diffuser would be facing left, and the rear to the right.

Again thanks to http://minkara.carview.co.jp/en/userid/301215/car/194604/415795/note.aspx

The front of the diffuser attaches to the left most double hole bracket by way of two metal brackets (like the one on the left in the photo below).  The holes in the middle, take a single bolt, the corresponding hole which is in the diffuser itself.

The rear of the diffuser is attached to the body by way of the side brackets (on the center and right), as well as a center bracket.  The side brackets attach permanently to the diffuser, while the center bracket is normally permanently attached to the car. The diffuser side is the left side with the cutout, the side that connects to the body are the two "fingers" with one hole each.

Unfortunately, the side brackets do not fit directly on the R33 – and that is because the R34 bumper is a bit wider in this area, allowing clearance to the body, which in turn has pre-welded stays for the diffuser to bolt onto. On the R33, the attachment point to the body is where the bumper is (the bumper covers it). Hence, the side brackets either end up attached to the body underneath the bumper – like this (with access holes cut out to access the bolts attaching the bracket to the body):
http://www.wind.sannet.ne.jp/quess/diy/ex-9.htm

Or, get tucked in underneath, like this, with cutouts in the rear bumper or spats to allow bolt access.
http://minkara.carview.co.jp/en/userid/301215/car/194604/415795/note.aspx

Then, there is the rear center bracket. It normally looks like this.
While the RB kit DID come with a replacement piece in stainless, unfortunately its dimensions were off:
Look closely, and you can see that the left side bent piece extends from the 0mm mark to the 125mm mark.  The right side extends from the 300mm mark to the 415mm mark - thus a difference of 10mm! So the left and right sides are not perfectly mirrored, and the angle of the bent pieces are also different. I can't use this!!
Finally, there was the question of re-installing the fins. As seen in my previous post, the stock ones were essentially destroyed, and so of course I sought improvement. I looked at the Nismo ones made of carbon fiber, but not only are they made to order and cost 42,000 yen for the set, their tallness compared to stock is an invitation to getting damaged or snapping off in a parking maneuver. So I settled on these carbon ones from Wisteria Sports, in the same dimensions as the stock ones and for half the price of the Nismo.
From: http://minkara.carview.co.jp/en/userid/705558/car/601264/1470770/note.aspx
So the fact that I did not want to arbitrarily/sloppily drill holes in my car for the rear center bracket, which was off to begin with, as well as coming up with a solution for the side brackets, meant that I would be taking my car to BeAmbitious for the final fitting.

And because of that, I chose not to install the carbon fins myself, but to have Ninomiya-san do it when the car was at his shop.

Stay tuned as I next show you how I got the diffuser to his shop!


Sunday, June 23, 2013

BNR34 Rear Diffuser Project, Part 1: Restoring the Diffuser

So given the condition the OEM BNR34 diffuser that I got on Yahoo Auctions (for relatively cheap) was in, it needed to be freshened up.  This meant removal of as many rusted or bent, broken parts, and replacing with new or refurbished.   Also, it meant that the carbon itself would have to be sanded down and a clear coat applied, where applicable.
Bent fins, scraped up carbon fiber, rusty bolts and rusted leading edge plate
As you can see clearly here, the leading edge of the diffuser is rusted.

This shows clearly how the supports for the fins are rusted as well

Left rear bracket is rusted and bent

Right rear bracket is in much better shape, although there still is some rust.

I guess this happens a lot, but check out the condition of the fins, as well as the rusted bolts, for example.
These side guard things are scratched up, the bolts rusted and the fins bent!
So I removed everything that I could easily. That included the side guard things (as above), the front brackets (thing on left in photo below), the side brackets (one was severely bent up), and the fins. 


With the fins, you can see how much dust was trapped underneath each one! 
excuse the mess in the garage...lol
Also, the side guard things (made of ABS plastic) were scuffed up, and in some places, damaged, so they needed to be repaired. The best I could do, of course, was to sand down the rough spots, and then spray on the spray rubber (Plasti-Dip).
BEFORE


AFTER
Came out OK though. I mean, you really can't see them, so as long as they are looking shiny and newly protected, I'm happy. 

I then sanded down the carbon fiber in places where it was rough (as well as gently all over), then applied a clear coat, just in case. (Note that the carbon fiber itself is a dry weave and probably doesn't need a clearcoat, if in new condition...)
Nice and Shiny!
After I was happy with how this turned out, I used a rivet gun to reattach the side pieces, this time with stainless steel rivets:

The end result being this - note that I did not attach the fins back on.  Also note that I replaced the front brackets with stainless ones from the RB Motorsport kit (one on the left attached here):

So in Part 2, I'll review how I was able to attach it to the car.

Tuesday, June 18, 2013

BNR34 Rear Diffuser Project, Intro

So I’m not sure why this mod is not more popular overseas, I've seen a couple on R33s at the SSCT gatherings, and even on the Minkara car blog here in Japan, there are several examples of people who have installed the R34 V-spec rear diffuser onto their R33s.

In my study of the R33 GT-R vs. the R34 GT-R, one obvious engineering difference, if not THE difference, was the aerodynamics that the R34 had. And, the most obvious piece was the rear diffuser. Thus, I’ve been wanting to do this mod for quite some time now.  So I did some research, learned that it basically bolts on, but first I wanted to confirm this so and then found and bought a used BNR34 diffuser on Yahoo Auctions.  This was over two years ago! (so yes, it sat there collecting dust all that time...)

It turns out however the tricky part was, despite its “bolt-on” nature, figuring out exactly how the diffuser would be attached to an R33.  Luckily, all that is really needed is to either weld on the necessary nuts onto the existing “triple cross bar” or to replace the R33’s triple cross bar with the R34 V-spec’s triple cross bar, which happens to be identical except for having the necessary brackets already welded on.  The triple cross bar is three pieces of pipe in the rear that extends from side to side in a rough “U” shape - here is what a standard R33 “triple cross bar” set looks like (bottom piece is towards rear, top is in front of the rear wheels) :

Courtesy http://minkara.carview.co.jp/en/userid/886880/car/866742/3781685/parts.aspx
And here is the R34 one, with the differences (that is, where the diffuser is bolted onto towards the front), highlighted:
Courtesy: http://minkara.carview.co.jp/en/userid/301215/car/194604/415795/note.aspx 
So I first had to find a used 34 V-spec triple cross bar. This I did by contacting a dismantler.  Then, it turns out that the used diffuser wasn't in the best condition, either missing some brackets, or the existing ones were extremely rusted and bent out of shape, so I had to find a tuner that could supply me with replacement brackets.  
Yeah, this isn't going to work...maybe stainless steel is a good idea, given the location?
I searched for a while in Japan and found one place that was prohibitively expensive – however Allen at Tomei Powered introduced me to RB Motorsports in the UK, who had a bracket kit of stainless steel brackets, bolts and rivets, just for this purpose!  

Unfortunately, as I found out later, this solution was not a complete one.


So after collecting the diffuser, the triple cross bar, and a set of bolts and brackets, it looked like I was good to go. I now had everything I needed to do the install. So this project was essentially broken down into the following steps: 1) restoring the carbon diffuser and then 2) ensuring the diffuser could be attached to the R33, 3) temporarily attaching the diffuser to get it to my tuners shop and then finally 4) full installation, including getting custom brackets made in order to make it work for the R33.  In order to make this easy reading, I’ve broken up the posts into 4 sections. 

Meanwhile, here are some links to Minkara posts showing other R33s with the BNR34 diffuser mod:

A nice LeMans

Black V-Spec

Silver Tommy Kaira tuned

White Race Spec

Midnight Purple Autech 4 Door GT-R

R33 GTS25T Type M

Midnight Purple 2.8L (with decent photo instructions)

Stay tuned for Part 1, next!