Wednesday, February 23, 2022

New Hi-Tech Mirror? - Yeah Not Sure About this Mod...

So those of you who have read this blog in the past know that, back in 2012 I was lucky enough to have my car outfitted with a GENTEX mirror, courtesy of the Japan affiliate which turned out to be just down the street from where I live!


It was an awesome bit of kit, being very OEM looking but with a small built in LCD screen to which hooked up to a back-up camera, helping to not just modernize the car but also making it so much easier to back up and park!  So even though I wasn't able to use all the options on the mirror, for example the built in garage door opener switch, it was a nice addition.


Unfortunately, the Gentex mirror was another victim of Nakamura of Worx Auto Alarm, because when I got the car back the mirror's wiring had been removed, rendering the LCD display useless (as well as its auto-dim feature, etc.). I guess he did not agree with my idea of having two cameras in back, one for the mirror and one for the 2DIN Pioneer Cybernavi he ended up installing...


Close up rear of Gentex... wire harness gone!

Anyway, ever since, I have simply been super careful about parking, but a couple of years ago I realized there were a lot of inexpensive LCD mirrors with back up cameras that now incorporate "drive recorders" (i.e. dashcams) and run on an Android platform, meaning that they come with GPS based maps, music, Bluetooth and other auto associated apps. So rather than finding another more modern Gentex mirror, I ordered one of these new Android ones and then decided to focus on other areas of the car first, namely the complete removal of all the wiring left over from Worx, including the original back up camera. 

So here are the contents. Note, even though I was sent the Nissan bracket, becuase my car had the window mount due to the GENTEX install I ordered that mount as well. 

Incidentally, most of these Android mirrors that pop up on an internet search are the "strap-on to original mirror using rubber bands" types.  This one however came from a seller that offered different kinds of brackets for different OEM vehicles and a secured mounting plate that eliminated the rubber straps.

Mount on left is for window mount, not Nissan Skyline OEM bracket mount


Installation was relatively straightforward.  However because I had ordered this right before re-installation of my OEM stereo deck,  I was able to take advantage of the interior being removed and lay out the wiring for the new back up camera that came with this new LCD mirror.  But it turns out that the recommended installation method was to route the wire along the roof/headliner. By choosing to route with emphasis on stealth, I routed from the trunk sides, to behind and then under the rear seat, and then along the left side of the chassis, following the left speaker wires... and then it  turns out that the wiring was too short!  Luckily I was able to get a 2.5mm 4 pole, 2 meter extension cord especially for dash cam back cameras! All that was left then was to attach the LCD mirror unit to the GENTEX windscreen mount then run some wiring, to include a GPS unit, the power lines, and the back up camera line.

So first step was to remove the Gentex unit:

And then wire in the LCD unit into the car's ground, power and accessories circuit.  The mirror came with these terminals with built in 15A mini fuses (light blue circle below) that plug into the car's fuse box, but two problems:

Soldered on two add-a-circuits and a new ground wire

First, the car does not use mini fuses but the standard size (ATO/ATC) fuses, so these could not be used in the first place.  Second, I want this mirror to be on its own circuit, and keep the fuses already in the fuse box for the respective power and accessory circuits.  This meant that I had to cut off the original terminals and solder on the add-a-circuit fuse holder that fits standard size fuses which in turn could be plugged into the fuse box next to the driver's foot.  Because the included power leads were relatively short - likely I should have routed up the driver's side A pillar but I wanted all the wiring going up the left A-pillar, I soldered on extra length of wiring for the power, accessories and ground, as in the photo above.

As I had back up camera lead extension already at the foot of the left hand A-pillar, I just made sure to route the power leads under the steering wheel and behind the glove box, making its way up the A pillar.  Then all that was left was the GPS antenna.


Using some double stick tape, I placed this unit straddling the two front vent pieces, in the center of the windscreen, and tucked the wiring between the windscreen and the dash. Then I attached the mirror using the mount to the base on the windshield, and made sure the circuit worked:

Success!

Even Google Maps works!


And of course it records what is in front of me.


So it looks like it works, right?

Well, here are the problems.

1. Android 8.1 seems to work very slowly. Nice to have the apps, but wow how slow it seems.

2. Since I refuse to pay for a SIM card just for the car - I am using my phone's WiFi hotspot to this mirror.  I have unlimited data transfer, but somehow I think the speed of data transfer just is not there.  Or it might be the Android OS of the mirror.  Even at home, when I link the mirror to my very fast home WiFi, it seems slow.

3. Intermittent back up camera - sometimes the rear camera does not work.  To get it working again, I have to restart the mirror. And actually, the other day it did not seem to be working at all:

4. Squeaking - I think it is the bracket, I will try to fix it, maybe with some Tessa tape?

5. And most annoyingly - inability to retain the mirror function when viewing the screen.  So it is either playing with the apps and no rear view, or rear view but no apps. Stupid.

So, next steps.  Since I went to the trouble of wiring this up, I don't want to give up but since it IS relatively inexpensive I think I am going to try to find another similar rear view LCD mirror with better features and see if it will work with the same bracket and wiring.  Otherwise, I may end up researching and going back to a proper mirror from GENTEX again, maybe? We shall see...

Saturday, January 29, 2022

Oh No! Brake Judder? Well... (at Mine's again)

 So a quick update everyone.

Today, took a quick drive to Mine's with Dino who was scheduled to do a photo shoot there for a very special engine build - which I might talk about more at some point.

But following up on my last post about my car being the world's first with R35 size carbon ceramic brakes, one of the comments I had heard (from Ochiai-san at Nismo) was that a slight brake judder could be detected.  Curious, because it hadn't really bothered me before, I had Dino do the driving down.

On my drive home from Nismo last time, for some reason I felt like whatever Ochiai-san had done to try to reduce the judder, had somehow made the brakes a bit mushy in initial application. But, I was very wrong, as Dino showed me several times on the way down.  He reported initial bite to be fantastic, and enjoyed himself by slamming on the brakes and watching my head flail forward several times. What a jerk lol. But he also reported some judder as well.

Sorry for the blurred photo.

Once at Mine's he was bothered enough by the judder that he was wondering if it might be an alignment problem, or even the discs being different weights.

So of course, I had Nakayama-san test drive the car to see what he thought. My guess is Nakayama-san has more seat time in second gen GT-Rs than Dino does so...

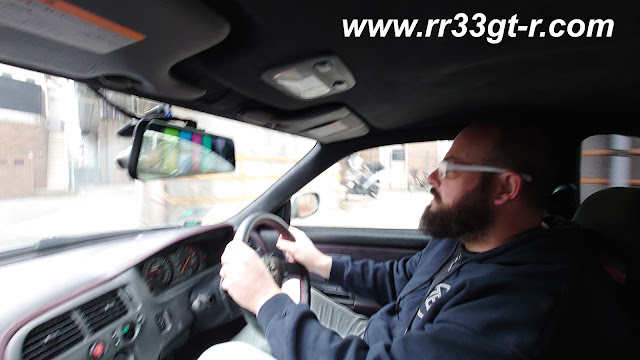
The man himself, behind the wheel. What an honor!

And of course, when the car left, somehow my Sony Xperia 1 mark iii took this photo, which I loved enough to change the header photo of this blog!


I guess I got lucky as I played with the zoom because with the fixed lens it looked like this:


Anyway, he was back in about 10 minutes.


And reported that first, yes there was some judder but it was not a big problem.  It is not an alignment problem, nor a brake rotor weight issue.  Simply, the Pagid RSC1 pads (which Lamborghini and Ferrari use in their cars with carbon ceramic brakes) in use are super grippy, which is resulting in the awesome initial bite. But because of the drilled rotors, Nakayama-san thinks that the holes (which are likely unnecessary in the first place) might be causing the pads to wear a bit unevenly given the high friction of the pads, hence the judder.  But, he mentioned that compared to their demo car, or other race spec vehicles, this level of judder was mild. So if I want to reduce the judder he recommended I go with a softer brake pad.

I think since it doesn't bother me (and when I drove back I didn't even notice again) I think I will keep these Pagids.  The actual initial bite is fantastic, and I prefer having that as these brakes are supposed to be high performance. 

What do you guys think?

BTW, while there we looked at the engine bay and made some plans on some future upgrades.  I can't wait!

Wednesday, January 19, 2022

Big Scare? And the Future of this Blog - Want Your Opinions!

 Friends,


As many of you know who were kind enough to message me, this blog was inaccessible for a couple of days this week.  This was due not to any fault of Blogger, the free platform I use to make this blog, but due to technical errors by Enom, which is the domain register I use.

Luckily as you can see, the domain is back up, and no posts or data were lost from this blog. But the whole incident got me thinking - what about the next time? Could it have been worse?

True, I can and do occasionally update the contents of this blog, but not having control of the situation caused by Enom and waiting it out in the hopes that, as the "world's largest" the domain registry they would HAVE to solve the problem eventually - I dislike being put into that situation, to say the least. 

And, as it stands, right now I am basically at the mercy of Google (Blogger) and Enom to ensure this blog maintains its content and is accessible to everyone.

So this got me thinking - are there other ways to maintain this blog, to make its contents and accessibility more secure?

I am still doing my research and will soon likely talk to people who do websites/blogs as a business to get their input.  

But it occurs to me that, if I want more security, it may cost money. And if it costs money - not just the annual fee I pay to Enom - whether to have a professional company host the site, etc. - I may need to monetize this blog in some form.

I am not a fan of the "click to buy a product I talk about" (Amazon?) so I think that means a subscription model?  Of course this would not be for my posts, but for new features I would have to offer in addition to my posts - an easy example would be English translations of articles about the R33 written in Japanese, for example, that only subscribers could read.  Or maybe special events or intros /live Q&A sessions when I drop into Nismo Omori Factory, or Mine's, or whatever tuner I am visiting.  Just some random ideas....

But what do YOU guys think? 

Please post your comments below so we can start some ideas flowing.

Thanks, and as always I very much appreciate your readership of this blog!

Aki

PS I already have a couple more posts coming very soon! Check back often!


Saturday, January 8, 2022

Another World's First! (Mine's Visit, Part 3)

 So take a close look at this. 

Specifically, the brake rotor.

Yes my friends, it is a carbon ceramic rotor! As you saw from the Speedhunters post (note, I wrote this article and the SH post at about the same time, hence a lot of repetition between the articles), I just got these installed at Mine's during my visit there, and let me tell you - they are absolutely fantastic! A game changer.  Basically, all of my mods I think have been evolutionary in nature - one dimensional. So improve engine breathability or exhaust for more power; or increase body rigidity to make handling better; or improve the interior to modernize.

But this is the first mod I can recall, that improves handling, acceleration, AND braking. So perhaps a revolutionary mod?

So here is the background - it took over a year from inception to delivery, but it was well worth it.  A fellow R33 GT-R owner (Matt J) - crazy machine, more modded than mine - in the UK told me he was running carbon ceramic disks (his sizes are 343 and 330, I think). Naturally, I had been toying with grabbing some R35 Spec V carbon ceramic rotors I had seen on Yahoo Auctions, but everyone I talked to - Nismo guys included - recommended against it.  Apparently the Spec V rotors were not as good as they could be? Apparently they are noisy and require warming up before they start biting well. 

It was at this time that Matt let me know that he had gotten carbon ceramic rotors for his R33 from Simon at Midland Brakes, and was kind enough to e-introduce me to Simon.  Simon claimed his company could produce a bespoke set of carbon ceramic rotors in any size up to 420mm, so naturally it meant I could keep the R35 calipers on my car, and simply have him reproduce the steel rotors in carbon ceramic.  Truth be told, I was not confident that the rotors would arrive and would bolt right up to my existing R35 rotor hats, so I also asked him to make me a custom set of rotor hats as well, and to have them all assembled together so I wouldn't have to bother doing so.

Anyway, here are some photos Simon sent me during the build. First, he showed me what was happening with the rotor hats:


Then he sent me photos of the carbon ceramic rotors being made:


Once complete, he wanted to show me how light these rotors were, so Simon sent me the following as well:

Weight of rotors on scale, in kg. Front:


Rear:

And then of course with the rotor hats fitted. Front:


Rear:

Front on top of rear, showing the backside of the rear rotor which works with the R33 parking brake! (It's not a steel ring like that I had Ninomiya-san insert when I first got the R35 brakes fitted. Can't believe it's been 10 years since I got the R35 brakes...) 


Flash forward and just a few weeks before I was set to go to Mine's for the new Silence-VX Titan III exhaust install, the rotors arrived in the mail. Perfect timing!  I was planning on doing the install myself, but figured I'd take them down to Mine's to see what Nakayama-san thought.

When I dropped the car off and showed him the rotors, he was a bit skeptical.  He had dealt with UK companies before and apparently the quality was hit and miss (and unfortunately that has been my experience as well - even with parts from so called well known Skyline shops...who I will not name here).  Nevertheless he agreed to see if he could install the carbon ceramics.  I was half expecting a call with bad news - "sorry they don't fit" - but that call never came.

Rather, when I picked up the car after the install of the exhaust, R35 injectors and R35 AFMs, the first words out of Nakayama-san's mouth were - "where did you get these rotors again? Can you introduce us to him?" 

In other words, the guys at Mine's were very impressed.  Indeed, Niikura-san magically appeared and also started asking me who made them, where the company was located, how much, etc. And that after Nakayama-san had fitted them and broken them in, given Nakayama-san's rave reviews, he had also driven my car to see how they were - and pronounced them spectacular (although now, he could feel that my car was having some torque steer! Nakayama-san told me later this is a common issue on 33s)!  Nakayama-san agreed, saying these were the best they had ever come across, as they were always testing carbon ceramic rotors but had never found a set they liked.  He told me he had weighed the stock R35 rotors and hats, which came in at about 13kgs, but these carbon ceramics with hats were only 6kgs, resulting in unsprung weight loss of about 7kg per corner! 6kgs is lighter than the steel OEM R33 GTR Brembo rotors, which I think weighed about 9kgs each!

As I described in the Speedhunters post, I initially thought that I would have to lower the spring rates for the Ohlins coilovers, but Nakayama-san assured me they were fine as is. And after having now gotten used to how the car is, I have to agree. However the benefits of the reduced unsprung weight continue to impress me - the handling is light, yet communicative; with reduced rolling resistance the car accelerates now with a new fury, making it easy to get wheelspin in second and third gears, in addition to quicker starts from stop. As for braking, if there was any small complaint, it would be that these don't have the quick initial bite that I recall the old steel rotors having, but it is still very close.  And this is something I will work on improving, hopefully with some assistance from Simon and Mine's.

Incidentally, the guys at Mine's weren't the only pros who were impressed. When I dropped off my car Nismo Omori Factory right before year end, I had Ochiai-san drive my car and he was similarly impressed, although he said he could feel a slight judder - but nothing that further breaking in would not fix.  Otherwise, he said he was surprised at how natural the brakes felt, and how stopping power seemed to be without issue. 

So next steps... honestly not much more I can do with the brakes (except maybe experiment with different brake fluids) but Nakayama-san did hint he had a few more tricks up his sleeve that he promised would make my car even more responsive than it is currently.  Even though he told me my car is now "scary fast" and I have to agree with that assessment.

There is also the issue of having enough mods to do that are Speedhunters worthy, but I will worry about that when the time comes. 

Wednesday, January 5, 2022

Starting the New Year Right! New and Newer Nismo Logos

Happy New Year, everyone! Let's hope this is a better year for all of us.

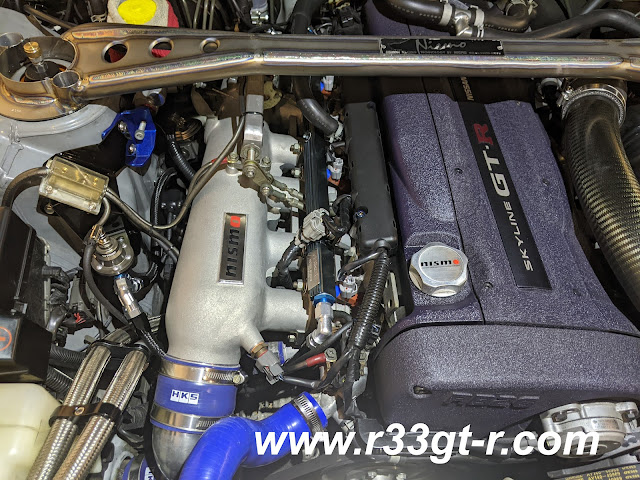
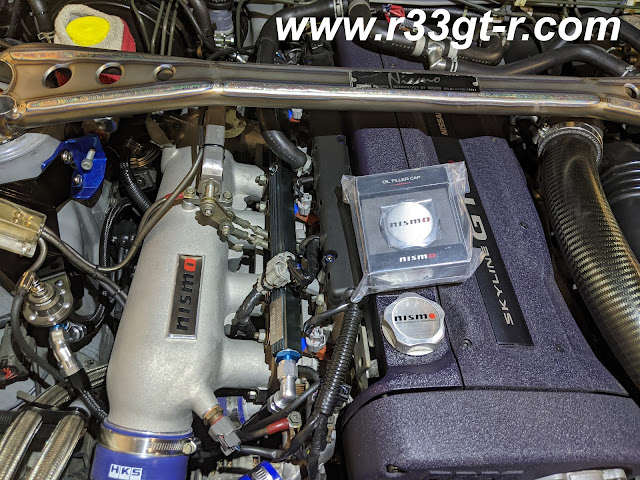
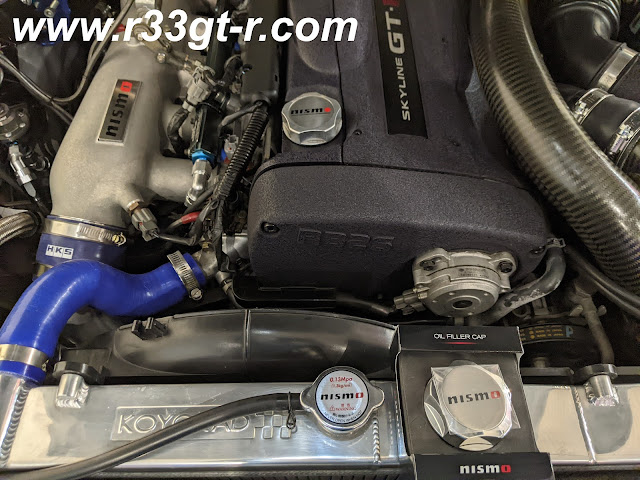
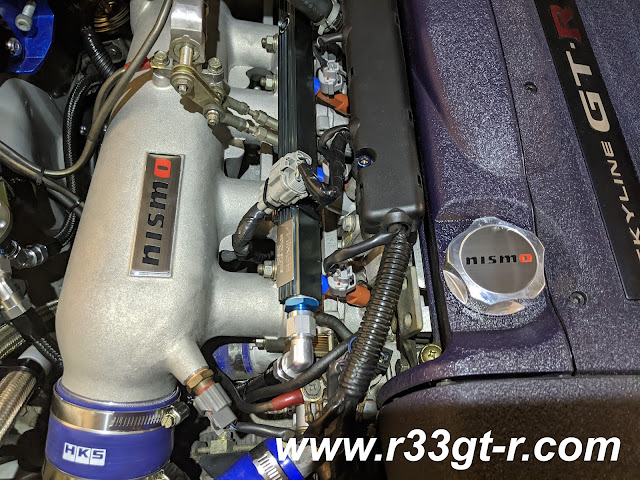
In a previous post where I reported on what Mine's had installed in addition to their new exhaust, my friend Matt commented that the "O" on my Nismo oil cap did not match the "O" on the newly installed Nismo plenum. 

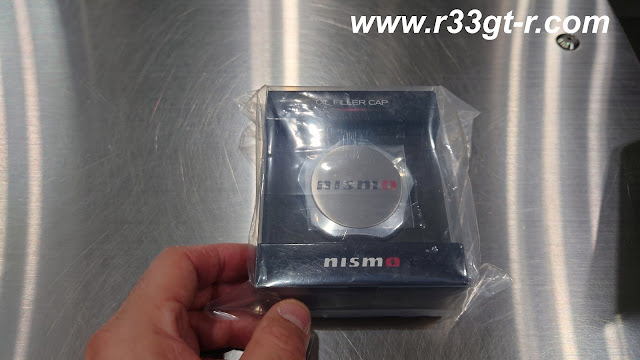
Apparently, Nismo has another oil cap  - the ratcheting one - which has the newer matching "O".  When I asked at Nismo Omori Factory, Ochiai-san immediately told me that the current oil cap they had in stock does indeed match - so I went ahead and got it on the spot during my last visit!


Of course did not do anything until today, but it was really bothering me, so I braved the cold and...

As you can see even the Nismo radiator cap has the newer logo.

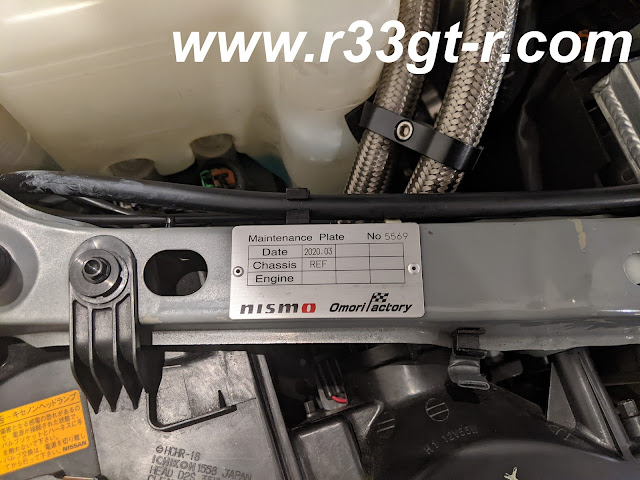
Of course the Nismo Omori Factory build plate has the newer logo too

Install is easy of course. Those of you who have this know that you screw in the billet part, then the Nismo logo plate is actually a metal sticker - this guarantees you get it on straight!

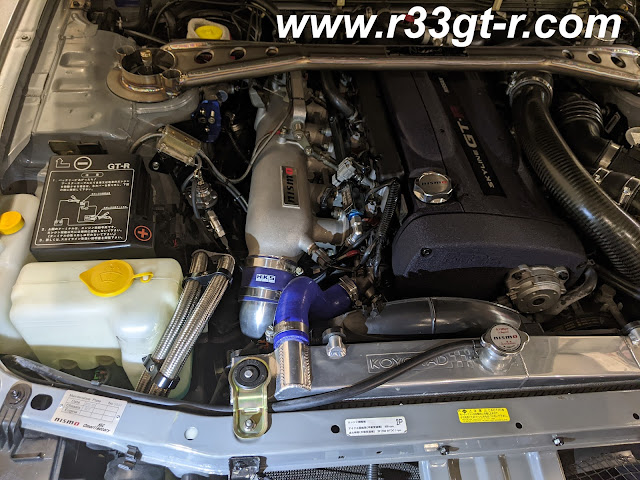
So here are all of them. Note the tower bar has the old style Nismo logo...hence I call the Nismo logo with the solid red "o" the "new" logo and the regular script red "o" the "newer" logo.

Finally - no more cognitive dissonance. I want to make sure there is NO mismatch! Call it attention to detail, or OCD, but hey little things matter, especially when it is easy to make the comparison on the logos.

Speaking of which - There was one more item I picked up as well at Omori Factory.


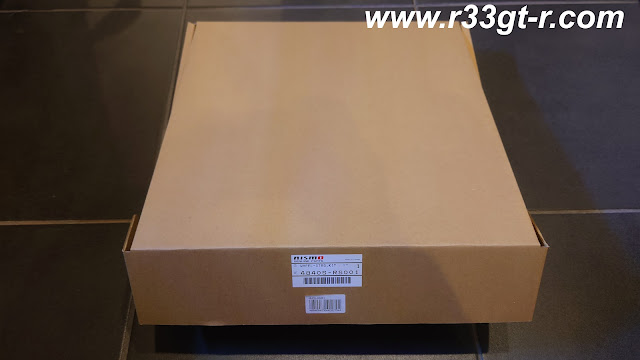
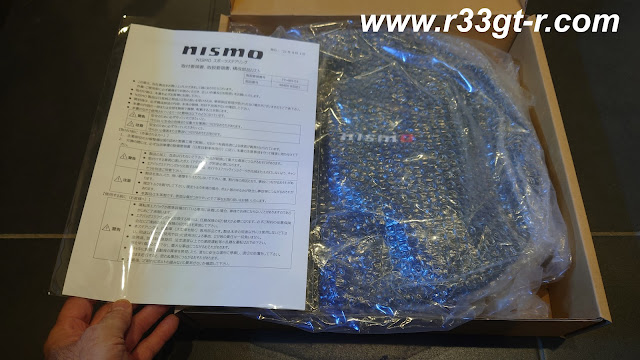
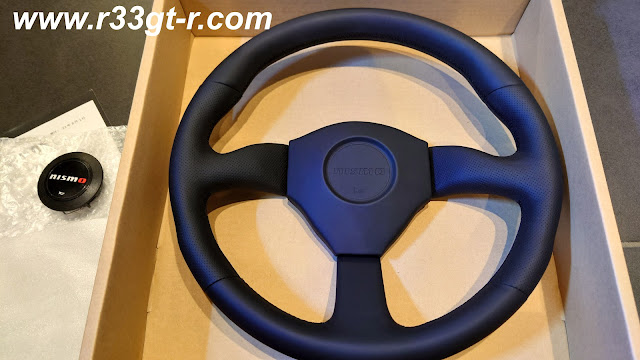
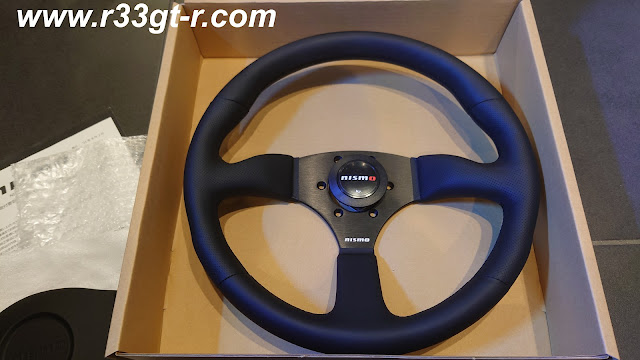
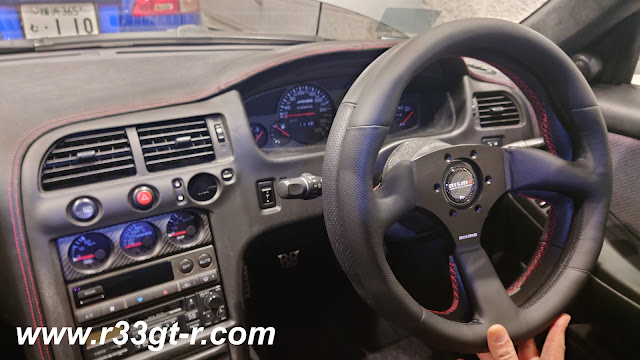
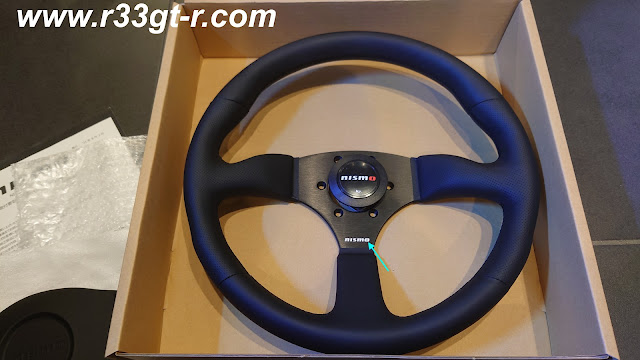
Behold Nismo's newest steering wheel.  Another limited edition production, this one sold out as soon as Nismo announced it was for sale, and the inevitably I started seeing people trying to resell at inflated prices.   


I still think that center cap looks goofy. Ochiai-san told me most of his customers who have chosen to install this, do not bother with the center cap.
Sorry - that center cap is just plain ugly...

Yes, I like this look much better:


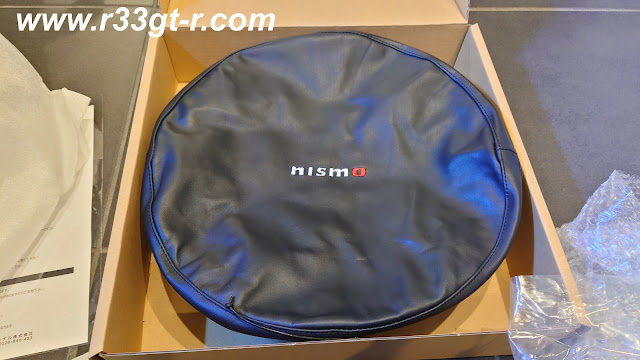
Still I do not understand why this comes with its own protective carrying case?
Maybe get one of those detachable bosses?

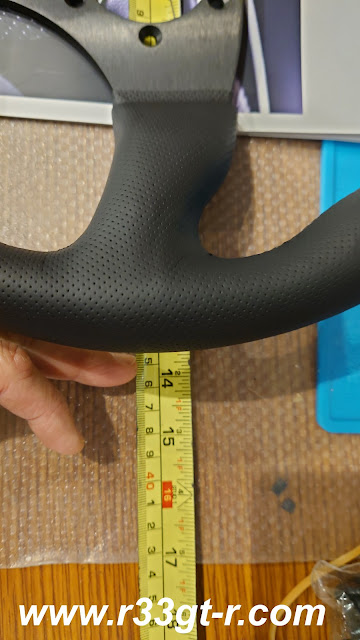
As you can see, the diameter is 350mm, so the same as my Ital Volanti

Lining it up against to compare:

Or do I keep it as is?

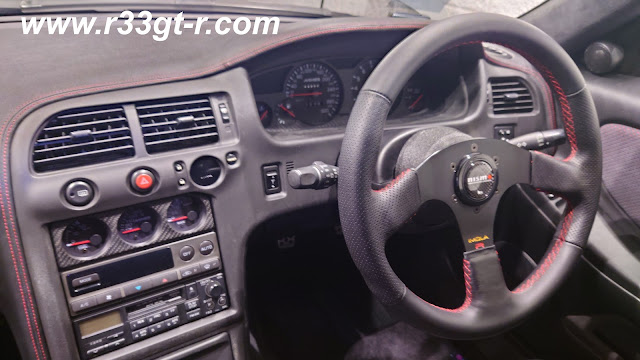
Now, at this time I am not sure if I will install this steering wheel, if I am honest. Why? Because while I very much like the look - as you can see here it has a deeper dish than my current Ital Volanti steering wheel - there are two small things that bother me.

First, the stitching is black, not red. When the BCNR33 was announced, one of the details that separated the GT-R from the non GT-R models was that the steering wheel had red stitching.  Thus for me, a GT-R should always have red stitching on the steering wheel. 

Second - the horn button has the most recent Nismo logo, with the hollow "O" but why is the lettering below it, just plain? Was it not possible to make the "O" here red, as well? 

WHY?

On the red stitching issue, I suppose I could always have Robson redo the wheel with red stitching, but that seems like such a waste.  On the logo, not sure I can do - maybe use some red enamel paint and a small paintbrush and VERY carefully paint it?

Or, I could simply put the wheel up for sale?

So what do you all think? Am I being too particular on this steering wheel?  Word from Nismo is that they DO plan on a second run next year, but cannot guarantee that it will happen or that the specifications will be the same.  Maybe I should just hold onto this wheel and see what happens...

Wednesday, December 29, 2021

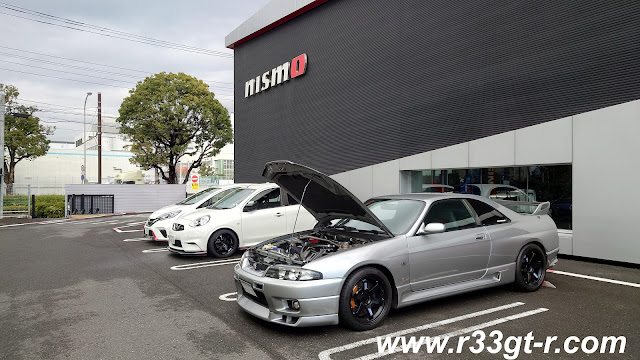
Final Visit to Nismo Omori for 2021!

So a few weeks ago, I got a message from Ochiai-san from Nismo Omori Factory, letting me know that not only had the part finally come in after a 6 month wait, but the OTHER had been returned.

Confused? Ok let me explain.

First part. Last time I had the car at Nismo Omori Factory back in June of this year, they had completed all the work except one bit, which required the ordering of a new part - and in all fairness, I was told to expect quite a wait. 

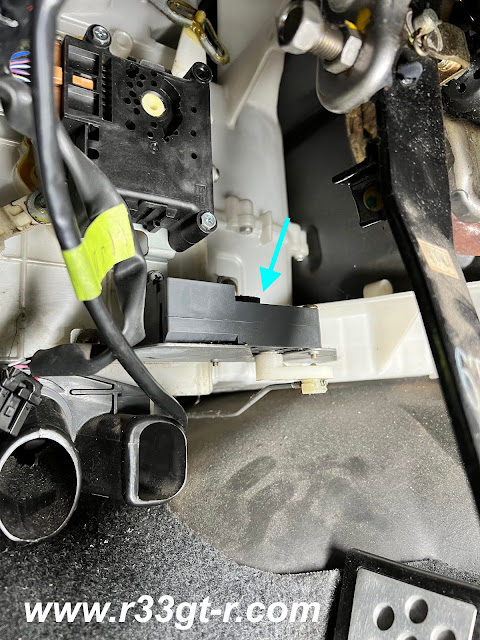
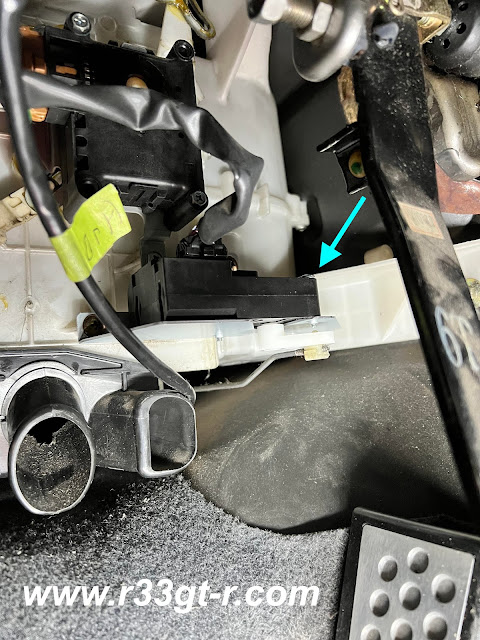
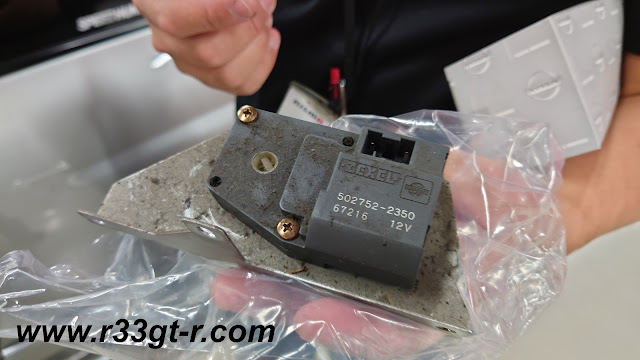
This is called the Mode Door Actuator - and is basically the servo unit that directs the heated or cooled air where it is supposed to go. Ochiai-san told me that this is often a problem with 33s - the internal circuit fails so the servo motor swings left and right continuously, making a whirring sound which can get quite annoying (and frankly might be hard to hear since the RB isn't the quietest engine...)

Man, that is dusty down there! Another winter project for me!!!


Yeah, that is a lot of dust on the old one... yikes.
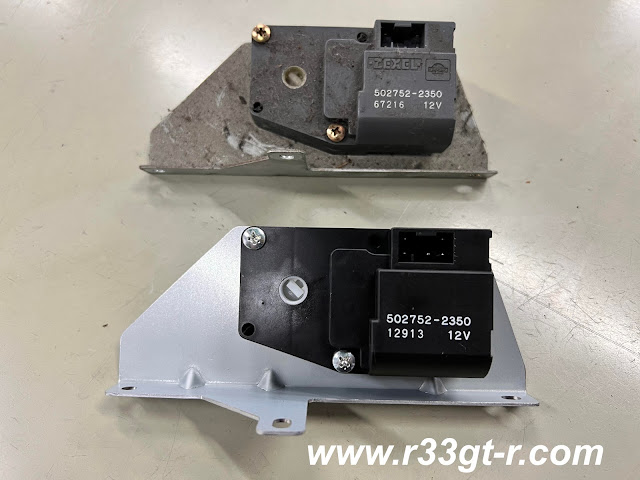
New part quickly installed.

So it only took a few minutes to install the part, after which Ochiai-san sent me these photos and the video clip below showing it working!

Ok, perhaps a minor part that most people wouldn't care much about, but for me, everything on this car has to be in proper working order!

Yikes that is filthy!


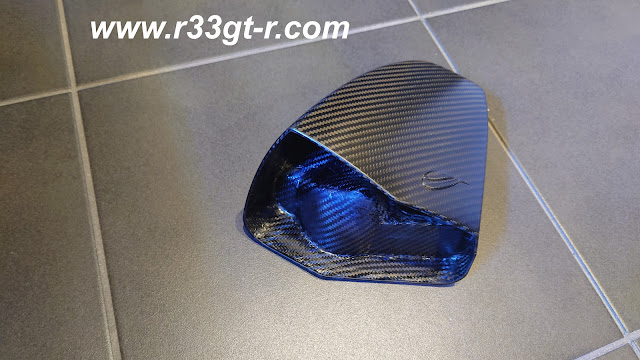
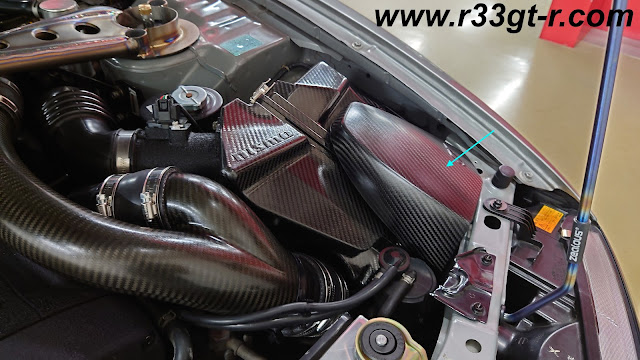
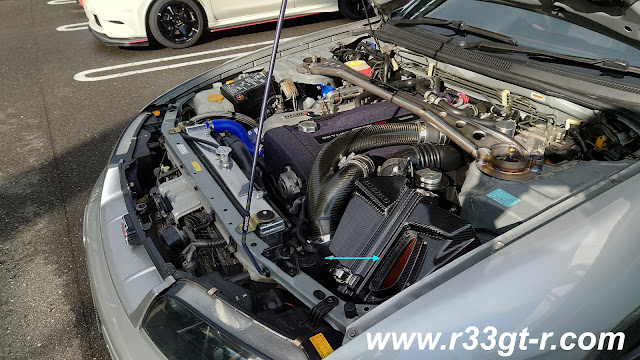
The OTHER part in question is the carbon snorkel, which as you can see is missing from the airbox.


Here is a close up:

Installed it looks like this, just in case:  


So what happened? This is quite embarrassing for Omori Factory, but apparently the production of this snorkel was supposed to be a one time, limited run only.  However demand was very high (the guys at Nismo tell me it's in part due to this blog! Way to go readers!) and so the decision was made to do a second run.  Problem is, the supplier had already destroyed the original mold, and so Nismo reached out to me to borrow my snorkel so it could be lent to the supplier for them to create another mold. 

So when I got the call that both parts had come in, I dropped off the car, and also had Ochiai-san take a look at all of the new upgrades courtesy of Mine's. He spotted a couple of issues but nothing some clever taping cannot fix - stay tuned for that!


Anyway, as we discussed the recent mods, it became apparent that there are STILL a few things I need to do. Some minor, some calling for another large donation to Nismo. In any case, as this crazy year comes to a close, I hope you all have a nice end of year and beginning of year holiday! See you all next year!