Showing posts with label Ital Volanti. Show all posts

Sunday, November 26, 2023

Removing My Most Annoying Mod Of Choice

 So after removing the crap car alarm and stereo that WORX Auto Alarm had installed in my car, I decided that without an alarm, I needed to figure out some ways to make my car harder to steal.

Enter the removable steering wheel idea.

This required changing the after market Daikei  boss I had installed several years ago to fit my steering wheel and replacing it with the WorksBell RAPFIX II wheel lock system.  

Installation was easy, but there was one problem - it moved the steering wheel a few centimeters closer to the driver, and in my case, made using the turn signal lever a bit of a stretch. Oh and given my short legs, I had to recline the seat to give my arms some space too. Anyway, it always felt unnatural.


It was a good idea otherwise, with removal of the wheel very easy - just pull on the silver tab (green arrow pointing) and the entire wheel unlocks due to the very clever mechanism - in essence a column side "male" steel column and the steering wheel with a matching "female" coupler.

Unlocked, it looks like this. And yes, WorksBell sells a steel cap that locks on top of this, with a key lock, to prevent thieves from walking around with their own steering wheel with the matching coupler. (I have one but no photos sorry...)

Anyway, I went into my cabinets and found the previous non-lockable/removable Daikei boss, along with the packaging for the RAPFIX II.


And then took the wheel up to the work bench, to begin the surgery.

Pretty easy actually. Just undo the allen bolts...
The female coupler on the right - note the wiring for the horn button

Next was to remove the steering column side coupler.

Again, super easy, just undo the allen bolts - here you can see the electrical coupler, along with the round metal ground between then column and the coupler.

And yes, this one was a bit of a struggle to remove. Despite using this breaker bar, I kept applying so much torque the front wheels kept moving on the epoxy floor...

Alas success was soon found, but it did cause me to wonder what I would do if I was unsuccessful in getting that bolt off...
Note the green arrow pointing to the resistor which came with the RAPFIX II - I removed it and put back on the resistor that came with the original short boss. This becomes important later...

This is a very chunky piece of aluminum...

So now, I had to reinstall the old boss.  And this time, I want to make sure I do not over or under torque. Enter one of my newest tools, a KTC electronic torque wrench!

I had picked it up a while ago but had no reason to use it, until this project!
Packaging is beautiful, as can be expected of Japan.


And yes, thanks for pre-charging this for me so I had no down time since I did not need to charge it up!

So the owner's manual gave a range, 29-39 N-m.
I decided to go on the higher side

Then it was making sure the wiring for the horn and the resistor isn't pinched.

The black coupler is for the horn. The resistor has been tucked underneath the sleeve that slips on over the boss.

And here is the metal plate that is needed to act as the ground for the horn button.

The Ital Volanti wheel fits nicely over this plate

Complete!

So it was super nice to get this back on - the wheel position felt natural, I could easily reach the turn signal stalk with my pinky finger, and my arm and seating positions felt natural again and not cramped. Nice!

Except... there was one small problem. The Airbag warning light kept flashing. I tried the driver's side door switch trick, yes, and even tried switching the resistor back to the one that came with the RAPFIX II. Nothing worked.  So guess who I called....

Wednesday, January 5, 2022

Starting the New Year Right! New and Newer Nismo Logos

Happy New Year, everyone! Let's hope this is a better year for all of us.

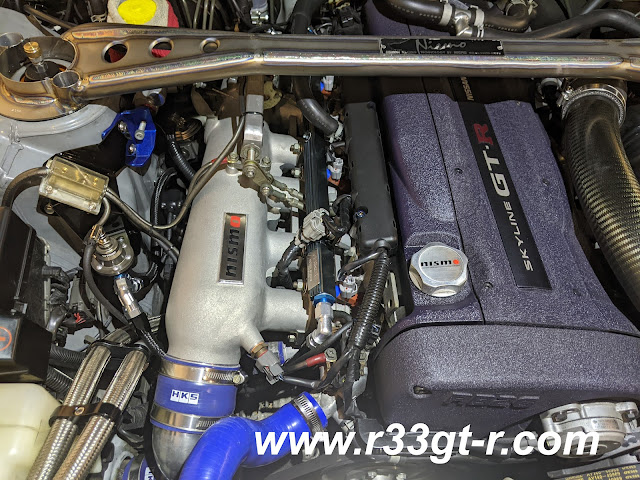
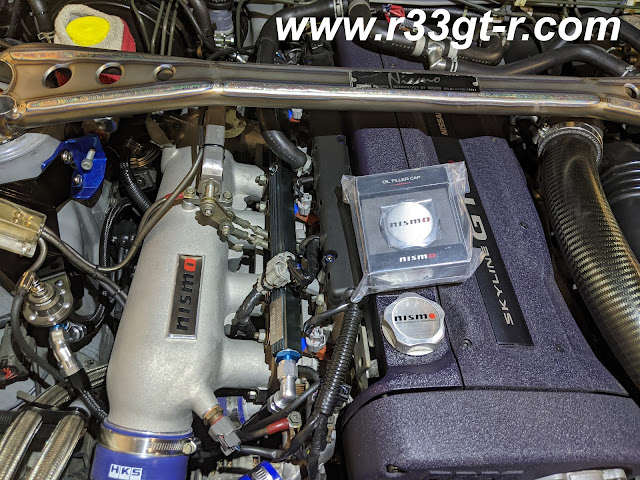
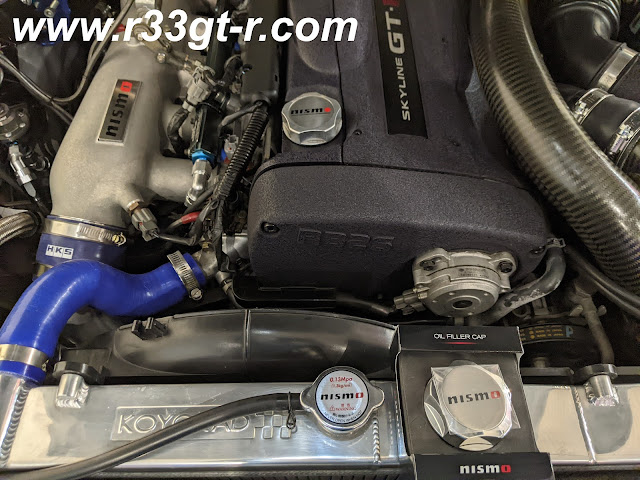
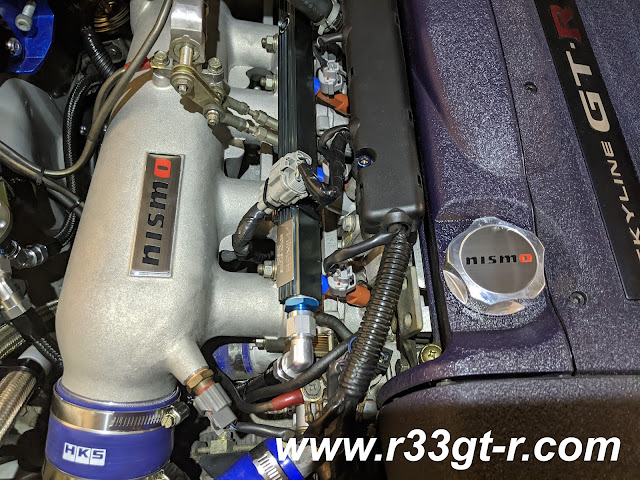
In a previous post where I reported on what Mine's had installed in addition to their new exhaust, my friend Matt commented that the "O" on my Nismo oil cap did not match the "O" on the newly installed Nismo plenum. 

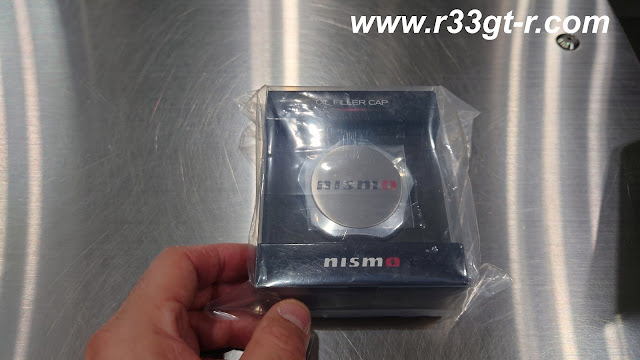
Apparently, Nismo has another oil cap  - the ratcheting one - which has the newer matching "O".  When I asked at Nismo Omori Factory, Ochiai-san immediately told me that the current oil cap they had in stock does indeed match - so I went ahead and got it on the spot during my last visit!


Of course did not do anything until today, but it was really bothering me, so I braved the cold and...

As you can see even the Nismo radiator cap has the newer logo.

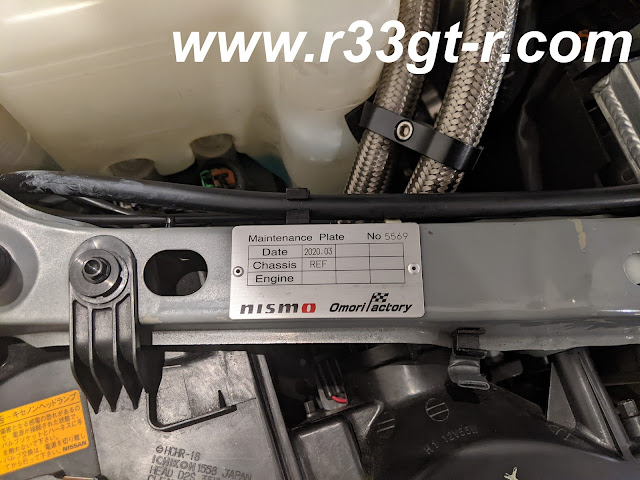
Of course the Nismo Omori Factory build plate has the newer logo too

Install is easy of course. Those of you who have this know that you screw in the billet part, then the Nismo logo plate is actually a metal sticker - this guarantees you get it on straight!

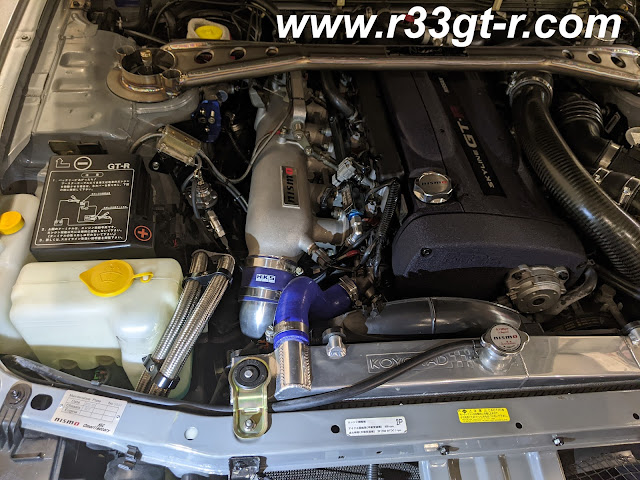
So here are all of them. Note the tower bar has the old style Nismo logo...hence I call the Nismo logo with the solid red "o" the "new" logo and the regular script red "o" the "newer" logo.

Finally - no more cognitive dissonance. I want to make sure there is NO mismatch! Call it attention to detail, or OCD, but hey little things matter, especially when it is easy to make the comparison on the logos.

Speaking of which - There was one more item I picked up as well at Omori Factory.


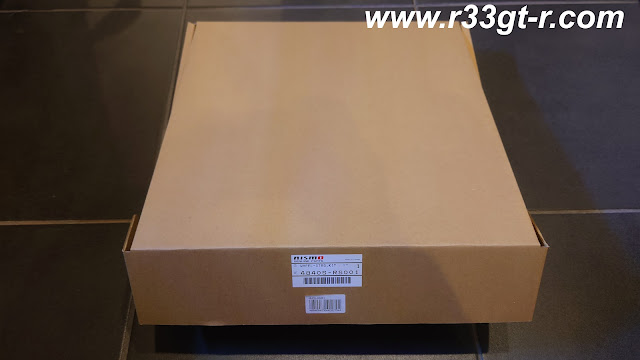
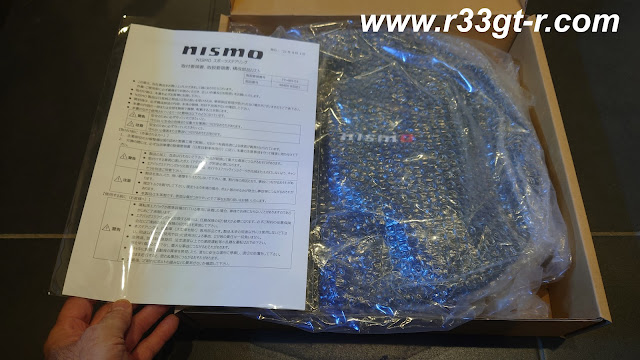
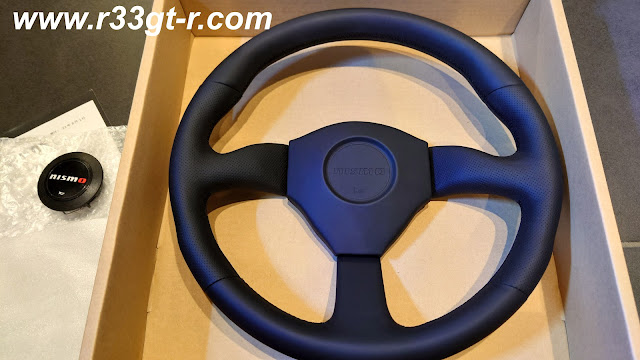
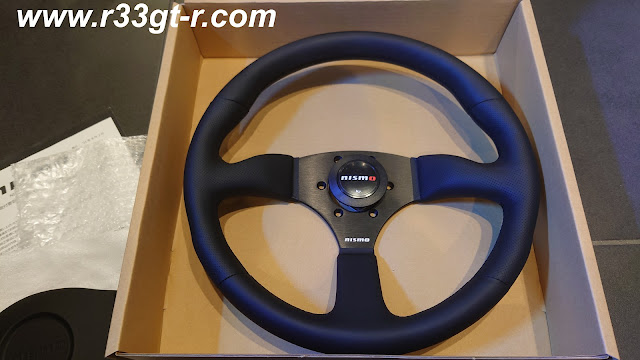
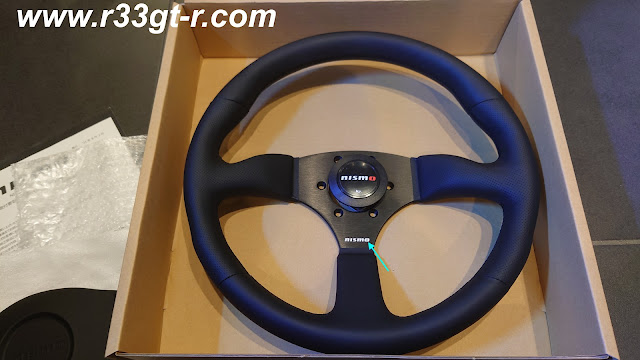
Behold Nismo's newest steering wheel.  Another limited edition production, this one sold out as soon as Nismo announced it was for sale, and the inevitably I started seeing people trying to resell at inflated prices.   


I still think that center cap looks goofy. Ochiai-san told me most of his customers who have chosen to install this, do not bother with the center cap.
Sorry - that center cap is just plain ugly...

Yes, I like this look much better:


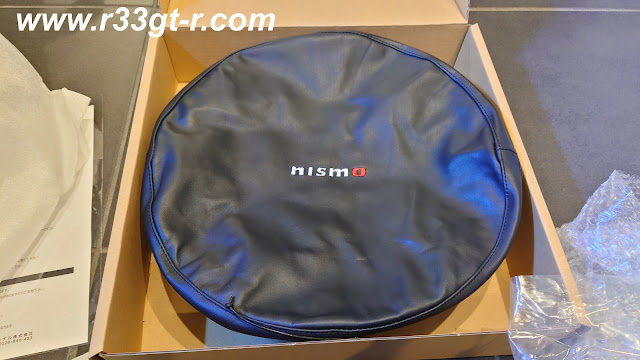
Still I do not understand why this comes with its own protective carrying case?
Maybe get one of those detachable bosses?

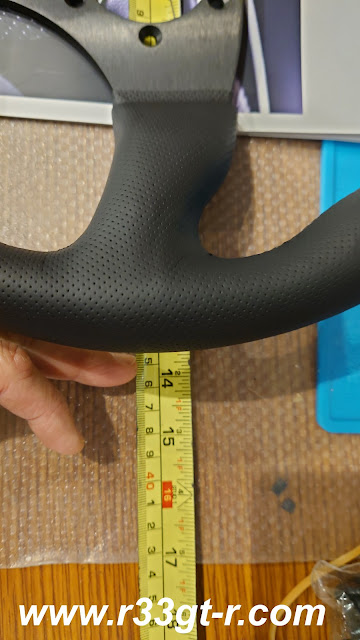
As you can see, the diameter is 350mm, so the same as my Ital Volanti

Lining it up against to compare:

Or do I keep it as is?

Now, at this time I am not sure if I will install this steering wheel, if I am honest. Why? Because while I very much like the look - as you can see here it has a deeper dish than my current Ital Volanti steering wheel - there are two small things that bother me.

First, the stitching is black, not red. When the BCNR33 was announced, one of the details that separated the GT-R from the non GT-R models was that the steering wheel had red stitching.  Thus for me, a GT-R should always have red stitching on the steering wheel. 

Second - the horn button has the most recent Nismo logo, with the hollow "O" but why is the lettering below it, just plain? Was it not possible to make the "O" here red, as well? 

WHY?

On the red stitching issue, I suppose I could always have Robson redo the wheel with red stitching, but that seems like such a waste.  On the logo, not sure I can do - maybe use some red enamel paint and a small paintbrush and VERY carefully paint it?

Or, I could simply put the wheel up for sale?

So what do you all think? Am I being too particular on this steering wheel?  Word from Nismo is that they DO plan on a second run next year, but cannot guarantee that it will happen or that the specifications will be the same.  Maybe I should just hold onto this wheel and see what happens...

Saturday, December 29, 2018

Out with the old, in with the NEW (Robson Leather Steering Wheel Re-Do)

One last post to close out 2018, and appropriately by swapping out the old with new. Or at least "re-newed."

Some of you may recall a few years ago when I first switched over from the OEM steering wheel to an aftermarket one, I found a nice and rare but very used Ital Volanti Imola R wheel.

Because it was worn, I decided to get the wheel re-done in a nice black leather, with perforations on the side grip areas, at the world famous Robson Leather in Tokyo.  I was generally happy with the quality of the leather and the new thickness of the wheel, and it matched the OEM interior very well.

However, once I had the interior completely redone by Cesar in high quality leather... well I noticed that the grain of the steering wheel leather now did not match the smooth finish of the rest of the leather interior (the OEM interior finish has this wrinkled simulated "leather" finish). This could not stand, and the cognitive dissonance generated by this mismatch was driving me nuts.
See how the leather appears wrinkly? This was the original grain of the leather I chose for the first re-wrap.
At the time it matched the OEM interior better.
Luckily for me, Robson Leather always has a tent up at the annual NISMO Festival, so I undid a few Allen bolts and took the wheel with me to this year's NISMO Festival on December 2. The plan of course was to save a few yen sending the wheel in, as well as to be able to inspect for myself the quality and grain of the leather that would be used on this redone.

Moments after I walked up to the Robson Leather tent, Robson's president, Masa Nakamura, greeted me like an old friend and listened to my request.  Lucky for me this Nakamura-san is miles removed from a certain other Nakamura....yes I am still pissed off. Anyway, moving on...

The sample of Robson's Nappa leather against my wheel
Masa knew immediately what I wanted, and showed me a sample of their "Nappa leather." Strangely, while the color and the feel was what I wanted, the leather sample itself looked almost like pleather in terms of how it had been tanned and processed, especially on the non-exposed side.  Nevertheless, because the wheel is a high use area, I was satisfied with the almost plastic feel of the leather, because even if it was a lower quality leather than the "Cardinal" automotive grade leather from Wildman & Bugby in the UK that Cesar used for the rest of the interior, durability (which is what I assumed from how this leather felt) would be key here.

So, I requested a re-wrap of my wheel from Robson with the "Nappa leather" option with side perforations, as before. I was thinking about adding a red 1cm wide swatch to the center top of the wheel (as often seen in some recent sports cars), but when the Robson factory called later and told me that they could not guarantee it would be perfectly centered, I cancelled. Having that center stripe not centered would be super annoying for me...

Meanwhile, my car had no steering wheel.  I was told the work on my Ital Volanti would be "finished before the end of the month" - but I had no idea how long that the re-leather work would actually take. So, I found a cheap 6000 yen steering wheel on Amazon Japan, to attach temporarily, just in case I needed to move my car in a hurry.
Superfast shipping! I had in in less than 2 days!
Nice white cardboard box. Wrapped up well for a cheap wheel...
Not bad for 6000 yen, right?
The temp steering wheel arrived very quickly. As you can see, the material is a fake Alcantara and the diameter is smaller than the Ital Volanti, at 320mm. It also has a deep cone of 70mm. So I knew driving with this on would be interesting...and in fact, when I took the car out to get some gas, it felt weird. The wheel is probably too small, as the car felt twitchy, almost like a (very heavy) racing cart.  And the seating position was now weird too...

It doesn't look bad, but not great either and the yellow center strip didn't line up perfectly.
I was glad I didn't insist on this option for my Ital Volanti
Amazingly, fast forward only 2 weeks from the NISMO festival, and I got a package from Robson and inside:


Wow! Looks OEM in quality!
See how nice and smooth the leather is? Granted, this might be more expensive than elsewhere but for the awesome service and the quality I am not going to complain. Also, it's always good to have connections with people like Masa...
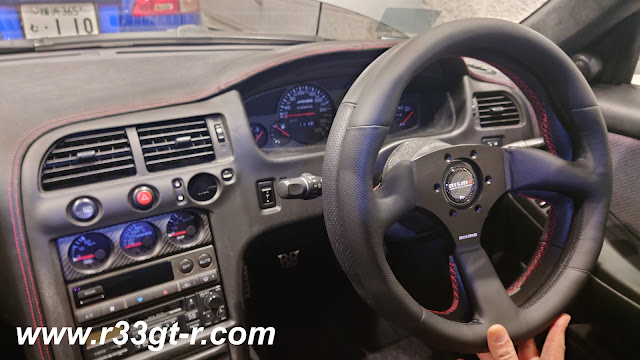
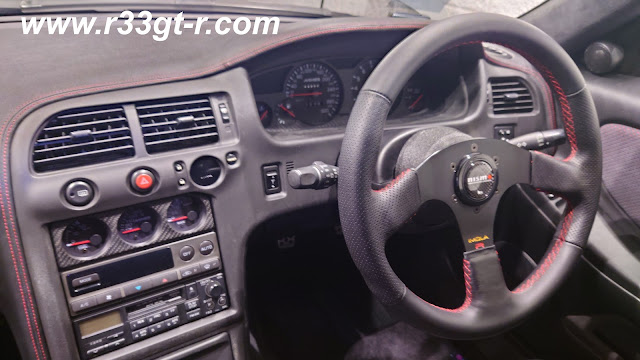
Here it is, installed... See how the leather of the wheel matches (at least in look) the leather of the rest of the dashboard and interior (the leather on the doors)?


Ok I realized that wasn't the best photo. How about from this angle?

Yes folks, quite awesome is the result! Thank you Masa and Robson Leather for restoring my faith in the Japanese aftermarket.  In 2019... yes my journey will continue in order to fix the remaining interior issues and the topical rust, but I'm also itching to do some more improvements in the mechanical area...

Anyway, I hope everyone is having a great holiday season, and I wish everyone a Happy New Year! Thank you everyone for reading and enjoying this blog. As always, drop me any questions or comments below.