So after removing the crap car alarm and stereo that WORX Auto Alarm had installed in my car, I decided that without an alarm, I needed to figure out some ways to make my car harder to steal.
Enter the removable steering wheel idea.
This required changing the after market Daikei boss I had installed several years ago to fit my steering wheel and replacing it with the WorksBell RAPFIX II wheel lock system.
Installation was easy, but there was one problem - it moved the steering wheel a few centimeters closer to the driver, and in my case, made using the turn signal lever a bit of a stretch. Oh and given my short legs, I had to recline the seat to give my arms some space too. Anyway, it always felt unnatural.
It was a good idea otherwise, with removal of the wheel very easy - just pull on the silver tab (green arrow pointing) and the entire wheel unlocks due to the very clever mechanism - in essence a column side "male" steel column and the steering wheel with a matching "female" coupler.
Unlocked, it looks like this. And yes, WorksBell sells a steel cap that locks on top of this, with a key lock, to prevent thieves from walking around with their own steering wheel with the matching coupler. (I have one but no photos sorry...)
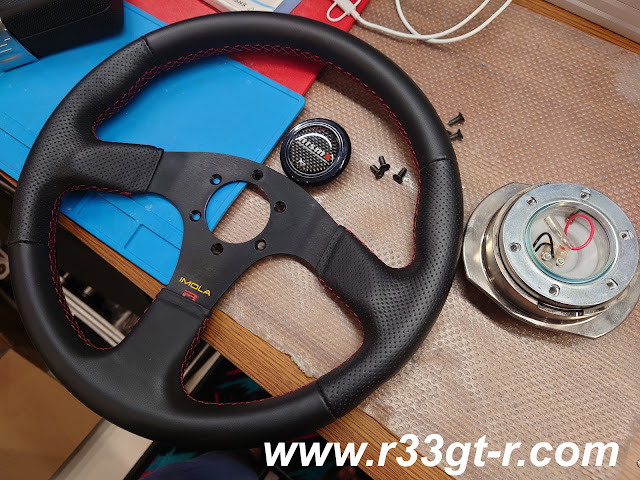
Anyway, I went into my cabinets and found the previous non-lockable/removable Daikei boss, along with the packaging for the RAPFIX II.
And then took the wheel up to the work bench, to begin the surgery.
Pretty easy actually. Just undo the allen bolts...
 |
| The female coupler on the right - note the wiring for the horn button |
Next was to remove the steering column side coupler.
Again, super easy, just undo the allen bolts - here you can see the electrical coupler, along with the round metal ground between then column and the coupler.
And yes, this one was a bit of a struggle to remove. Despite using this breaker bar, I kept applying so much torque the front wheels kept moving on the epoxy floor...
Alas success was soon found, but it did cause me to wonder what I would do if I was unsuccessful in getting that bolt off...
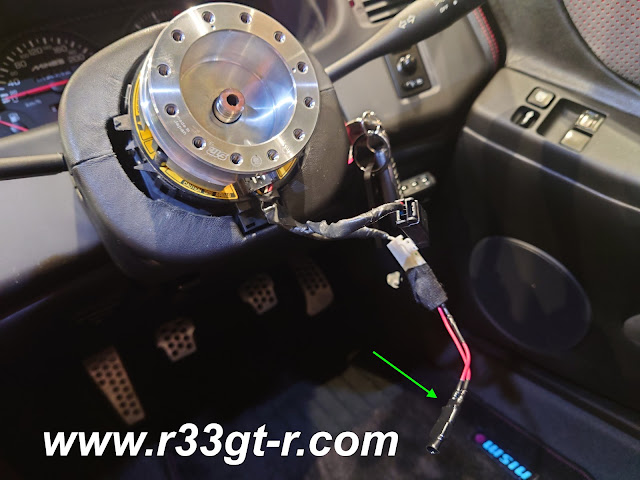 |
| Note the green arrow pointing to the resistor which came with the RAPFIX II - I removed it and put back on the resistor that came with the original short boss. This becomes important later... |
This is a very chunky piece of aluminum...
So now, I had to reinstall the old boss. And this time, I want to make sure I do not over or under torque. Enter one of my newest tools, a KTC electronic torque wrench!
I had picked it up a while ago but had no reason to use it, until this project!
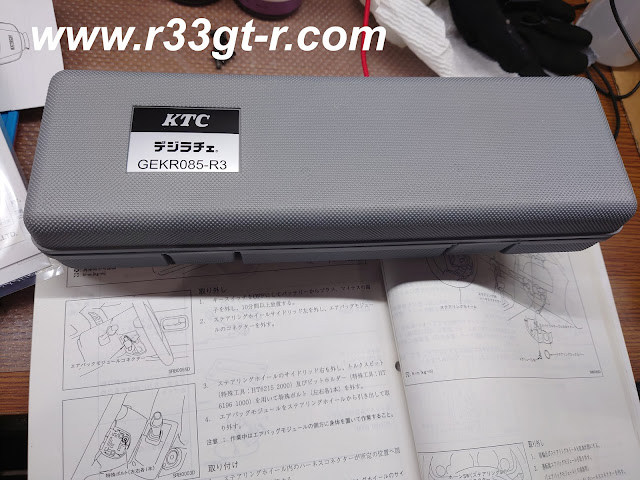 |
| Packaging is beautiful, as can be expected of Japan. |
And yes, thanks for pre-charging this for me so I had no down time since I did not need to charge it up!
So the owner's manual gave a range, 29-39 N-m.
 |
| I decided to go on the higher side |
Then it was making sure the wiring for the horn and the resistor isn't pinched.
The black coupler is for the horn. The resistor has been tucked underneath the sleeve that slips on over the boss.
And here is the metal plate that is needed to act as the ground for the horn button.
The Ital Volanti wheel fits nicely over this plate
Complete!
So it was super nice to get this back on - the wheel position felt natural, I could easily reach the turn signal stalk with my pinky finger, and my arm and seating positions felt natural again and not cramped. Nice!
Except... there was one small problem. The Airbag warning light kept flashing. I tried the driver's side door switch trick, yes, and even tried switching the resistor back to the one that came with the RAPFIX II. Nothing worked. So guess who I called....


2 comments:
Question: Do you know what happened to the R33 CRS Omori Factory demo car's carbon air cleaner scoop? It wasn't on the car at R's meeting 2023...Re-design? Re-mold? Thank you!
Out of production...
Post a Comment