Thursday, March 10, 2011

At Tomei Powered... Again!

But this time to lend my car to Allen and his crew for some "testing"... not allowed to talk about it, but he was kind enough to "pimp" me on their website!

Check it out - my car all wrapped up in protective blue film (yes, they loved how clean it was!)


Here's the link so you can read Allen's write up:
http://www.tomeipowered.com/BTE/index.php/2011/03/08/ongoing-developments-for-the-gtr/

Wednesday, March 9, 2011

Update to Engine Cover Painting Episode of August 23 last year

Some of you may recall my little project last year - my friend Miguel encouraged me to paint some RB engine covers. Not for myself actually - I'm quite happy with the Mine's dark blue engine covers on my car. (click title to go to that post).

Well I remembered I had a picture of the completed project, after Miguel installed them in our friend Alex's R32 GT-R.


With the addition of the nice center plate, sure looks nice! I wish I had a before picture to show you, it looked so horrible before...

Sunday, March 6, 2011

It's Been a While... UPDATE Time

Wow how time flies.

It turns out the last time I posted here was back in November! Well, I DO have a good excuse - my wife and I had our first child, and so for those of you who have kids, you know how it is...

There was also an issue with my PC - this thing I am typing on is now is 8 years old, and lately it wasn't physically possible to even type or surf the internet, it was operating so slowly... so I spent a few hours today deleting programs, and switched browsers. Working much better now, thankfully I didn't have to do a full re-format job.

Anyway, I thought I'd share what's been happening with the GT-R despite my limited time and the current COLD Yokohama weather which really makes it hard to do anything with the car.

Oh, first, here is the newest option that I've installed in my car:


Yes, baby seat!! This was tough - the scooped out rear seat means that there are not many models that work in the rear seat of the R33. But, I did my research, and Takata (yes, the same company that makes the racing harnesses and mass market airbags and seatbelts) also makes child safety seats - and the crash data shows this is one of the best seats out there... Good thing is this seat is designed in such a way that it will fit most cars, so I can take it out and put into other cars (e.g. second car) as well.

Anyway, my lack of time means I can only do some minor projects.

Here is one - it always bothered me how dirty the radiator brackets were:


So I bought some carbon ones on Yahoo Auction. Unfortunately, I will have to get out the Dremel and reshape to fit properly. Can't really tell from this angle, but needs to be a bit more narrow in order to fit into the depression. I'll be doing this soon.


I also decided, what the heck I will try to "Titanium-ize" my engine bay. So I did some research, and found a company that sells various bolts and nuts.


For example, here is one (poor) example - a bracket with the standard steel bolts:


And here it is after switching to titanium bolts:


Wasn't just titanium either. Decided to bling out the transistor pack by replacing the ugly screws (black, and differing lengths) with some shiny aluminum ones (titanium is not as good as a ground as aluminum is...as I run some grounding wires on these bolts).


Ok, not great examples. But I still have some other bits to swap out (for example on the Nismo titanium tower bar), so will try to get a better picture next time.

Oh yes, also did wash my car, almost froze my fingers off:


I also managed to take the car into Nissan Prince Shinagawa for an experiment - some friends had insisted I try the Redline Heavy Shockproof Transmission Oil, as my gearbox had started to make some bad sounds when occasionally shifting into 4th.


Well I'm happy to report that this stuff WORKS! Can't believe it!

Anyway... not my usual level of tuning. BUT, I do have a few projects in the works as you read this. Hopefully will be able to work on some of it this weekend/month, and will report back then.

In the meanwhile - as you know I'm thinking I need some new wheels - the RE30s I have are fine but I THINK could be better darker on a silver car. I wonder how dark silver or matte black would look?

My friend Russ (photoshop guru) decided to give me some other ideas - enjoy!

Hmm. Flat black looks good actually (not necessarily this wheel though).


Silver, blah.


Bronze, nope.


Chrome? No, no, no...


Dark silver/black. Hmmm...

Saturday, November 27, 2010

R32 Group A Replicas at SSCT Trackday

So at the SSCT trackday at Fuji Speedway on Tuesday - more on that on my next post - some of the SSCT members brought along their R32 Group A replicas. Me not knowing anything about these cars, took this as an opportunity to practice my camera skills, as my pro photographer friend Dino had suggested.

Now I had brought my Nikon D90, but I thought it would be better to have a zoom lens, so I brought only the standard kit 18mm-105mm zoom.

I quickly found out of course that this was not wide enough, so I had to take three shots to get all the cars from this angle!


This Taisan replica was interesting...check out that dual side exhaust!


From the top, first a close up of a few cars:


Then tried to get all of the cars.


Then a shot from the rear - the photo is darker as I was playing with the exposure.


The best shot of the day - I sent to Dino for his "analysis" - but he liked it so much he published it on Speedhunters!


http://speedhunters.com/archive/2010/11/25/random-snap-gt-gt-gr-a-skyline-gt-rs-fuji-speedway.aspx

Thanks Dino! But judging from the quality of my photos, I think I'll stick with my day job, thanks very much!

Finally - as this is a blog about the R33 GT-R:

While the R32s were getting all the attention, SSCT member and fellow R33 owner HIRAGA-san managed to line up 3 R33 GT-R LM editions - his, Honda-san's (from Nissan Prince), and a new guy (didn't get the name).

Monday, November 22, 2010

Sunday before Trackday at Fuji on Tuesday

So this Tuesday is a national holiday - and luckily for me, the next SSCT trackday at Fuji Speedway.

I like to use these trackdays as excuses to find and install new performance parts for my car, and this time was no exception. Lately as you may have noticed I've been doing much more to my car myself - but due to some time issues, I decided to pop into Nissan Shinagawa Motorsports and let them do the hard work.

So here is my car at the dealer. At DCD's suggestion, I am experimenting with my Nikon, hence the slightly underexposed hue - but I think it looks pretty good? Not DCD quality, but heck...


Speaking of DCD, I had sent him via iPhone a photo of the new Nissan Fuga Hybrid that was parked there and I spotted while I was waiting - and it turned out he was in the area with this thing - and he kindly dropped by for a chat and quick drive:


Meanwhile, they had begun working on my car - taking off the standard tower bar:


And replacing it with this!


Yes folks, a Nismo Titanium towerbar! My friend in Europe found it - it had some paint flaking off from the label, but nothing a quick spray job couldn't fix (it's not perfect, but will do for now until I figure out how to fix it properly...) And suffice to say I didn't have to pay a ridiculous price for it. Speaking of which, there was an R34 GTR with the new Oomori Factory Titanium Brace... nice, but too expensive. Plus, it is so wide that components such as the Nismo oil separator have to be moved around so the thing can fit. NO thanks, I'll stick with this one, and personally, I think it looks better too! (DCD agreed).

Meanwhile - the other part I had installed were the front and rear Nismo Performance Dampers (developed by Yamaha).

The front one attaches here at the tow hook:

Which mean removal of the HKS Kansai tow hook extender, unfortunately. So now, I have to figure out what kind of tow hook to get...

In another post, I will show the installation in the back (forgot to take a photo today). Meanwhile, here is how it looks in the front:


Problem of course is the HKS Kansai carbon undertray - which has a hump up towards the oil pan right where the Performance Damper lies...which meant some cutting was needed. Here is Motorsport Division's Sugimoto-san using an air saw and cutting into the diffuser (note the poor quality fiberglass patch I did...). The banged up nature of the diffuser meant, I really didn't care if they went ahead and made modifications to the diffuser. In fact, if I ever get another one, I'll get one with a flat bottom, that will avoid having to make any cuts.


After several tries, finally got enough removed, ending up with this on the left side:


And this on the right side;


Now, I had heard how these dampers worked, in theory. And Koyama-san at Nissan told me to expect the car to feel somewhere "between an R34 and R35" in terms of rigidity and steering response. Yeah right! Whatever...

But when I got in the car and begain driving home - guess what, he was right! Absolutely transformed the car, I could not believe how solid and smooth the car felt. Made the car much easier to drive fast...incredible.

Here is Nismo's explanation as to how they work:
http://www.nismo.co.jp/en/products/competition/lb/performance.html
"Even if the car body is reinforced and made more rigid, road surface input through the tires and load shifts during cornering make the entire body act like a spring, causing the occurrence of micro vibrations. The performance damper acts to control the transmission of micro vibrations to the body. During circuit driving, micro vibrations from the car body are transmitted through the steering system to the driver, resulting too often in unnecessary steering corrections. With the performance damper installed, however these micro vibrations are eliminated and excessive steering wheel handling is no longer needed, resulting in more stable handling. Also, in normal driving, the micro vibrations are eliminated, as well providing a much more enjoyable and comfortable ride."

So I think body rigidity-wise, the only thing left for me to do would be spot weld -which I'm not really interested in doing - and maybe finding other brace pieces that actually work. (i.e. Nagisa auto brace...)
http://www.nagisa-auto.com/products/gacchiri/index.html

After dinner, I went out to the garage and changed out the radials for S-tires. I am hoping there is no rain on Tuesday. While I was at it, I also used some 3M Din-oc carbon-look material and some duct tape and sealed off the holes in the diffuser - I just don't think wind getting in there at 270kph is a good thing!

I also took off the carbon fiber Garage Defend panel and replaced it with my ram-air modified aluminum Greddy one. Also took out the spare tire, etc. I think I am pretty much ready to go...

Speaking of which, adding ram-air to the Garage Defend panel is going to be a project for me this winter, as well as some other minor tweaks I have planned. Stay tuned!

Tuesday, October 12, 2010

A Sunny Three Day Weekend means...

Being able to detail and tinker with my car to my heart's content.

As many of you know, for detailing I use the Zaino line of products. http://www.zainostore.com/

The weekend before, as I mentioned in my previous post, there was one sunny day, so I took my time and washed and claybarred the car. Then followed up with the Zaino AIO (Z-AIO) product, applied and removed by Porter Cable.

This past weekend, I used the Zaino instant detailer spray (Z-6) and cleaned the car (there was only some dust on the car anyway, as I had not driven it). I then followed with another coat of the Z-AIO (applied by PC again) and then some hand application as below:

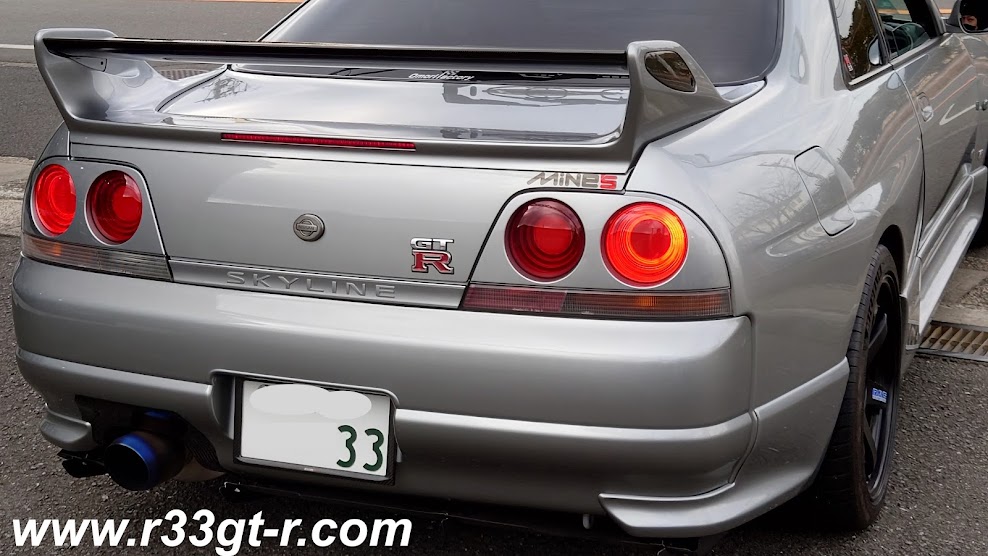
Here, I'm using a toothbrush to remove some old built up polish on the "Skyline" lettering on the rear valance:


And of course - the details - here I am attacking the license plate too - both the front and rear were dirty.


Don't have any action pictures of me removing the Z-AIO (again by PC), which was followed by a coat of the Z-5 product , followed after removing it by PC by a gloss enhancer/instant detail spray, Z-8 , then followed by another coat of Z-5, again on and off by PC. So that's 2 coats of Z-5 - each coat enhances the shine, and the effect is additive! (someday, I will have 4-5 coats on... someday!)

I then sealed this all with their new one step sealant - Z-CS

Hard to tell from these photos, but the car looks amazingly better - so good in fact that the defects - stone chips, etc. are even MORE noticeable...


I also took a couple of hours to remove the dry carbon exhaust surround, which not only was dirty but was applied somewhat off by the bodyshop (when they fixed my rear bumper). I then cleaned it the best I could, and put it back on, this time straight.


I like this photo the best - really brings out the shine and the definition of the car!


But that wasn't all - I then decided to put on some carbon bling that I had taken off before - the side panels to the rear wing - when the clips fell off.

Here is the wet carbon blade compared to the stock plastic insert:


And here is the solution - those metal clips designed to route wire, with the adhesive tape on the backside (I think the carbon items had something similar originally, except the tape was much weaker):


But that wasn't all! I kept going - and this time installed the Optima yellow top that I had lying around as well.

But getting to the battery wasn't easy - not only did I have to remove the trunk wall (black steel), but also the standard tower bar!


And check out the size of this thing!
From the top:


Here it is, I finally got it sitting in snugly in the bay (note - not for the weak of arm, hoisting it up into the bay requires some muscle!)


Apologies for the bad picture - but here it is, done!


The result - I can't believe how easily the engine starts now! There is not only no loss of power, but the starter seems to be a bit more eager in how it cranks! Nice!

Next project - start figuring out ways to reduce the car's weight it gained from the Optima! Seriously, thinking of some titanium bolts, maybe some anodized washers (yes, BLING) for the engine bay... stay tuned!