Showing posts with label GT-R R33 Wheels Rims Alloys. Show all posts

Saturday, July 22, 2023

Torque Wrenches JUST for Car Wheels

 Check this out...

Thanks to Amazon its algorithm which knows that I own a Nissan, I found out that KTC (Kyoto Tool Company) makes and sells torque wrenches that are pre-set to the wheel lug nut torques for various JDM car manufacturers.


From Amazon


For example, the blue one torques at 85N-m for Suzukis and Nissan kei-cars; the black one at 103N-m for Toyota and Daihatsu cars, and the red one at 108N-m for Nissans and Hondas.

Naturally I sprang for the  Nissan specific one as it was heavily marked down during the recent Amazon Prime day sale. Thanks Amazon!

Made In Japan, of course!

Truth be told, I already have an old Husky brand adjustable torque wrench I think I borrowed from my father many years ago, and never returned.  I found out however that with such manually adjustable torque wrenches you are always supposed to return the setting to zero after every use, otherwise the internal springs start to stretch and this can throw off the accuracy of the wrench.  And to be honest, I think I never did that, preferring to leave it on the last used setting (which was usually for the GT-R's wheel nuts anyway...)  But if the wrench is NOT adjustable, then this is not an issue. 

I wasn't expecting a case but this is a nice touch!

For something that retails at around $100 USD, it goes without saying that it better be accurate! But yes there is this Certificate of Calibration showing within 0.5%.
Love how there is a Certificate of Calibration

Of course I finally broke out my Ko-ken plastic sleeved car lug nut sockets, which I had bought a couple of years ago.  Why the plastic sleeves? To prevent the accidental scratch of course! 
Blue band is 17mm for Nissan, Yellow is 21mm for the Lexus

Love how Ko-ken has these knurled extension bars.

So of course once this wrench arrived I had to go and "check" all the wheels. 

Everything was tight, except for one nut on the front right wheel. Nice! As for removal, I had previously bought a Ko-Ken ZEAL series cross series lug nut wrench. 

From https://www.amazon.co.jp/-/en/Ko-ken-4711XZ-Free-Turn-Wrench-12-7mm/dp/B08GL5PY49

I have a breaker bar somewhere too. So in summary, now I have all the specific tools to perfectly remove and re-mount my wheels.  If I ever have a need to do so (with carbon ceramics, the wheels don't get brake dust dirty anymore...)

Anyway, yes it is sad that I am so busy these days that I can only post this kind of stuff. I actually have a few things that have accumulated in my garage I need to get done soon. Hmm...

Saturday, September 3, 2022

I've Met Another Crazy Kohki KR4 Owner

Recently, a fellow R33 GT-R owner messaged me on this blog about how he had successfully used a BNR34 part on his car. Murray (Follow him on IG: kaizen.r33) currently lives in Okinawa, Japan, so when I found myself there for a couple weeks of special work, it was natural that we would meet up in person just so I could check out his car (his daily!).
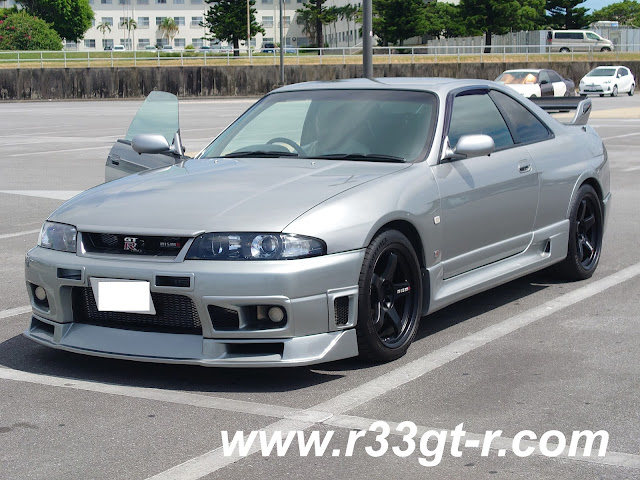
Beautiful! Love the quasi 400R look, reminds me of my car. And the Nismo intercooler
venting is awesome!

Once we met up, of course I had to check out in person what he had tried to explain to me via email and photos about his mod using the BNR34 rear strut tower board, which being two layered (vice the single layer BCNR33 piece) provides more rigidity to the rear of the car.


So I could tell immediately that this looked different from the usual 33 part.  First, the Nismo Performance Damper appears (and is) shorter, but that is because its mounting points are different - you can see in the next photo (kindly provided by Murray) that compares the 33 and 34 rear boards - the 33 is one piece so the rear strut bar (and thus the Nismo Damper) connects on top, while the mounting for the 34 strut bar (and thus Nismo Damper) is a separate piece that lies on top of and bolted underneath the rear board.  Murray told me that because of the different lengths he had to buy a new Nismo Damper for the rear. Because Nismo only sells in front/rear pairs, he sold his new 34 front one on Yahoo Auctions.  
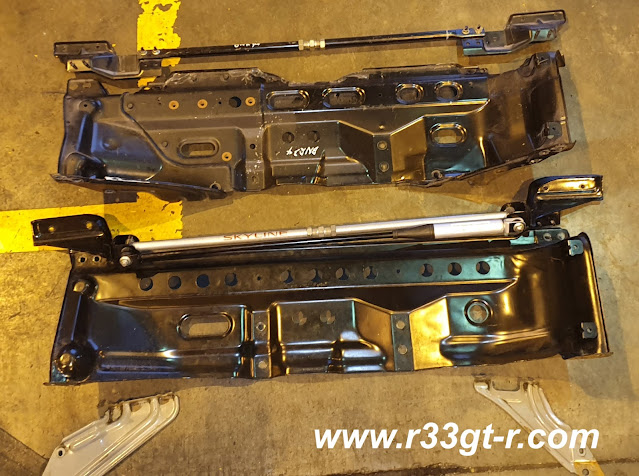

Additionally, Murray informed me that, compared to the 33 board, the 34 board has 4 extra recessed holes, probably M10x50mm in the standard 1.25 pitch. He says the Series 3/Kohki cars already have these holes drilled at the factory so he had no problems adding and tightening these extra bolts down. Otherwise, as I reported in the GT-R magazine article post, this part is a direct easy fit requiring no mods to either the car or the 34 board.

Murray reports he could immediately feel the difference - an increase in rear stability - and this makes sense as the 33 is longer than the 34 and thus I would suspect that an increase in rigidity here in this area would do wonders in how the car feels.  Certainly makes sense given how this 33 was used as the basis for improvements that would end up in the 34. Incidentally, I forgot to take photos, but Murray also has the S15 trunk bar installed as well, so the improvement I think might be noticeable in my car as well.

I am very, very tempted to do this mod! I will have to research the Damper issue- whether the change in structure is effective, etc. Ideally I want not to have to buy a new Nismo Damper...

But of course I had to check out the rest of the car.  I had already noticed that this car was running those beautiful Nismo semi-gloss LMGT4 wheels, and I could already spot some brake mods.
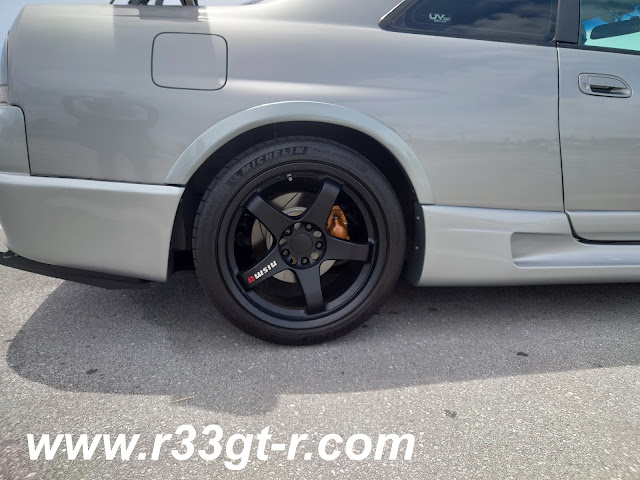
And yes we agreed on tire choice too - PS4S

These are ACRE Dustless-Real pads and Dixcel FS 6 slot rotors. He has the 400R fender flares but told me that Nismo no longer offered the ones for the front. I will have to look into this, but meanwhile we discussed how the Nismo R35 brake package does wonders for the braking ability of the car.  I think if Murray ever takes his car to Fuji Speedway, he will realize that the OEM brakes are the weak point of the car. I did advise him to stay away from adaptor brackets made elsewhere, unless he can overcome the shortcomings I found with the set I sourced from the UK. 

While still at the rear of the car, I noticed that Murray had also installed a BNR34 rear diffuser. But it looked different than mine. And it's not just the 400R rear bumper.
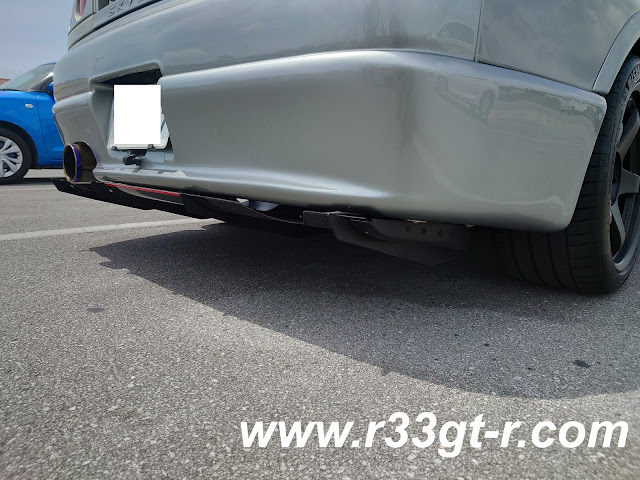
I forgot to ask if the red taping is reflective. If so, nice touch!

Turns out that Murray had the rear diffuser custom-made by CW-collective.  No photos from me as my knees were not cooperating that day (but check out Murray's IG), but I did notice how clean the exhaust cut-out was.  Murray did remark that compared to the OEM 34 version, he did not have a jack up point (so he has to use the arms), but otherwise the install was very clean.  And he even used the OEM 34 plastic fins, which is a smart move because they can get damaged when backing up (although I did not see any damage to the fins on his car).

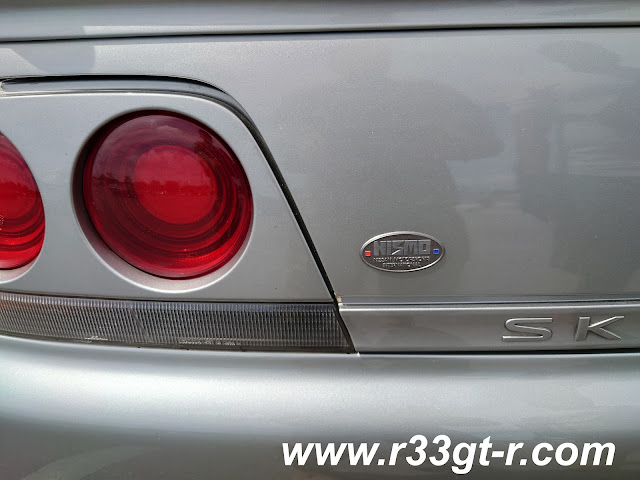
One more interesting piece in the trunk area was this old-style Nismo badge that is no longer available.  I suspect that Murray and I may have been competing on Yahoo Auctions for the last few years over the same parts...

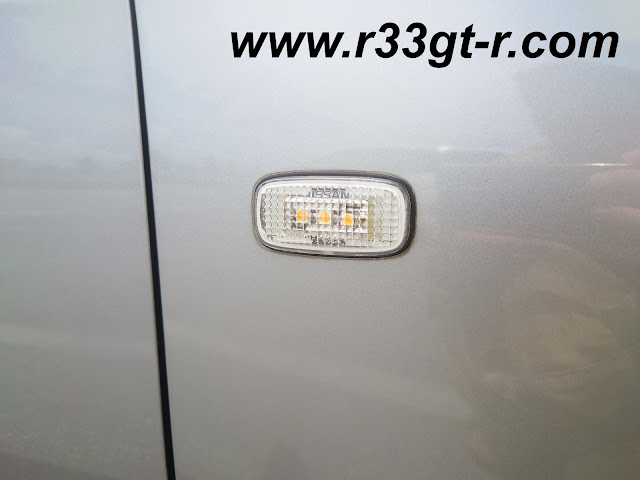
I also spotted this side turn signal that Murray says came with the car. Yes I have advised him to get it changed out for a more inconspicuous part.

Anyway a well put together and a very clean look that works! (despite the shaved off trunk lock - done by the prior owner of the car).
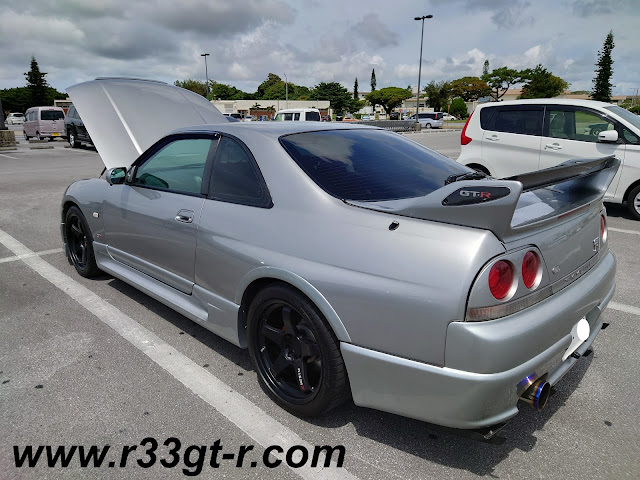
And the car has a replica carbon 400R double blade rear wing

Ok so let's check what's under the hood(bonnet!).
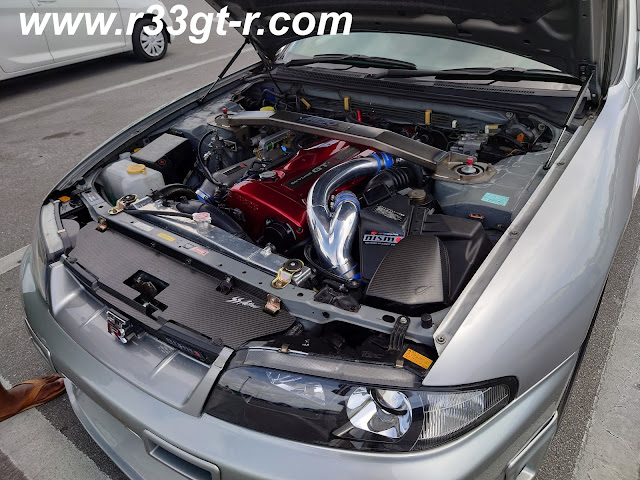

Hard to tell at this angle, but Murray reports the new HKS GTIII-2530s work really well. I also spotted the carbon fiber Nismo Omori Factory original air intake - great minds think alike?  Also hard to tell at this angle is the deletion of the OEM CAS for a more modern trigger kit, with the engine now controlled by a Haltech Elite 2500.  And yes that is a MASSIVE front strut tower bar! 

I also noted that he was running a non-standard front lip. Murray reminded me that this was also a Nismo piece, I guess my focus has been on other Nismo parts as it didn't register with me when he told me!
A better view of that massive Midori Seibi tower bar

From what else I can recall, Murray told me that he had gotten his Xenons redone with a much brighter bulb set-up, retrofitted with G5-BRT projectors from Lightwerkz Global. Additionally, he told me he is running a very interesting cam set-up - 290 on both intake and exhaust with 10.8mm clearance.  Sounds awesome, but he admits that the decrease in engine pressure was causing him some brake pressure issues; hopefully the Auto Select Large Capacity Brake Master Cylinder he is getting installed soon will mitigate the issue.

But wait - what about the interior? Hold on as this was, to me, the highlight of the tour.

First, I noticed the real carbon treatment on the dash surround. Not my taste as I like matte and not gloss but it worked well here actually. Then I noticed the Garage Yoshida sourced HVAC relocation kit, and the 2DIN screen.  Yep, been there, done that, except of course not Garage Yoshida. 

But of course, I then saw that the instrument cluster is the old Nismo option that has the center screen. Murray told me he sadly does not have the Epson EJ1 computer module that came with it - he is on the hunt for it. 

I would argue however that he does NOT need it. Yeah I know not OEM, but his current execution is WAY better:

And if that wasn't impressive enough, once past the welcome screen:

Here is a close up:


Murray says he was inspired by the R35's graphics when he configured this set up! I am very, very impressed with this!

I really think this is way better than the original:

I mean if you are going to Resto-mod... let's make it modern, right!?

But this wasn't his only interior mod. Check out his camera mount.

We were joking that maybe this gave some more body rigidity as well. Looking forward to whatever video Murray takes from this!

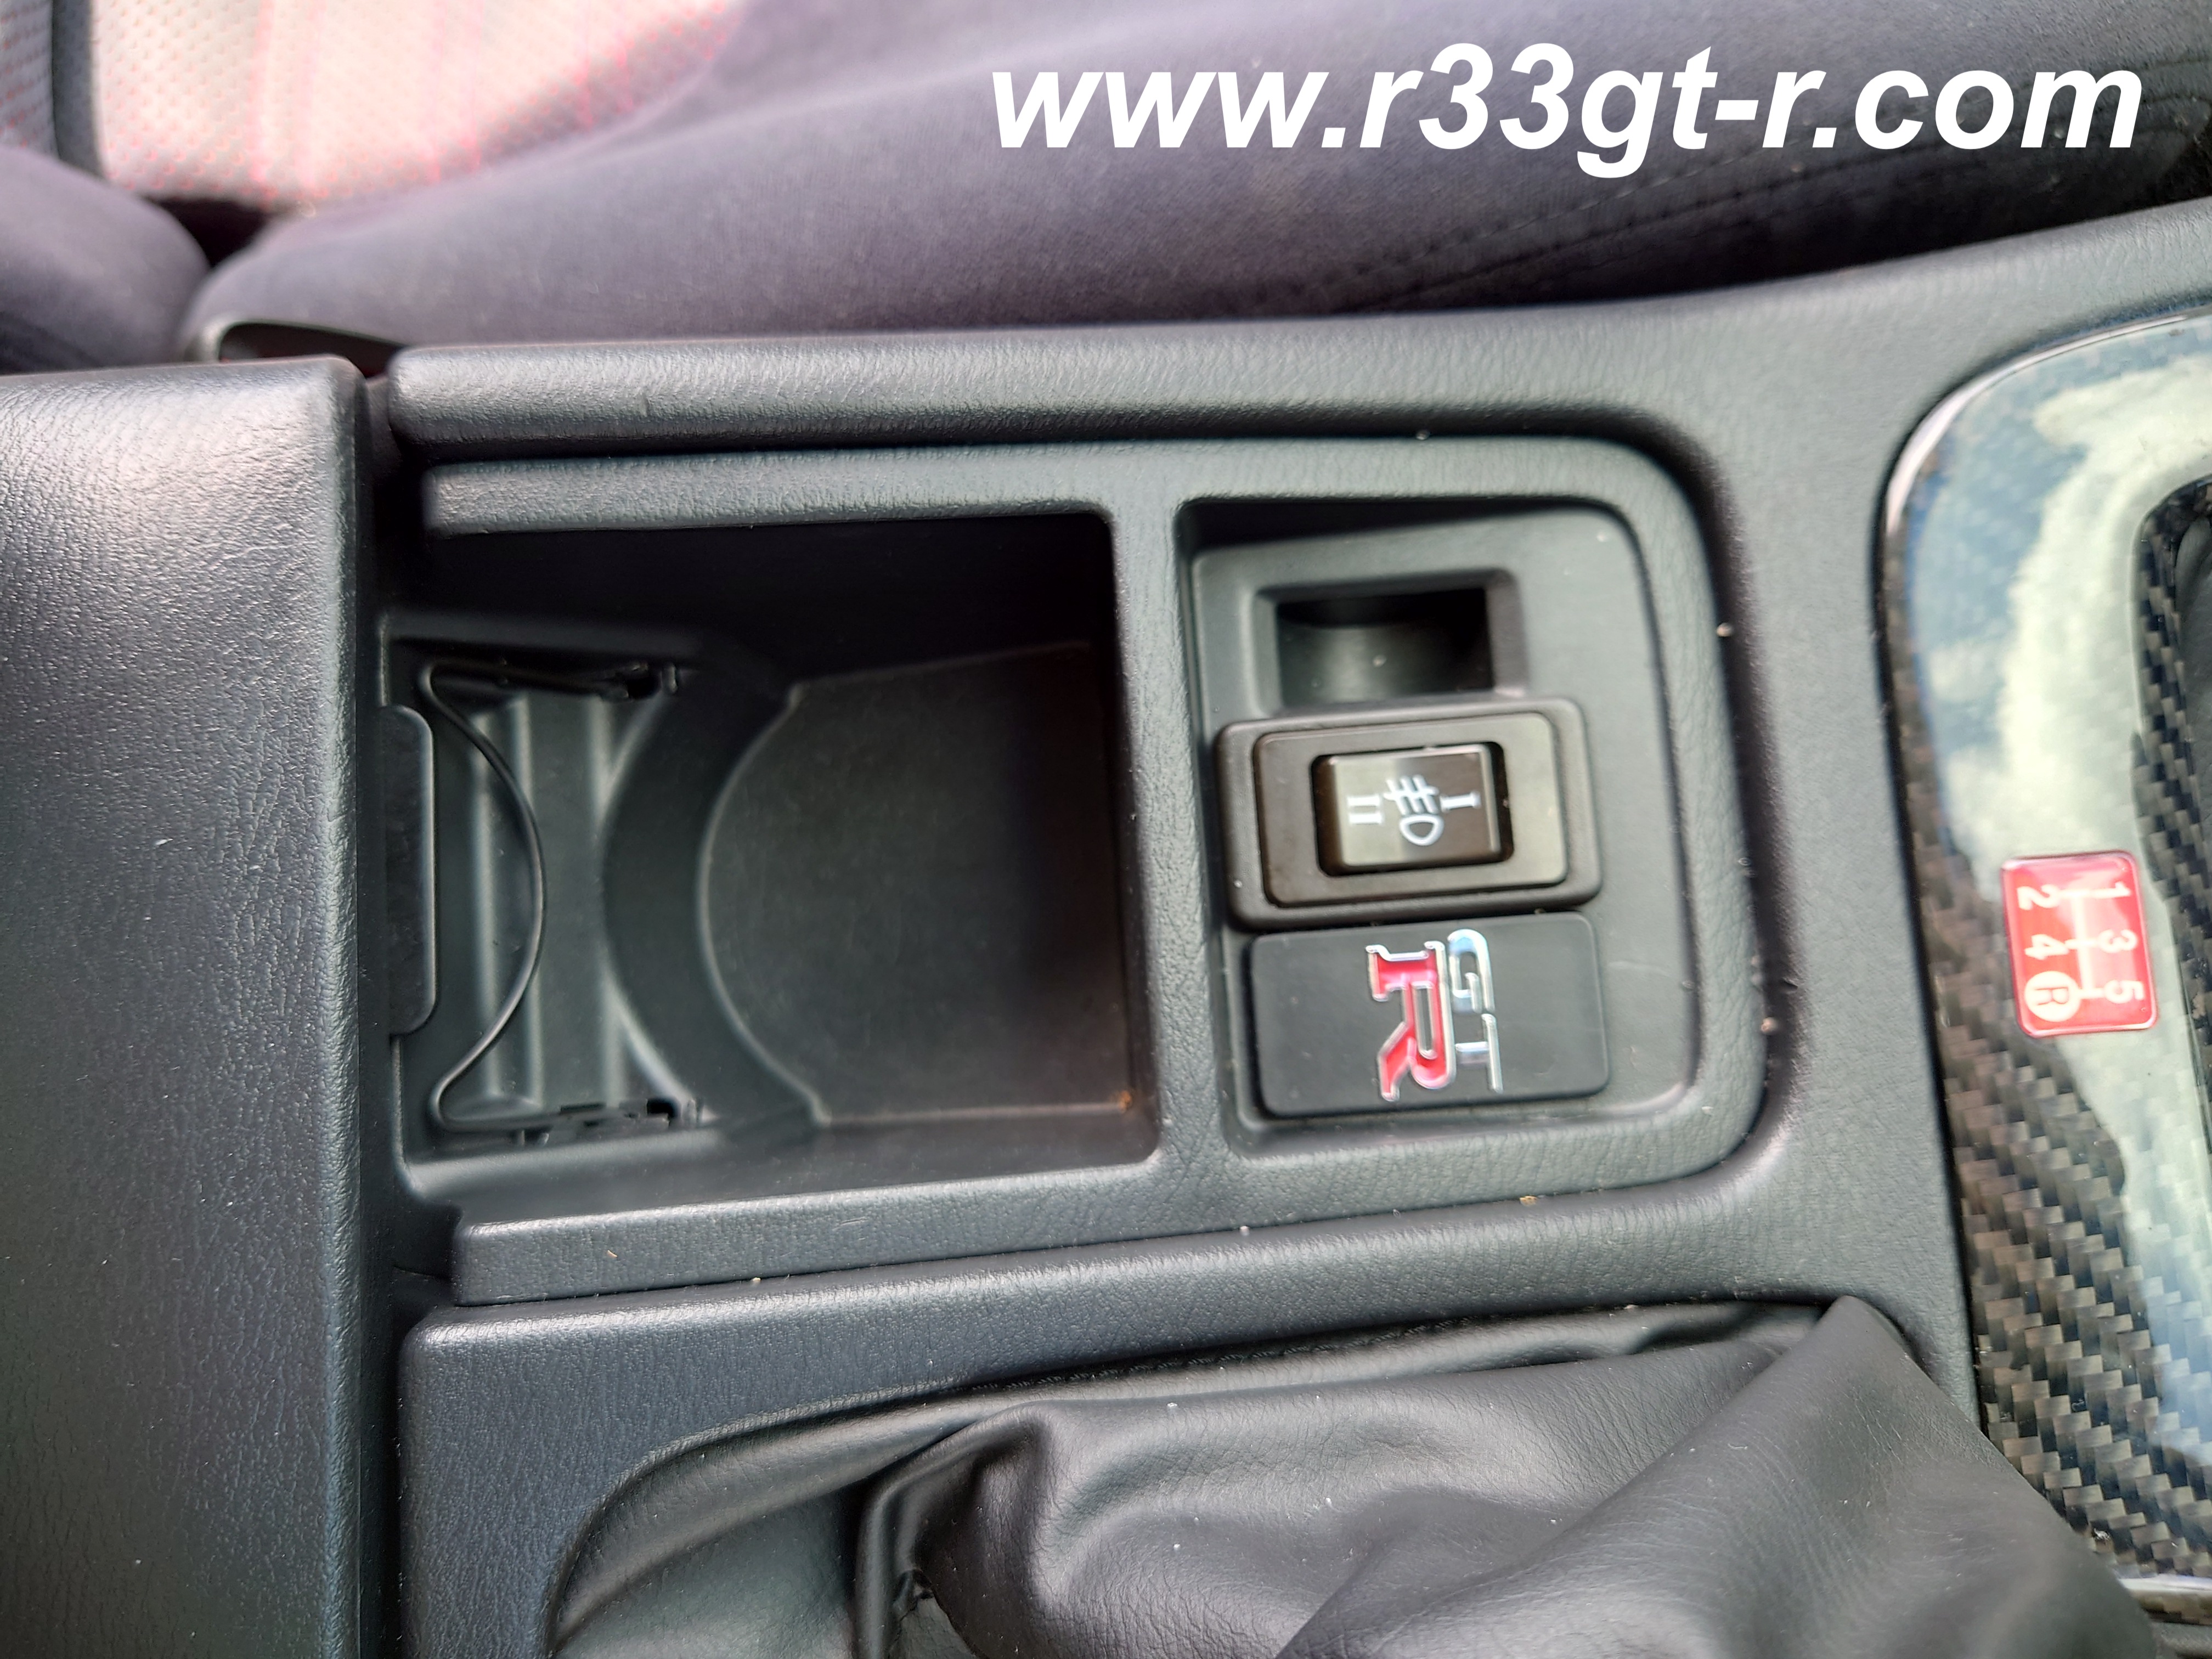
Lastly - and this is something new for me - as I learned something - is this OEM R33 cup holder.
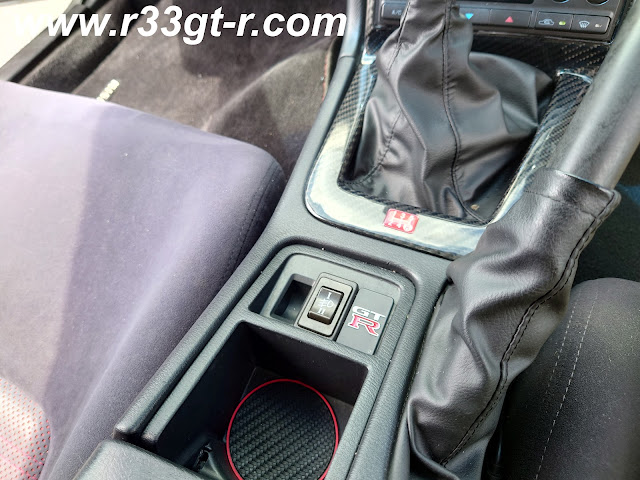
No OEM foglights yet, but Murray is on the hunt for a set!

Ok here is a better shot of the cupholder, without the carbon fiber insert:


So it turns out that the R33 GTST had these cupholders.  Unfortunately for the GT-R, the G-sensor needed for the ATTESA system that is mounted underneath this space prevents this part from fitting, but if you have already replaced the old analog G-sensor for a digital one from Do-Luck or Midori Seibi, then this mod is possible.

So this is another Murray mod that I may have to try out! Not that I EVER drink or eat in my car, but maybe if I get this part I will allow a water bottle in the car... lol.

Anyway, my thanks to Murray for taking time out of his day to swing by and let me check out his car.  I'll close this post with a fantastic photo he took... and I do hope we will be able to meet up again soon!

Sunday, April 25, 2021

So the Latest Work at Nismo Omori Factory... (Part 1)...Mostly Cosmetic?

As I mentioned in my last post, I had dropped off my car at Nismo Omori Factory for some additional work. This time, I decided I would take the train and walk there from the nearest station, which is Namamugi Station on the Keikyu train line. If you ever choose to do this, just make sure you have enough battery charge on your phone for Google Maps to guide you, although essentially it is a left out of the station onto the main road, then a right turn onto the large street that takes you all the way to Nismo, which you will see on your left after about a leisurely 20 minute walk in a very industrial, and dirty, party of Yokohama. Sad but true.

First, as many of you may recall during the car's long stay at Omori Factory we found that the OEM cigarette lighter wiring had been completely hacked out and the mechanics didn't have time to restore it.   So this time around the guys had to create a new cigarette lighter lead and wire it into the main harness. 

Not the original clip but it works

To show me it was working, Ochiai-san sent me this video:

That was the big one (I need to mount and charge my phone somehow!), but there were also a few other details that had to also be perfected. For example - a minor point but the valve stems of the aftermarket tire pressure sensors (post coming soon?) were silver and detracted from the overall look of the wheel. So I asked them to paint them all flat black to match the wheels.

Before:

From a past post - http://www.r33gt-r.com/2020/07/next-steps-at-nismo-omori-factory.html

...and after:

Looks much better, right? The RAYS caps look good too!

Speaking of wheels, for some reason even though they had done some wheel repair on the left side wheels, they had forgotten to apply the RAYS/VOLKS stickers. Oops - no way I could offer the car for a photo shoot, if I was lucky enough to be offered one, with such an important detail missing!

Before:

During the excess wiring removal project

After, close up of front left wheel:

But I also had some additional things I wanted to discuss, and hopefully have remedied. For example, while I was fixing the mess caused by Worx, restoring the stereo to the OEM cassette deck and adding a modern DSP amp, I realized certain areas of the interior could be improved.

For example - take a look at this, which I posted last time: 

While I was able to find both covers for the rear tracks of the front seats, for some reason I couldn't make the inboard ones fit properly, as I mentioned last time.

Somehow they got them to fit properly...thanks!

One thing that Ochiai-san recommended was to replace the door strikers with new ones - the old ones still worked, but were somewhat ugly from 24 years of use.  I forgot to take a photo of the old ones, but they were ugly, with the thin layer of plastic peeling off.

After:
Yeah, I have to remove that leftover oil change sticker residue there...

Finally, the trunk - when I finished wiring up the amp in the trunk, for some reason the interior trunk liners just did not seem to fit properly.  

I had noticed they were "off" when I took them out, and at the time I wasn't really paying attention but when I put it all together they were still off, and just didn't seem right to me that Nissan would sell a car with such messy trunk liners. 

Well this turned out to be an easy fix - those flaps that stick out from the side trunk liners, get tucked INSIDE the black reinforcement frame. Doh!

Much cleaner, but...

So much better, but the green arrows point to imperfections. On top, the flap on the center liner that attaches by velcro to the top of the left liner, is torn; and for some reason the left liner is cut? So now I will have to find OEM replacements...

Unfortunately, there were also a few mechanical issues that were NOT fixed - one was this weird sound that I could hear when the ignition was in ACC mode (excuse my breathing)... 

...which I traced to the servo that changes the direction of the air blowing into the cabin. After tracing all the wiring, I got the sound to stop by disconnecting the temperature sensor.  However, when I asked them to look into this, I had forgotten to mention that I had disconnected the temperature sensor. As a result, when they tested it, the whirring sound could not be replicated.  We agree it's probably just a faulty temperature sensor. Next time!

So is that it? Did I really just blog about a visit to Nismo where they did mostly cosmetic repairs, drop a hint about a future repair, and not even talk about sexy stuff like carbon parts or parts not normally found in the Nismo catalog?  Well, tune in for Part 2 tomorrow then...

Tuesday, July 21, 2020

Another Update From NISMO Omori Factory

So last Friday afternoon I got the following update from Ochiai-san...turns out that even though the crap alarm keeps interfering with the starter motor (so I guess the immobilizer works..., in a way... ha ha) work is progressing on other parts of the car.

One item that I had asked to be replaced with new...turns out it HAD been on the last go around. I forgot to check, Ochiai-san forgot to tell me... oops.
Forgot to ask them to replace the brake cooling duct with new...
maybe it can be refurbished, we shall see...
I also got an update of sorts on the new headlight bulbs.  If you recall from this past post, one of the Phillips HID bulbs had failed, and in order to pass Shaken the techs at  Nismo Omori Factory hurriedly installed an aftermarket bulb sold by Sphere Light.
Shaken approved and 1 year warranty. 
The company website claims OEM Quality... we shall see...
So here is a photo comparing the two:
New bulb on right side (left side in photo) appears slightly more blue?
And yes I like the Star Wars Landspeeder effect!
But strangely I did not get sent a photo of both installed. Either they did the install and Ochiai-san simply forgot to take an "after" photo or they are saving me a few yen by letting me install the passenger side one myself (frankly, it's the easier one to do as the back of that headlight is more easily accessible as you can remove the airbox to get clear access to it).  Either way is ok with me!


Finally, it looks like they installed the Ohlins DFV as I mentioned last time and have installed the newly refurbished (and of course, glass coated) wheels - note they haven't yet applied the Rays stickers yet - with the new tires mounted.  In addition to the requisite alignment they will also be lowering the car to the bare minimum allowed under the Shaken rules... so a few more cm for sure.

Meanwhile I'm also happy to report that Ochiai-san has found an alarm shop that is willing to help out with the alarm removal. It's not the same shop that I went to many years ago in Tokyo (where I will go again to get another alarm installed) but one that is an authorized installer of the same alarm system that WORX Autoalarm "installed." Hopefully Nakamura wasn't too clever and they can sort out the mess.

So hopefully by next week the car will be ready... keeping fingers crossed...

Thursday, October 24, 2019

Final Visit to NISMO OMORI Before The Work Begins...

So yeah another update...on my way back from the Tokyo Motor Show 2019, where I had been invited to the Opening Ceremonies (not worth it...), I stopped by Nismo Omori Factory.
You should have seen the confused looks from people in the parking lot...
Today they happened to be displaying this monster machine which I LOVE.


Anyway, after Takasu-san got off the phone he called me over and we discussed what we needed to do for my car. Details to follow in an upcoming post because I have a few R33 tidbits I want to share in this post first.

A couple of posts ago, my friend Ale had sent over a couple of photos of the new prototype carbon fiber air inlet Nismo Omori was developing for their show car. Naturally, I asked Ochiai-san to let me take a closer look.

First, I asked why the half shroud slam panel. As I guessed in the previous post, indeed this is to let air into the snorkel. Ochiai-san claims that most slam panels effectively prevent adequate air flow from going into the snorkel. Obviously I have my ram air idea and Ochiai-san agreed that, like the built in scoop found on the BNR34 carbon bonnet, it would help as well.  Personally, I think it's a cleaner solution but heck I'm not in the business of giving them too many new ideas... lol.

As for this piece, the large hump is indeed to clear the radiator bolt mount, and it was shaped and formed like that as it's the easiest (and thus cheapest) way to do so.

I felt back there and there is nothing there, in that the carbon fiber smoothly wraps around where my index finger is. So everything behind what is visible is essentially open space.  So the hump isn't as intrusive as I thought. In fact Ochiai-san claims that, this piece allows more air flow than the OEM ABS part which has to be melted in places to allow for the Nismo air inlet pipes.


The reason for this odd shape - on the left side the snorkel is fairly low - is to allow for the OEM bonnet to shut closed.

If you remember this version:
courtesy of Speedhunters
This was apparently designed for use with the 400R bonnet. In any case I think I like the other one better.
Thanks for showing me the engine bays!
 We then walked over to my car to check out a couple of things. First, the alarm key fob was acting up, meaning they had to push my car around as sometimes they couldn't get the car to start. Second, as mentioned earlier they had noticed the longitudinal Do-Luck brace bars got very close to the jack up points and wanted to show me - apparently the area underneath that could use some cleaning/refreshing. The Do-Luck bars make it difficult to clean under that area.

Fooled me too! Same color, ALMOST the same wheels...
My car! Like meeting up with an old friend I hadn't seen in ages!
To get the car to start, Ochiai-san and Takasu-san had to hook up their portable battery jumper...


And then I had to walk them through the confusing menu on the key fob. But once sorted, I couldn't believe how smoothly the car started up! I was so excited to hear that familiar RB26 rumble again!
And maybe my excitement at hearing the car start up is why this photo is blurry...
Anyway - it was good to know that my car is in good hands. Apparently it's been there so long people are starting to ask questions, so it's good that the NISMO project will finally begin, scheduled for November 10.

So what work - well all I will reveal at this point is that it DOES involve new NISMO parts, as well as some rust removal. Where and how - well that is for your future reading pleasure!

Bonus photo of me grinning it up inside the Omori Factory...