Showing posts with label BNR34. Show all posts

Friday, November 1, 2024

Meeting The Father of the R33 GT-R, Kozo Watanabe!

At this year's R's Festival, I had the honor of taking a photo with Kozo Watanabe, who was the Chief Vehicle Engineer that oversaw the development of the R33 GT-R and the R34 GT-R.

Here is the Wiki link for him.


Much like Kazutoshi Mizuno for the R35 GT-R, and Naganori Ito for the BNR32, Watanabe-san is a true engineer who worked his way up at Prince Motors and Nissan.  Watanabe-san in particular, in addition to being the chief engineer for the R33 and R34, also worked on the Pulsar and the C110 Skyline and was also the Chief Experimental Engineer of the R32 under Ito-san.   Both Ito-san and Watanabe-san were mentored by Shinichiro Sakurai, who is acknowledged as the father of the Skyline. Further Mizuno-san worked on the R34 project under Watanabe-san and took over the BNR34 program when Watanabe-san retired from Nissan in 2000 and went to head Nismo, overseeing its racing program!

Watanabe-san had probably the toughest job ever - how to make a heavier and longer car go FASTER than the race champion R32 GT-R! And as we know, he succeeded so well that most of the running gear engineering on the 33 was carried over to the 34!

So you see, THESE guys are the ones who should be getting accolades as well as the nickname of the "Father of the GT-R" - as they truly were.  Unfortunately there is at least one guy running around now who is over stating his involvement in each of the programs, whereas his true talent seems to be in the area of self-promotion.  Caveat Emptor!

So... if you find yourself at any of these GT-R related events, and happen to run into Ito-san or Watanabe-san... well now you know who actually to ask the question - "Why didn't Nissan have a Nurburgring lap time for the BNR34?"

Saturday, September 3, 2022

I've Met Another Crazy Kohki KR4 Owner

Recently, a fellow R33 GT-R owner messaged me on this blog about how he had successfully used a BNR34 part on his car. Murray (Follow him on IG: kaizen.r33) currently lives in Okinawa, Japan, so when I found myself there for a couple weeks of special work, it was natural that we would meet up in person just so I could check out his car (his daily!).
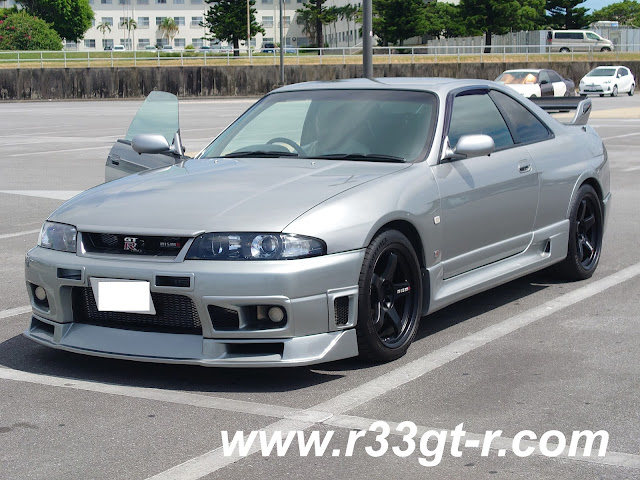
Beautiful! Love the quasi 400R look, reminds me of my car. And the Nismo intercooler
venting is awesome!

Once we met up, of course I had to check out in person what he had tried to explain to me via email and photos about his mod using the BNR34 rear strut tower board, which being two layered (vice the single layer BCNR33 piece) provides more rigidity to the rear of the car.


So I could tell immediately that this looked different from the usual 33 part.  First, the Nismo Performance Damper appears (and is) shorter, but that is because its mounting points are different - you can see in the next photo (kindly provided by Murray) that compares the 33 and 34 rear boards - the 33 is one piece so the rear strut bar (and thus the Nismo Damper) connects on top, while the mounting for the 34 strut bar (and thus Nismo Damper) is a separate piece that lies on top of and bolted underneath the rear board.  Murray told me that because of the different lengths he had to buy a new Nismo Damper for the rear. Because Nismo only sells in front/rear pairs, he sold his new 34 front one on Yahoo Auctions.  
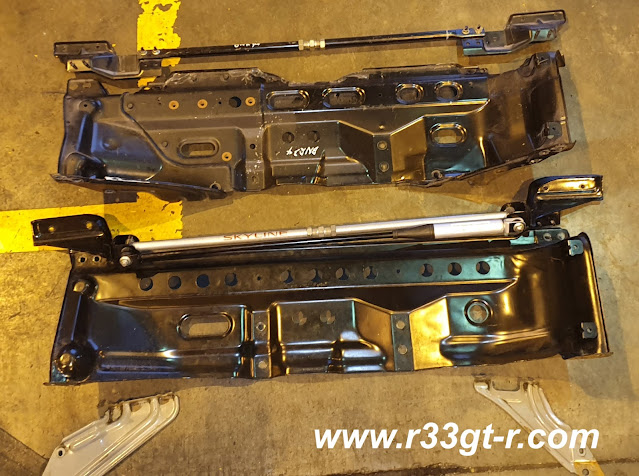

Additionally, Murray informed me that, compared to the 33 board, the 34 board has 4 extra recessed holes, probably M10x50mm in the standard 1.25 pitch. He says the Series 3/Kohki cars already have these holes drilled at the factory so he had no problems adding and tightening these extra bolts down. Otherwise, as I reported in the GT-R magazine article post, this part is a direct easy fit requiring no mods to either the car or the 34 board.

Murray reports he could immediately feel the difference - an increase in rear stability - and this makes sense as the 33 is longer than the 34 and thus I would suspect that an increase in rigidity here in this area would do wonders in how the car feels.  Certainly makes sense given how this 33 was used as the basis for improvements that would end up in the 34. Incidentally, I forgot to take photos, but Murray also has the S15 trunk bar installed as well, so the improvement I think might be noticeable in my car as well.

I am very, very tempted to do this mod! I will have to research the Damper issue- whether the change in structure is effective, etc. Ideally I want not to have to buy a new Nismo Damper...

But of course I had to check out the rest of the car.  I had already noticed that this car was running those beautiful Nismo semi-gloss LMGT4 wheels, and I could already spot some brake mods.
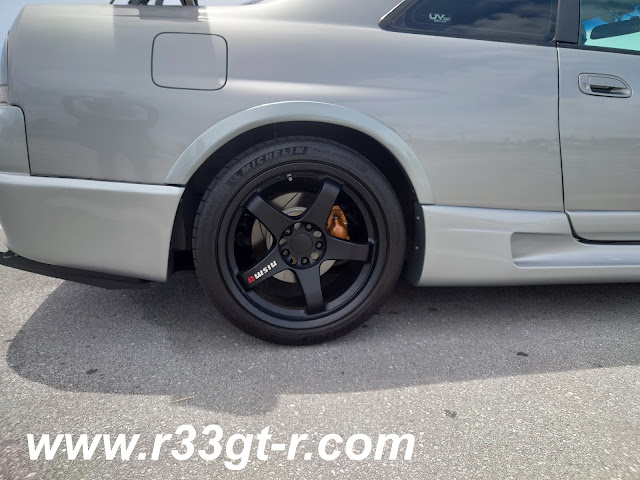
And yes we agreed on tire choice too - PS4S

These are ACRE Dustless-Real pads and Dixcel FS 6 slot rotors. He has the 400R fender flares but told me that Nismo no longer offered the ones for the front. I will have to look into this, but meanwhile we discussed how the Nismo R35 brake package does wonders for the braking ability of the car.  I think if Murray ever takes his car to Fuji Speedway, he will realize that the OEM brakes are the weak point of the car. I did advise him to stay away from adaptor brackets made elsewhere, unless he can overcome the shortcomings I found with the set I sourced from the UK. 

While still at the rear of the car, I noticed that Murray had also installed a BNR34 rear diffuser. But it looked different than mine. And it's not just the 400R rear bumper.
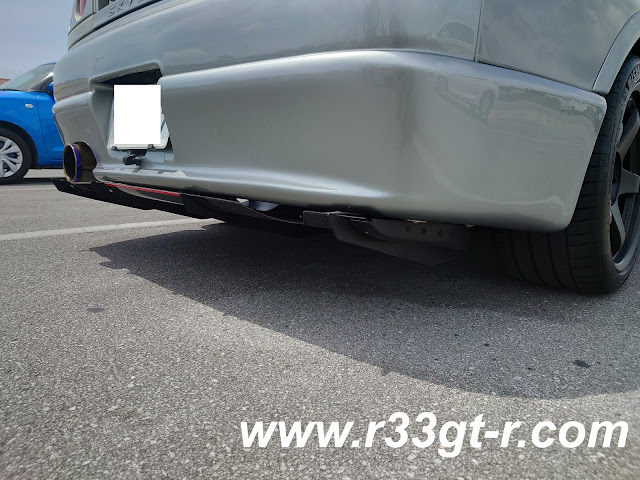
I forgot to ask if the red taping is reflective. If so, nice touch!

Turns out that Murray had the rear diffuser custom-made by CW-collective.  No photos from me as my knees were not cooperating that day (but check out Murray's IG), but I did notice how clean the exhaust cut-out was.  Murray did remark that compared to the OEM 34 version, he did not have a jack up point (so he has to use the arms), but otherwise the install was very clean.  And he even used the OEM 34 plastic fins, which is a smart move because they can get damaged when backing up (although I did not see any damage to the fins on his car).

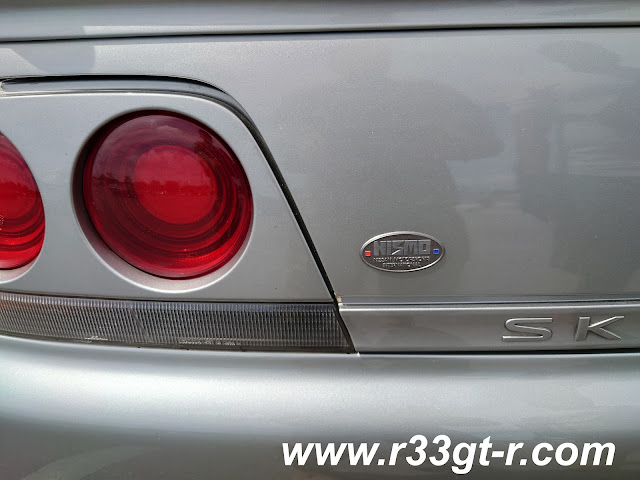
One more interesting piece in the trunk area was this old-style Nismo badge that is no longer available.  I suspect that Murray and I may have been competing on Yahoo Auctions for the last few years over the same parts...

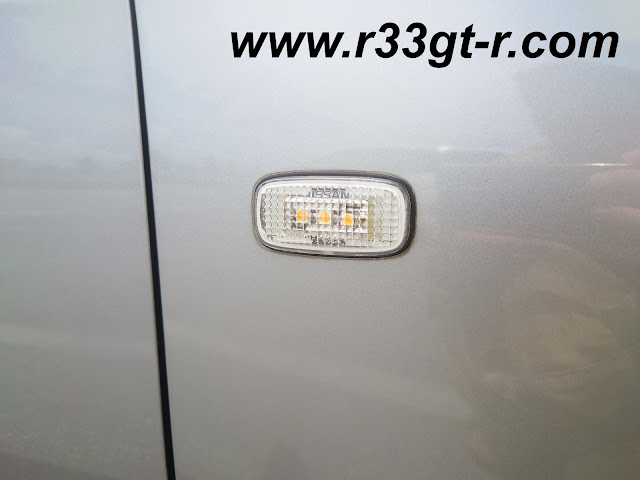
I also spotted this side turn signal that Murray says came with the car. Yes I have advised him to get it changed out for a more inconspicuous part.

Anyway a well put together and a very clean look that works! (despite the shaved off trunk lock - done by the prior owner of the car).
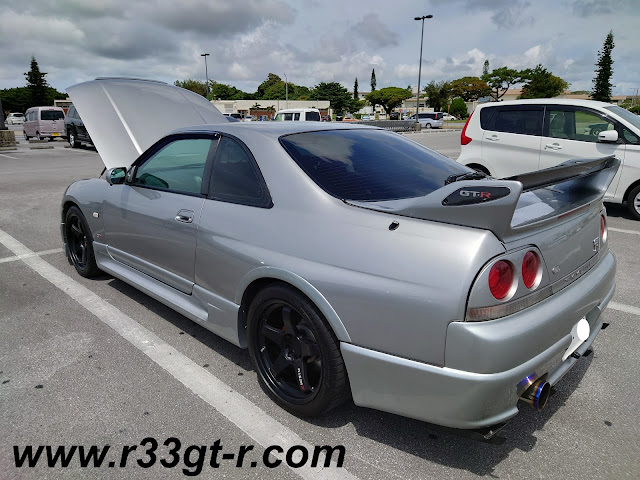
And the car has a replica carbon 400R double blade rear wing

Ok so let's check what's under the hood(bonnet!).
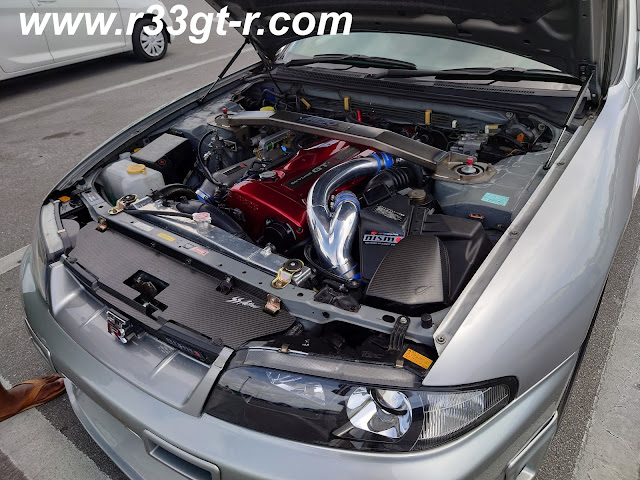

Hard to tell at this angle, but Murray reports the new HKS GTIII-2530s work really well. I also spotted the carbon fiber Nismo Omori Factory original air intake - great minds think alike?  Also hard to tell at this angle is the deletion of the OEM CAS for a more modern trigger kit, with the engine now controlled by a Haltech Elite 2500.  And yes that is a MASSIVE front strut tower bar! 

I also noted that he was running a non-standard front lip. Murray reminded me that this was also a Nismo piece, I guess my focus has been on other Nismo parts as it didn't register with me when he told me!
A better view of that massive Midori Seibi tower bar

From what else I can recall, Murray told me that he had gotten his Xenons redone with a much brighter bulb set-up, retrofitted with G5-BRT projectors from Lightwerkz Global. Additionally, he told me he is running a very interesting cam set-up - 290 on both intake and exhaust with 10.8mm clearance.  Sounds awesome, but he admits that the decrease in engine pressure was causing him some brake pressure issues; hopefully the Auto Select Large Capacity Brake Master Cylinder he is getting installed soon will mitigate the issue.

But wait - what about the interior? Hold on as this was, to me, the highlight of the tour.

First, I noticed the real carbon treatment on the dash surround. Not my taste as I like matte and not gloss but it worked well here actually. Then I noticed the Garage Yoshida sourced HVAC relocation kit, and the 2DIN screen.  Yep, been there, done that, except of course not Garage Yoshida. 

But of course, I then saw that the instrument cluster is the old Nismo option that has the center screen. Murray told me he sadly does not have the Epson EJ1 computer module that came with it - he is on the hunt for it. 

I would argue however that he does NOT need it. Yeah I know not OEM, but his current execution is WAY better:

And if that wasn't impressive enough, once past the welcome screen:

Here is a close up:


Murray says he was inspired by the R35's graphics when he configured this set up! I am very, very impressed with this!

I really think this is way better than the original:

I mean if you are going to Resto-mod... let's make it modern, right!?

But this wasn't his only interior mod. Check out his camera mount.

We were joking that maybe this gave some more body rigidity as well. Looking forward to whatever video Murray takes from this!

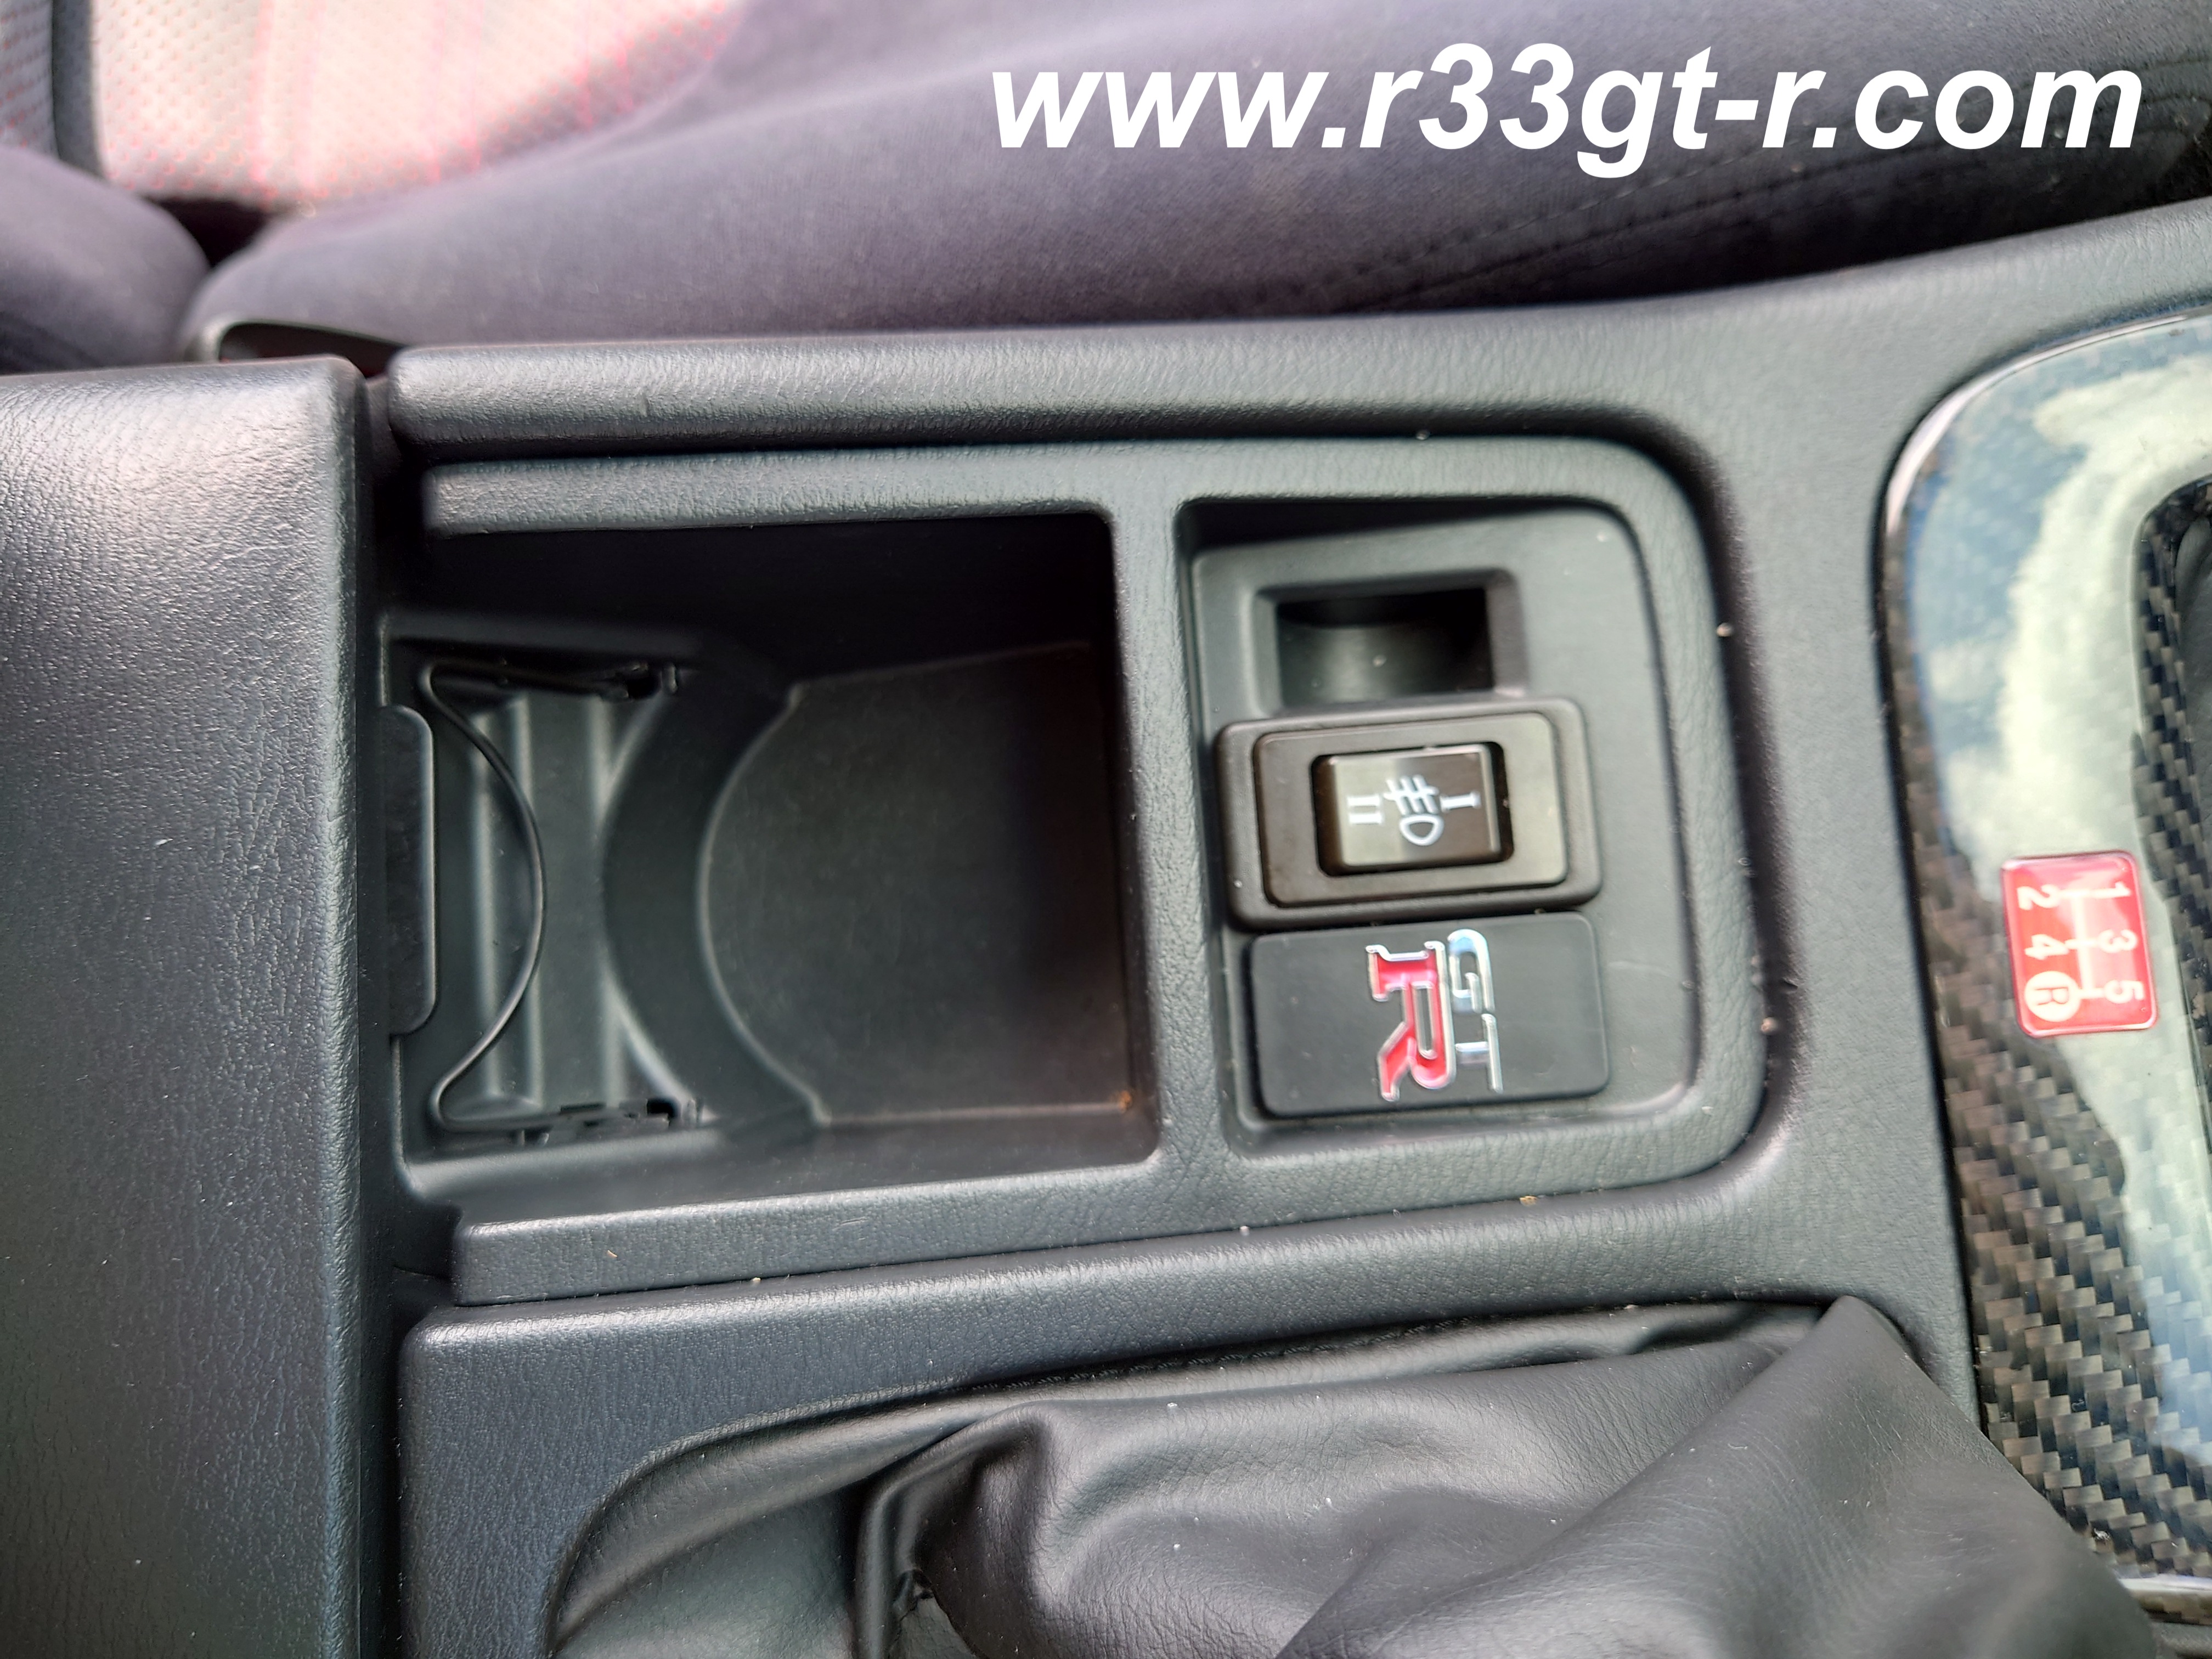
Lastly - and this is something new for me - as I learned something - is this OEM R33 cup holder.
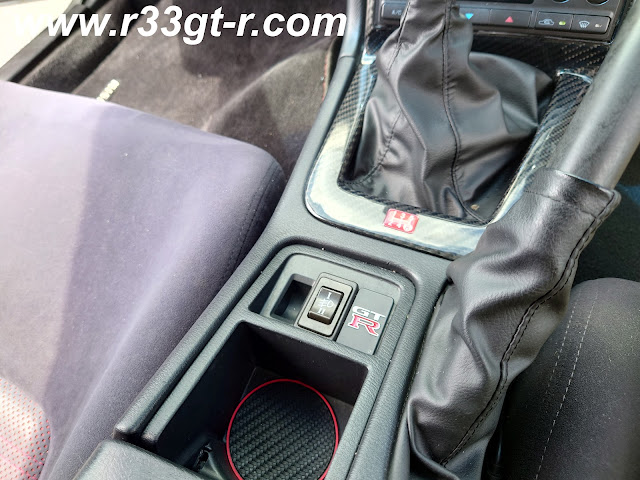
No OEM foglights yet, but Murray is on the hunt for a set!

Ok here is a better shot of the cupholder, without the carbon fiber insert:


So it turns out that the R33 GTST had these cupholders.  Unfortunately for the GT-R, the G-sensor needed for the ATTESA system that is mounted underneath this space prevents this part from fitting, but if you have already replaced the old analog G-sensor for a digital one from Do-Luck or Midori Seibi, then this mod is possible.

So this is another Murray mod that I may have to try out! Not that I EVER drink or eat in my car, but maybe if I get this part I will allow a water bottle in the car... lol.

Anyway, my thanks to Murray for taking time out of his day to swing by and let me check out his car.  I'll close this post with a fantastic photo he took... and I do hope we will be able to meet up again soon!

Saturday, February 17, 2018

GT-R Magazine Article: Using Bolt On BNR34 Body Reinforcement Parts for the BCNR33

As some friends from the ClubR33 Facebook owner's group had given me a heads up that this month's GT-R Magazine (#139, 2018/Mar)...


...had an interesting article featuring how a Japanese tuning shop, Garage Yoshida, had developed a menu of BNR34 bolt on parts in an effort to improve the BCNR33's body rigidity, I went out and bought this issue in the hopes that the content would be worth sharing here.  I was pleasantly surprised!


As I had learned in my research on the objective differences between the BCNR33 and the BNR34, Nissan put lots of effort into improving body rigidity (along with aerodynamics, of course) in the BNR34.  This month's article provided even more insight, as follows.

1) The BCNR33 and the BNR34 are, save for the extended chassis, basically the same mechanically.  Nissan developed bolt on parts to improve body rigidity of the BCNR33 over the base R33 chassis based on the input of Nissan's top test driver, Hiroyoshi Kato, during the development of the BCNR33.  It turns out that the locations of these bolt on parts are essentially the same for the BCNR33 and the BNR34, and that for the BNR34, these parts were revamped for even better body rigidity.  So, Garage Yoshida decided to offer an "R34 Body Reinforcement Plan."

2)  Some of the parts may require a bit of extra work to fit.  The basic difference in parts are increases in the size/area of the part bit that is attached to the body, and reinforcement of the part itself. For example the diameter of a tube may be similar but the BNR34 part has extra ribbing on the base, or the base has dual layers, in other words changes that are cheap (for Nissan) to implement. 

3) As these parts were developed by Nissan, unlike some aftermarket parts from various tuners, you can be assured that the parts were subjected to R&D and thoroughly tested.

So, what are these parts?


As you can see from above (and my summary below):
Starting from, left top to bottom:
A) Trunk Bar.  I installed the S15 trunk bar on my car, but the 34 one is installed differently. First, the trunk floor needs to be prepped as there is a base that needs to be welded to the floor and then painted. The trunk bar attaches to that base.

B) Front Tower Bar.  I have the NISMO titanium one, but when comparing the OEM BCNR33 and BNR34 front tower bars, you can see that, although the diameter of the bar itself is the same, again the base mount area is different. For the R33, the base bracket is simply welded on, but in the 34, in addition to the welding, the shape of this bracket is different and has ribs.

C) Center Plate.  These center plates are attached at the base of the B pillar area for additional rigidity.  For installation in the 33, the floor side is bolted on, but the pillar side apparently requires a gusset, to which the center plate can be attached. I will have to look into this, although after having the Do-Luck Floor Support Bar bracing installed I am not sure there is much to be gained in my car.

D) Upper Plate.  These connect the body and the rear upper (coilover) mount areas, resulting not in body rigidity but more vibration suppression.  All it takes to install in the 2 door coupes are drilling 2 extra holes.  I am DEFINITELY going to install these, someday.

E) Steering Member.  The BNR34 version has larger diameter piping in some areas and gussets added to the attachment points, presumably to increase steering response. However this requires removal of the dashboard and so for me, having just had my dashboard replaced, a lost opportunity. Although most people who have driven my car have praised the steering so not too worried...

Right top - F) Rear Strut Tower Board.  This is the bolt on part that results in the biggest improvement. The BNR34 board is dual layered, and so its overall rigidity has increased.  For the BCNR33, the lower part of the panel was separate, and in the BNR34 this section has become unified with the main part.  For Series 3 kohki cars, this BNR34 part is an easy bolt on, but for Series 1 zenki and 2 chuki cars, some work is required as the floor shape is slightly different and so some heating and painting are needed.  Another part I definitely want to get installed.

Right middle - G) Front Cross Bar.  The BCNR33 part has a diameter of  25.4mm, while the BNR34 part is 32mm. Additionally, the gusset and ribs are thicker, with more surface area attaching to the body.  I have installed the NISMO Underfloor Front Brace, which replaces this OEM part for both the 33 and 34. I will have to check to see if the 33 and 34 NISMO parts are the same (the parts number is different but I don't know if the dimensions are) but I doubt I will change as the NISMO part seems to be designed to improve even the OEM 34 part, and so if the 33 NISMO part is shaped the same, then I suspect the NISMO part has better results than the OEM 34 part. 

So friends, this gives me some other stuff to think about and possibly install this year, in addition to my continuing interior modernization saga! Comments always welcome and thanks for reading!

UPDATE: I just called Nissan Prince Tokyo Motorsports, and this is what they told me:

That Nissan Prince Tokyo Motorsports is where GT-R Magazine shote the photos used in the article, using the magazine's own R33 GT-R. AND, truth be told, the usage of some of those parts are questionable in the opinion of the top mechanic there.

For example, the Rear Strut Tower Board - even the the article claims it is "bolt-on" for Series 3 kohki R33 GT-R, the mechanic is claiming that isn't exactly true.  Some minor mods are probably needed to make it work properly.

The Center Plate, as well - see how, in the photo, the right side of the piece rises up towards the B pillar? This means that the rear seat cushion now won't lay flat, as you will have to literally cut out a section of the rear seat to make it fit properly again.

Of the 3 parts I was interested in (the aforementioned 2 plus the Upper Plate), I would probably only install only the Upper Plates.  Except that since it's quite tight back there and holes need to be drilled, I would likely do so only in the event I have to replace the rear window.  Luckily, I was told there are plenty of these Upper Plate pieces in stock, AND they only cost 960 yen each.

So, I guess this won't be happening anytime soon... On the other hand, looks like I've got the other areas covered already. So, time to focus on other stuff...

Saturday, April 11, 2015

I Had An Affair!! Ok not really but... (plus my driving impressions of a 34 GT-R)

So for the past few months, in addition to my R33 GT-R (on the other side of the center wall), I've had THIS:


Living in my garage.  No, I haven't decided I have a sudden need for an R34 GT-R; my friend Ross in Canada happened to buy a near pristine KR4 (same color as mine!) zenki (1999) BNR34 at auction (with only 20,000 kms!) and needed a place to store it during the snowy season in Canada.  He would then have the car shipped to him in March, to arrive just about now.

Naturally, as a GT-R fan I couldn't say no, plus I had that extra space doing nothing.

Here's a video shot by Derek Wheldon of Pacific Coast Imports, who did the actual buying of the car at auction for Arneja Trading, the agent who imported it into Canada for Ross.

First order of business once the car was in my hands was to take the car to RAPT to get it properly detailed, and those ugly foglights removed.  Kabe-san, giving the car a once over, believed the car's mileage to be genuine.  However, he postulated that the car must have been left outside for much of its life.  Clues to this included some hairline cracks in the paint, some discoloration spots UNDER the clear coat, etched in rain spots on the glass and flat surfaces, and a badly cracked old style Nismo sticker on the trunk (as seen in the video).

As many houses in Japan don't have enclosed garages, this wasn't necessarily a sign of abuse; in fact given that many Japanese live in apartments, outside uncovered parking isn't unusual. In any case, I was confident that Kabe-san could either fix or minimize the damage, and 72 hours after I dropped the car off, it looked like this:
Amazing what a professional detail can do!

Weird black spot under the clear coat.... at least this is on the bumper, easily resprayed (you can see Kabe-san's reflection!)

Note yes that there are still a few places where a respray will be needed, but to me a respray is cosmetic and takes nothing away from the mechanical condition of the car, which is what is most important.

Anyway, once I got the car back from RAPT, I ordered a car cover, and put the car away for a few months.

Meanwhile, Ross had found out that my friend Dino Dalle Carbonare was looking to sell his Mine's BNR34 titanium muffler and Mine's BNR34 carbon wing mirrors.   A negotiation ensued, a price was decided - and then someone (me) had the brilliant idea that, since I have a long running relationship  with Mine's - why not get Mine's to install those Mine's parts? Plus, do a once over mechanical inspection to ensure the car was in good shape.  So I called Mine's and arranged for a little visit to do all this in early March.

So the day we went to Mine's the skies were overcast and it was drizzling...
just my luck, as it hadn't been outside since the detail...

On the way I had to get some gas... and the tires felt a bit soft for some reason...
Arrival at Mine's...yes despite being Italian Dino was there EARLY and I was 30 minutes LATE...
Some good company... that NSX-R was awesome!
The car gets pulled into the Mine's garage. World famous Nakayama-san (center) is ready to go
Last shot of the RSR muffler,
shortly before it was yanked off to be replaced with Dino's old Mine's titanium unit
When all the parts were put on, and the car given a clean of health - of course we had to ensure that people knew that Mine's did the work:
Mine's Takayanagi-san putting on the sticker....Turns out the sticker on my car was never offered for sale publicly...
found only on certain cars like their demo cars and a few select customer cars!  yay!
OK - now for what people really want to know - my driving impressions.

First, it wasn't my car, so I wasn't going to go crazy with it (and, as Nakayama-san at Mine's pointed out later, the tires were hard and cracked... could they be the original OEM tires?!! I knew they felt funny).  Second, I only drove in the city and the expressway. Third, it's hard to compare this 34 with my car because my car is tuned up both in power and handling - however I have tried to compare to what I remember when I got my 33 back in 2005 when it was near stock.  Also, this 34 had an aftermarket exhaust and suspension, so that may also have affected my perceptions.

First, the good. The engine, given how little it's been used, absolutely purrs. But, I also believe that build quality must have been better, as my car's OEM engine, with only 50,000kms on it, was not as smooth.  Clearly, there is also more boost off the line, which makes the car feel more peppy? In any case the engine felt "just right" -not weak, not overly powerful - for the job.  And this could have been the gearing as well - in any case, the car felt very easy to drive.  Also, the body rigidity was clearly better (I think mostly from the extra rigidity in the C pillars/roof area), and yes the car does feel a bit smaller than the 33.  At expressway speeds, however, the 33 is a better drive - a bit more stable, although I think the 34's underbody aero does a lot to minimize the differences.  However, the 6 speed Getrag on the 34 sure is nice to have, as 6th acts as an overdrive to lower the RPMs at speed (and thus makes the engine and thus car a bit quieter).

Next, stuff that is not necessarily good and not necessarily bad.  I am not sure to what extent this is due to the narrow OEM tires, but the steering was extremely light, and also somewhat numb.  The car felt like a luxury sedan in that respect.  I definitely wanted more feedback, and would have preferred less power assist. But, it did make for extremely easy driving in the city.  So together with the gearing and the extra boost, Nissan DID manage to accomplish one of its goals, which was to make the car easier to drive than the 33, which was deemed fast enough.

Also, I liked the Multi Function Display - it was fun to fiddle with, but I am used to 3 gauges and so having only 2 there... but the ability to change the display is cool.  The MFD would probably be useful on the track, if it was preset to show the important stuff like oil temperature and boost.

yes, fun in the beginning but do I really need all that info?

Lastly, the bad.  For the price of the car, Nissan really cheaped out on the interior of the car. The car's interior is much more plasticky than the 33. Yes the 33 is plastic too so it must be a different type of plastic. The seat fabric too, even though the seats are desirable from the perspective of having two harness holes, the fabric itself felt cheaper vs the suede-like material in the 33.  Continuing on the interior - the gas level and engine temperature gauges in the gauge pod are huge, compared to the 33. Frankly they were distracting to me, I much prefer the cleaner 33 gauge pod (plus, the straight down and 90 degree needle positions on the 33 give that car character... in the 34 they are like just like any other car...)

Meh... just doesn't look as good, sorry. And does a stock 34 really rev up to 9000?

Subjective, I know, but somehow it just looks better

So there you have it - my impressions of the 34 vs the 33. Clearly, these cars are very similar - and it makes sense as the engine and chassis are fundamentally the same.  The differences, both good and bad, are minor, and nothing that money can't fix or improve.  Again it would have been nice to see the differences on the track but that wasn't going to happen, hence my picking on relatively superficial aspects of each car.  Hopefully sometime in the future I will be able to drive a 34 similarly tuned to the specifications of my car, so I can do a direct comparison!

In any case - a week after the Mine's visit the car was picked up to be put onto the ship. Thanks Ross for trusting me with your car - I certainly hope you enjoy it!
Still looking good for the trip overseas!
The Mine's Titanium Exhaust and decal look good!
I wonder what will end up in my garage next?

Sunday, November 2, 2014

Flash Back Post - Aluminum Pedals

Since I haven't heard anything from Mine's since my last post, I've been trying to clean up parts of this blog.  For example, I updated my Spec List page and realized that I had made some mods, and even took photos, but had forgotten to post when I did those mods!

So, time to post and get those photos up. First up - aluminum pedals.  This I did back in April, 2010!

From a distance, the OEM pedals sure look boring and ugly:
But look closely... the "R" on the clutch and brake pedals

To be honest, I was hesitant to do this mod.

First, note how Nissan has actually inscribed the "R" on the pedals themselves. GT-R specific? Probably! But old and getting worn...

Second, aluminum isn't going to be very useful if the soles of my shoes are wet from rain.  Then, I realized that since I almost never drive in the rain, this should not be an issue.

Out of excuses, I went ahead and ordered a set from Nissan. Note in the photo below there are three "bush" - but if I recall correctly, only two were actually needed (I can't recall where I got the part number list.  Unfortunately, I also don't remember which one bush I didn't use, but as they are cheap parts, I would go ahead and order all 3 if you are going to do this mod, unless you have access to a proper parts list).

These began appearing on the later model BNR34s
No instructions were included, but this can't be that hard. The foot rest was a simple bolt off and bolt on affair.


Next up was the gas pedal. Note the difficult part here was, getting that clip undone that holds the top part of the pedal. A small standard screwdriver is handy here.

holding the pedal upside down (narrow end on top)

The aluminum pedal - I can't recall exactly, but I seem to remember that you had to be careful to force the bottom piece (onto which the metal pedal arm hooks into) in. The top piece is self explanatory.
I don't know what that piece on the right is?? I think it wasn't needed.
Turned out that the brake and clutch pedal were the most difficult to get on. I ended up using a hair dryer to soften up the rubber, and then quickly stretch the rubber part on the back side of the pedal around the metal pedal arm portions.


Here is the aluminum pedal installed, from the back.


And finally, the end result:


Looks good! Yes, I lost the "R" factor, as these same pedals are now found throughout various Nissan vehicles. Still, I can't complain as they look good and I GUESS the small rubber sections on the left and right of the brake and clutch pedals act as anti-slip mechanisms for wet shoes.

Also, yes I have seen Nismo branded aluminum pedals, but was never sure if they were fake or not. So I stayed away from those, even though I'm pretty sure Nismo did at one time have such parts available.

In any case, this was one more small thing I did to help "modernize" the car - heck if Nissan installed these on the later model BNR34s, then of course they would have put these on the R33 GT-R had these parts been available back then, right?