So although I've previously explored the differences between the R33 and R34 GT-Rs, and discovered that while the running gear basically stayed the same, with improvements to body rigidity and aerodynamics (as well as styling, of course) being the main differences, I hadn't yet really looked into the differences and improvements between the R32 and the R33 GT-Rs.
Nissan had a problem - the R32 GT-R was spectacularly successful - and its successor the R33 was bound to be in its shadow unless it was substantially better both subjectively and objectively. While R33 haters may not like to admit it, the R33 GT-R is a technically much improved car over the R32 GT-R - so much so, if you recall the objective when designing the R34 GT-R, Nissan's goals were not to make it any faster than the R33 (it was deemed fast enough), but rather, just easier to drive for the average driver.
In any case, with all the information I found, I've split the discussion into two parts - this post, Part 1, which examines the improvements in the exterior (design and aerodynamics) and the "High Traction Layout" (balance and body rigidity), and the next post, Part 2, which examines the Engine, ATTESA ETS PRO, and Super HICAS.
Exterior Design and Aerodynamics:
When development of the R33 (the general model, NOT the GT-R) began, it was initially conceived that the 2 door coupe would ride on a shorter wheelbase than the 4 door sedan. The coupe was to have a shorter hood as well (further, no turbo model was contemplated). This all changed, however, when Nissan decided to put the coupe on the same wheelbase as the sedan.
We all know that the R32 GT-R excelled in the Group A racing series in Japan. However, the R33 GT-R was facing a different race series (N1 Taikyu), this one which required sustained speeds exceeding 250kph; this requires not just awesome acceleration but stable braking prowess as well. Thus, Nissan decided to put heavy emphasis on aerodynamics during the design; and not just better aerodynamics, but balanced aerodynamics.
The R32 was developed with the “Zero Lift” concept in mind, hence it sported a large rear spoiler to help keep the car on the ground and provide stability in high speed cornering. However, its coefficient of drag was 0.40, which was not something to brag about even back then. Further, based on racing experience Nissan wanted the R33 GT-R to have superlative cooling and anti heat abilities, which would require large openings for the radiator and oil cooler. The front spoiler would have to be a shape which would reduce front lift as well.
Nissan called the design theme for the R33 GT-R, "Sophisticated Strength" - while engineers wanted superior aerodynamics, cooling ability, and a wider tread, the designers wanted a design that suggested speed and power.
Here are some quotes on various design aspects from the chief of the GT-R’s exterior design, Hidetoshi Nishiizumi: (Source: Cartop Mook: R33 Skyline GT-R Best Album) (all Nissan Gallery photos from Wikipedia)


“The size and height of the rear spoiler of the R32 GT-R were designed with Group A racing in mind. The regulations meant the wing could not be adjustable, so we put a big one on from the beginning. The R33 GT-R had an adjustable one. From the rear, you can see that it actually has a “Y” shape design. Mizuno-san was heavily involved in the design. Although it extends a total of 30mm on the sides, the size of the spoiler is limited. We did experiment with a spoiler that would fit within the width of the trunk lid, but it looked unbalanced. This is what lead to the current design with its overhang.”
Nissan called the design theme for the R33 GT-R, "Sophisticated Strength" - while engineers wanted superior aerodynamics, cooling ability, and a wider tread, the designers wanted a design that suggested speed and power.
Here are some quotes on various design aspects from the chief of the GT-R’s exterior design, Hidetoshi Nishiizumi: (Source: Cartop Mook: R33 Skyline GT-R Best Album) (all Nissan Gallery photos from Wikipedia)
"The R32 had excessive front lift. At Fuji Speedway, taking the high speed 130R corner at speed was scary, according to Kaz Mizuno (later father of the R35 GT-R). So efforts were made in the R33 to minimize front lift - and in that regard, the longer front overhang worked in our favor."
"We designed large openings in the front bumper, and made the shape spoiler-like. We experimented with various angles for the lip spoiler as well, to get the best wake separation for the air.”
“The size and height of the rear spoiler of the R32 GT-R were designed with Group A racing in mind. The regulations meant the wing could not be adjustable, so we put a big one on from the beginning. The R33 GT-R had an adjustable one. From the rear, you can see that it actually has a “Y” shape design. Mizuno-san was heavily involved in the design. Although it extends a total of 30mm on the sides, the size of the spoiler is limited. We did experiment with a spoiler that would fit within the width of the trunk lid, but it looked unbalanced. This is what lead to the current design with its overhang.”

“Compared to the R32 GT-R, what really gives the 33 remarkable presence is the larger spoiler on the back. From the back, it really enhances its presence. The reason we included an adjusting tool in the tool kit was so that the wing could be adjusted for track days – but in town, it looks best at horizontal.”
“We experimented with making the entire wing adjustable, but in the end settled only on angle adjustability and the caps on the sides, for weight purposes. Also the reason why the rear is solid, but the front of the blade is adjustable, is just in case it became separated, it would move in the direction of generating downforce, allowing the driver to stop safely.”
The design was in a state of change until right before the car went on sale. You can see that the production car looks far more aggressive than the the prototype:
“Compared to the prototype, we widened the lower half of the body to give the appearance of a lower center of gravity.”
 |
| The R33 GT-R Proto - I'm not sure I see the narrower lower belt line? Photo from http://www.gtr-world.com |
 |
| You can see the solid, fixed position rear wing which has evolved from the Type M wing but is still not adjustable Photo from http://www.gtr-world.com |
 |
| The R33 GT-R could have had this rear spoiler design. Courtesy: http://asteriskblog.blog90.fc2.com/blog-entry-39.html |
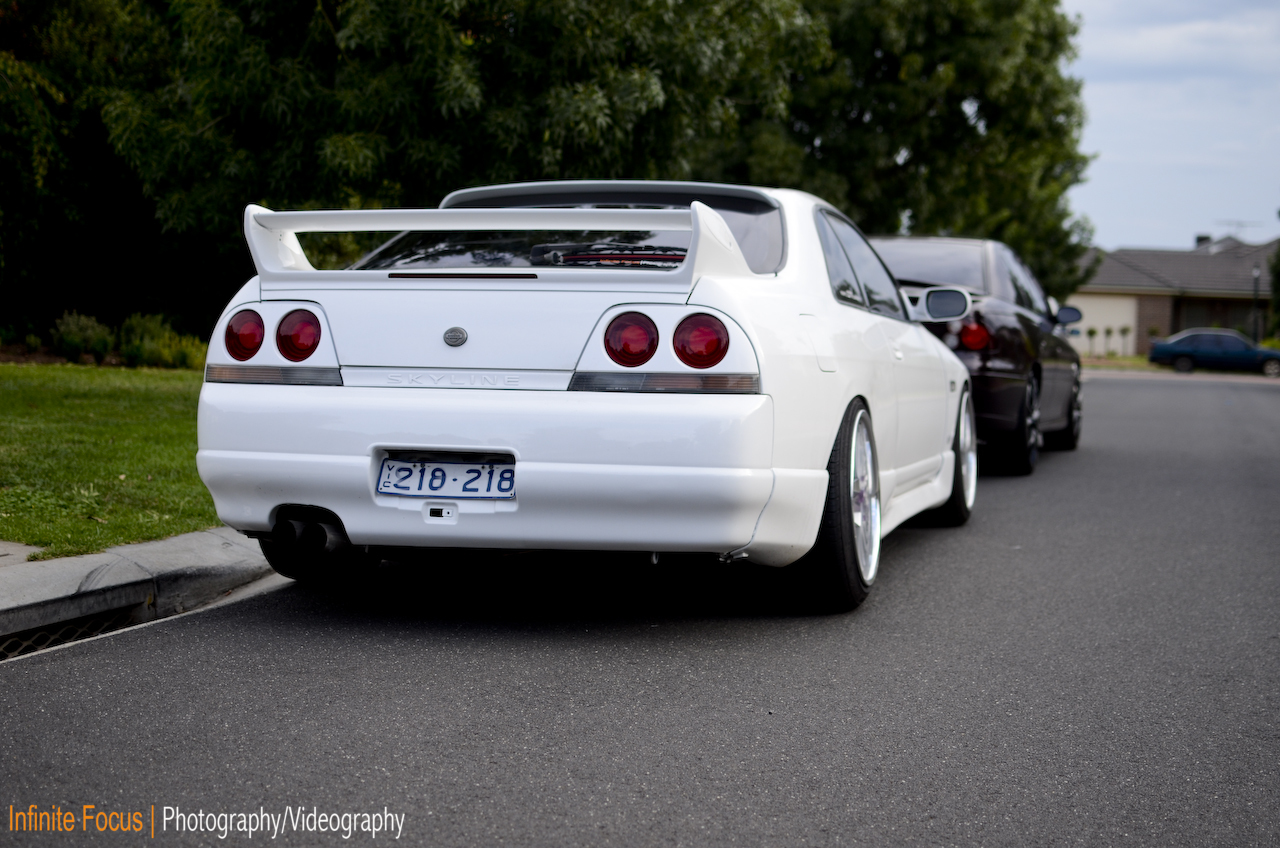 |
| GT-R could have looked like this, with the roof spoiler! From: http://infinitefocusphoto.wordpress.com/2011/12/19/hangs-muskis/ |
There was extensive wind tunnel and road testing of the design, with efforts made to obtain the best front-back lift balance while allowing for wide tires, blister fenders and rear spoiler. In the end the Cd equaled 0.35 (beating the R32's 0.40), and the front /rear downforce was better balanced, with a front coefficient of lift of 0.09, and a rear downforce of 0.03 (with the spoiler at the flat position). Even with the bigger body.

The "High Traction Layout":
In addition to the aerodynamics, the High Traction Layout improved the dynamic performance of the chassis. This is Nissan's terminology for the technical chassis design differences which were designed to improve the performance of the R33 GT-R over the R32. In addition to the improved aerodynamics, the High Traction Layout improved the dynamic performance of the chassis. It did this by improvements in two areas: body rigidity and weight distribution.
Body Rigidity:
With the addition of front and rear strut tower bars, as well as adding cross bars under the floor in over 30 locations, rigidity was improved – 40% increase compared to the R33 GTS, and over 150% (1.5 times) more rigid than the R32. The improvements include, front tower bar, front cross bar (which connects the sides of the transmission tunnel), floor cross bar, the seat back center (the plate behind the rear seats), rear strut bar, etc.
 |
| From: "All About the New Skyline GT-R" |
Four wheel multi-link suspension: The front layout was changed. The R32’s weak point was the use of an “I” shaped upper arm, which was susceptible to rattles. These were changed to “A” arms, which gave 90% more lateral rigidity.
In the rear, Nissan added the “triple cross bar” – which adds more rigidity for the suspension members (in the R34, it also provided a nice place to hang the rear carbon diffuser off of… the 33 and 34 triple cross bar is the same, incidentally).

Having increased body rigidity means, of course, that power not only gets to the ground more directly, but the suspension behaves more accurately. To the driver, this makes the car feel more nimble and agile, with more direct feel, and thus easier to drive.
Weight Distribution:
The Problem: The R32 GT-R was criticized as being too front heavy, which lead to strong understeer. Additionally, the fuel tank was placed below the trunk floor, meaning that there was weight overhang in the rear as well. Not only was the weight BEHIND the rear wheels an issue, but as fuel was consumed and the rear got lighter, there was an obvious effect on the car’s performance. Combined with a less rigid body, the R32's potential was wasted.
The Problem: The R32 GT-R was criticized as being too front heavy, which lead to strong understeer. Additionally, the fuel tank was placed below the trunk floor, meaning that there was weight overhang in the rear as well. Not only was the weight BEHIND the rear wheels an issue, but as fuel was consumed and the rear got lighter, there was an obvious effect on the car’s performance. Combined with a less rigid body, the R32's potential was wasted.
The Solution: With the increased wheelbase, it was now possible to improve weight distribution; the plastic fuel tank was placed below the rear seats, battery moved to the trunk, and to the extent possible, heavy things were moved towards the center of the car. The front and rear overhang weights were lightened.
But improving the weight distribution wasn't just about moving things around between the wheels - it also means reducing weight in critical areas to improve the balance of the car. The increased body rigidity didn't help - the added bracing added to the car's weight, which meant that Nissan engineers had two compelling reasons to try to figure out ways to lighten the car.
Up front, to reduce front overhang weight, the front hood and fenders were made of aluminum (as in the BNR32), the headlights were made of lightweight plastic and the intercooler was lightened, in order to lighten the front overhang, reducing inertia. The intercoolers were changed from extruded multi hole tube to inner fin type which improved response, cooled 4% better, and was 400g lighter.
 |
| From: "All About the New Skyline GT-R" |
Up front, to reduce front overhang weight, the front hood and fenders were made of aluminum (as in the BNR32), the headlights were made of lightweight plastic and the intercooler was lightened, in order to lighten the front overhang, reducing inertia. The intercoolers were changed from extruded multi hole tube to inner fin type which improved response, cooled 4% better, and was 400g lighter.
Nissan engineers also found other ways to reduce weight, even by a few grams.
This includes:
Hollowing out the side door beams.
Using high tensile steel on body panels.
Reduction in sound deadening materials.
Super HICAS becoming electric.
Hollowing out of rear stabilizer bar.
Use of high tensile springs front and rear.
Shrinking the ABS actuator.
Light aluminum wheels with higher rigidity
The front and rear axles were made of aluminum (as in the BNR32) but also so were engine mount insulators and brackets
The front and rear axles were made of aluminum (as in the BNR32) but also so were engine mount insulators and brackets
New plastics were used for : fuel tank, head lamps, super high strength "PP" bumpers, air cleaner, changing the headlining material, changing material of rear spoiler.
So even though the R33 was heavier by 100kg, the records show that it was 30kg heavier up front, and 70 kg heavier in the rear.
There were a few drawbacks to the High Traction Layout, however - although these were deemed worthy sacrifices to get better performance:
1) With the battery moved to the back, as well as the rear strut bar, trunk space and volume is smaller on the R33 vs the R32.
2) Additionally, the fuel tank shrank from 72 liters to 65 liters… resulting in a lower range.
1) With the battery moved to the back, as well as the rear strut bar, trunk space and volume is smaller on the R33 vs the R32.
2) Additionally, the fuel tank shrank from 72 liters to 65 liters… resulting in a lower range.
In any case, I think they did a great job on both the looks, aero and chassis development. It is ironic that people criticize the longer wheelbase without understanding how Nissan engineers actually used that to the car's advantage from a dynamic technical standpoint - the longer wheel base is not just stability at speed in a straight line, but also with the High Traction Layout in corners too!
Next: Engine, ATTESA E-TS PRO, and SUPER HICAS
Sources:
1) Cartop Mook: R33 Skyline GT-R Best Album
2) Neko Mook: I Love R33 Skyline GT-R
3) Motorfan: 新型スカイラインGT-Rのすべて("All About the new Skyline GT-R")
Sources:
1) Cartop Mook: R33 Skyline GT-R Best Album
2) Neko Mook: I Love R33 Skyline GT-R
3) Motorfan: 新型スカイラインGT-Rのすべて("All About the new Skyline GT-R")